Download Article
Download Article
Protect your cell phone with a cozy handmade holder. All you need is some fabric and basic sewing skills to make a fun project that comes together quickly. For a beginner project, make the simple holder lined with felt. If you’d like to be able to prop your cell phone up while you store or charge it, make a pyramid-shaped holder. Then, fill it with stuffing so your phone can lean against it.
-

1
Lay your phone on an 8 in (20 cm) square of felt. Cut a piece of felt into an 8 in (20 cm) square and lay it on your work surface. Put your phone on the felt so it’s lined up with the bottom left corner.[1]
- Use any type of felt material, such as acrylic, wool, or cotton felt. Felt is great for the liner of your holder since it’s soft and doesn’t fray. This means you won’t have to finish the edges of the holder.
-
2
Mark lines on the felt and cut them to make a rectangle. Flip the phone with the felt over lengthwise. Take a piece of chalk or a pen and draw a line that’s 1 inch (2.5 cm) from the long folded side. Then, make a line that’s 1 1⁄4 inches (3.2 cm) from the short end of the phone. Use scissors to cut out the felt piece.[2]
- This makes a folded felt rectangle that’s slightly larger than your cell phone.
Advertisement
-
3
Place the felt on a piece of decorative fabric. Put an 8 in (20 cm) square of fabric that you want to use for the outside of the holder on your work surface. Arrange the decorative fabric so the pattern faces down. Then, lay the felt on the fabric so it lines up in a corner of the decorative fabric.[3]
- You could use any type of decorative fabric, but if you’re working with 100% cotton, wash it first so your holder doesn’t shrink.
-
4
Cut the outer fabric so it’s larger than the felt. Lay your ruler on the long side of the decorative fabric and draw a line that’s 1⁄2 inch (1.3 cm) from the felt edge. Move the ruler to the short edge and draw a line that’s 1 1⁄4 in (3.2 cm) from it. Then, cut the 2 lines to make a slightly larger rectangle for the outer fabric of your holder.[4]
Variation: If your cell phone is rounded near the bottom instead of square, cut your felt and fabric to match the curve of your phone. This helps it sit down easily in the holder and it won’t slide around as much.
-
5
Arrange the felt on the wrong side of the decorative fabric. Set your phone aside and unfold the decorative fabric so the pattern faces down. Then, place the felt on the fabric so the bottom short edge lines up and the sides are even.[5]
- Since the felt piece is narrower than the fabric, you’ll see 1⁄4 inch (0.64 cm) of decorative fabric along the long sides of the felt.
-
6
Fold the short end of the fabric over by 1 1⁄4 in (3.2 cm) and pin it in place. Take the decorative fabric and fold it 1⁄4 inch (0.64 cm) towards the felt. Then, fold it over again by 1 inch (2.5 cm) and insert sewing pins so the fabric doesn’t unfold.[6]
- Folding the top edge of the holder a few times hides the raw edge of the fabric. This creates the top edge of the holder.
-
7
Fold the fabric in half lengthwise so the felt faces out and pin the long side. Fold the felt and fabric so the felt side faces out. Line up the corners so the holder is even and insert sewing pins through long side the fabric.[7]
- Although you can pin the bottom edge of the holder, it’s small enough that the fabric shouldn’t slide around on you.
-
8
Sew a straight stitch across the bottom and side of the holder. Take the fabric to your sewing machine and straight stitch along the bottom and side edges. Leave a 1⁄4 in (0.64 cm) seam allowance as you work.[8]
- If you don’t have a sewing machine, use a needle and thread to hand stitch the holder.
- Don’t sew across the top folded edge of the holder or you won’t be able to slide the cell phone into it.
-
9
Sew around the top edge of the holder but don’t stitch it closed. Place the top end of the holder under your sewing machine foot so just the inside of the fabric is under the needle. Then, straight stitch around the edge, turning the fabric in a circle as you sew. Leave a 1⁄4 inch (0.64 cm) seam allowance.[9]
- Since it can be tricky to sew around the edge, go slowly and take your time.
-
10
Turn the holder right-side out and push the corners down with a pencil. Trim the excess threads from the holder and flip it inside out so the pattern faces out. Take a pencil and push it down into the corners so they are perfectly square. Then, slide your phone into your new holder![10]
- If you want to wash your cell phone case, follow the care instructions for the fabric you used. For example, if you used wool felt, you’ll need to handwash the holder in lukewarm water and let it air dry.
Advertisement
-

1
Cut 2 pieces of fabric 6 in (15 cm) squares and stack them. You can use any type of fabric you like to make your cell phone stand. Lay the fabric flat and use scissors to cut 2 squares that are 6 inches (15 cm) in size. Then, stack the 2 squares so the patterned sides touch. Line up the edges so the holder is even.[11]
- Work with fabric that you’re comfortable using. You may want to avoid fabric that stretches or pulls if you’re a beginner sewer.
- Since the holder is small, there’s no need to pin the fabric in place.
-
2
Sew a straight stitch around 3 sides of the stacked square. Set your sewing machine to make short, straight stitches and sew across 1 side of the square. Then, turn the fabric and sew straight down the next side. Turn it again to sew along 1 more side of the square.[12]
- Leave about 1⁄4 inch (0.64 cm) seam allowance as you sew.
-
3
Cut a 2 1⁄2 by 6 in (6.4 by 15.2 cm) rectangle of fabric and fold it in half lengthwise. Use the same decorative fabric you used for the rest of the holder and cut a rectangle that’s 2 1⁄2 by 6 inches (6.4 cm × 15.2 cm). Fold the rectangle in half lengthwise so the right sides of the fabric touch.[13]
- Feel free to use a different fabric that works with the style of the holder. For example, if you have a polka dot holder, use striped fabric in the same color for the rectangular base.
-
4
Sew across the short ends of the rectangle. Take the small, folded rectangle to the sewing machine and use straight stitches to sew across each short end. Leave a 1⁄2 inch (1.3 cm) seam allowance as you go.[14]
-
5
Turn the square and the rectangle right-side out. Take both of your stand pieces and flip them right-side out so the pattern is visible. If the corners of the rectangle are curved, you can push a pencil into the corners to make them pointed.[15]
-
6
Place the raw edges of the rectangle onto the raw edge of the square. Arrange the raw edge of the folded rectangle so it’s centered on 1 of the sewn sides of the square. Line up the raw edges of the rectangle with the unfinished edge of the square.[16]
- You’re leaving the square and rectangle open so you can stuff it before you sew it shut.
-
7
Sew the bottom of the rectangle to the top of the square. Carefully sew the rectangle piece to the square fabric, but only sew 1 layer of the rectangle and 1 layer of the square. You might have to take the removable extension table so you can slide the fabric onto it.[17]
- Don’t sew through all of the layers of fabric or you’ll close the holder.
-

8
Fill the rectangle with stuffing and hand sew the ends closed. Take a cotton ball-size clump of synthetic stuffing and push it into the rectangle. It may help to use a pencil or knitting needle to poke the stuffing in. Keep filling the rectangle until it’s firm and you don’t feel gaps. Then, use a needle and thread to whip stitch each end of the rectangle closed.[18]
- Use a thread color that matches the color of the fabric.
- To make the whip stitches, work the needle back and forth in loops across the edge of the fabric.
-
9
Push stuffing into the square and slip stitch the edge to the rectangle. Use more of the synthetic stuffing to fill the square of the holder. Continue to stuff until the holder stand is as firm as you want. Then, tuck the raw edge under by 1⁄4 inch (0.64 cm) and use the needle and thread to sew it shut. Tie off the thread when you reach the end.[19]
- To work the slip stitch, insert the needle through the rectangle and over onto the folded side. Then, push it back into the rectangle before bringing it to the folded side again.
Variation: If you’d like to weigh the holder down, put a small beanbag into the square once you’ve stuffed it half full. If you don’t have a beanbag, fill a small bag with rice or beans and seal it shut.
Advertisement
Ask a Question
200 characters left
Include your email address to get a message when this question is answered.
Submit
Advertisement
-
Always check the size of your cell phone before you cut the fabric.
Thanks for submitting a tip for review!
Advertisement
-
Remove sewing pins as you sew or you may damage your sewing machine.
Advertisement
Things You’ll Need
- Fabric
- Felt
- Scissors
- Ruler
- Sewing machine
- Sewing pins
- Pencil
- Cell phone
- Fabric
- Ruler
- Sewing machine
- Scissors
- Cell phone
- Stuffing
References
About This Article
Thanks to all authors for creating a page that has been read 14,777 times.
Did this article help you?
Download Article
Download Article
Protect your cell phone with a cozy handmade holder. All you need is some fabric and basic sewing skills to make a fun project that comes together quickly. For a beginner project, make the simple holder lined with felt. If you’d like to be able to prop your cell phone up while you store or charge it, make a pyramid-shaped holder. Then, fill it with stuffing so your phone can lean against it.
-

1
Lay your phone on an 8 in (20 cm) square of felt. Cut a piece of felt into an 8 in (20 cm) square and lay it on your work surface. Put your phone on the felt so it’s lined up with the bottom left corner.[1]
- Use any type of felt material, such as acrylic, wool, or cotton felt. Felt is great for the liner of your holder since it’s soft and doesn’t fray. This means you won’t have to finish the edges of the holder.
-
2
Mark lines on the felt and cut them to make a rectangle. Flip the phone with the felt over lengthwise. Take a piece of chalk or a pen and draw a line that’s 1 inch (2.5 cm) from the long folded side. Then, make a line that’s 1 1⁄4 inches (3.2 cm) from the short end of the phone. Use scissors to cut out the felt piece.[2]
- This makes a folded felt rectangle that’s slightly larger than your cell phone.
Advertisement
-
3
Place the felt on a piece of decorative fabric. Put an 8 in (20 cm) square of fabric that you want to use for the outside of the holder on your work surface. Arrange the decorative fabric so the pattern faces down. Then, lay the felt on the fabric so it lines up in a corner of the decorative fabric.[3]
- You could use any type of decorative fabric, but if you’re working with 100% cotton, wash it first so your holder doesn’t shrink.
-
4
Cut the outer fabric so it’s larger than the felt. Lay your ruler on the long side of the decorative fabric and draw a line that’s 1⁄2 inch (1.3 cm) from the felt edge. Move the ruler to the short edge and draw a line that’s 1 1⁄4 in (3.2 cm) from it. Then, cut the 2 lines to make a slightly larger rectangle for the outer fabric of your holder.[4]
Variation: If your cell phone is rounded near the bottom instead of square, cut your felt and fabric to match the curve of your phone. This helps it sit down easily in the holder and it won’t slide around as much.
-
5
Arrange the felt on the wrong side of the decorative fabric. Set your phone aside and unfold the decorative fabric so the pattern faces down. Then, place the felt on the fabric so the bottom short edge lines up and the sides are even.[5]
- Since the felt piece is narrower than the fabric, you’ll see 1⁄4 inch (0.64 cm) of decorative fabric along the long sides of the felt.
-
6
Fold the short end of the fabric over by 1 1⁄4 in (3.2 cm) and pin it in place. Take the decorative fabric and fold it 1⁄4 inch (0.64 cm) towards the felt. Then, fold it over again by 1 inch (2.5 cm) and insert sewing pins so the fabric doesn’t unfold.[6]
- Folding the top edge of the holder a few times hides the raw edge of the fabric. This creates the top edge of the holder.
-
7
Fold the fabric in half lengthwise so the felt faces out and pin the long side. Fold the felt and fabric so the felt side faces out. Line up the corners so the holder is even and insert sewing pins through long side the fabric.[7]
- Although you can pin the bottom edge of the holder, it’s small enough that the fabric shouldn’t slide around on you.
-
8
Sew a straight stitch across the bottom and side of the holder. Take the fabric to your sewing machine and straight stitch along the bottom and side edges. Leave a 1⁄4 in (0.64 cm) seam allowance as you work.[8]
- If you don’t have a sewing machine, use a needle and thread to hand stitch the holder.
- Don’t sew across the top folded edge of the holder or you won’t be able to slide the cell phone into it.
-
9
Sew around the top edge of the holder but don’t stitch it closed. Place the top end of the holder under your sewing machine foot so just the inside of the fabric is under the needle. Then, straight stitch around the edge, turning the fabric in a circle as you sew. Leave a 1⁄4 inch (0.64 cm) seam allowance.[9]
- Since it can be tricky to sew around the edge, go slowly and take your time.
-
10
Turn the holder right-side out and push the corners down with a pencil. Trim the excess threads from the holder and flip it inside out so the pattern faces out. Take a pencil and push it down into the corners so they are perfectly square. Then, slide your phone into your new holder![10]
- If you want to wash your cell phone case, follow the care instructions for the fabric you used. For example, if you used wool felt, you’ll need to handwash the holder in lukewarm water and let it air dry.
Advertisement
-

1
Cut 2 pieces of fabric 6 in (15 cm) squares and stack them. You can use any type of fabric you like to make your cell phone stand. Lay the fabric flat and use scissors to cut 2 squares that are 6 inches (15 cm) in size. Then, stack the 2 squares so the patterned sides touch. Line up the edges so the holder is even.[11]
- Work with fabric that you’re comfortable using. You may want to avoid fabric that stretches or pulls if you’re a beginner sewer.
- Since the holder is small, there’s no need to pin the fabric in place.
-
2
Sew a straight stitch around 3 sides of the stacked square. Set your sewing machine to make short, straight stitches and sew across 1 side of the square. Then, turn the fabric and sew straight down the next side. Turn it again to sew along 1 more side of the square.[12]
- Leave about 1⁄4 inch (0.64 cm) seam allowance as you sew.
-
3
Cut a 2 1⁄2 by 6 in (6.4 by 15.2 cm) rectangle of fabric and fold it in half lengthwise. Use the same decorative fabric you used for the rest of the holder and cut a rectangle that’s 2 1⁄2 by 6 inches (6.4 cm × 15.2 cm). Fold the rectangle in half lengthwise so the right sides of the fabric touch.[13]
- Feel free to use a different fabric that works with the style of the holder. For example, if you have a polka dot holder, use striped fabric in the same color for the rectangular base.
-
4
Sew across the short ends of the rectangle. Take the small, folded rectangle to the sewing machine and use straight stitches to sew across each short end. Leave a 1⁄2 inch (1.3 cm) seam allowance as you go.[14]
-
5
Turn the square and the rectangle right-side out. Take both of your stand pieces and flip them right-side out so the pattern is visible. If the corners of the rectangle are curved, you can push a pencil into the corners to make them pointed.[15]
-
6
Place the raw edges of the rectangle onto the raw edge of the square. Arrange the raw edge of the folded rectangle so it’s centered on 1 of the sewn sides of the square. Line up the raw edges of the rectangle with the unfinished edge of the square.[16]
- You’re leaving the square and rectangle open so you can stuff it before you sew it shut.
-
7
Sew the bottom of the rectangle to the top of the square. Carefully sew the rectangle piece to the square fabric, but only sew 1 layer of the rectangle and 1 layer of the square. You might have to take the removable extension table so you can slide the fabric onto it.[17]
- Don’t sew through all of the layers of fabric or you’ll close the holder.
-

8
Fill the rectangle with stuffing and hand sew the ends closed. Take a cotton ball-size clump of synthetic stuffing and push it into the rectangle. It may help to use a pencil or knitting needle to poke the stuffing in. Keep filling the rectangle until it’s firm and you don’t feel gaps. Then, use a needle and thread to whip stitch each end of the rectangle closed.[18]
- Use a thread color that matches the color of the fabric.
- To make the whip stitches, work the needle back and forth in loops across the edge of the fabric.
-
9
Push stuffing into the square and slip stitch the edge to the rectangle. Use more of the synthetic stuffing to fill the square of the holder. Continue to stuff until the holder stand is as firm as you want. Then, tuck the raw edge under by 1⁄4 inch (0.64 cm) and use the needle and thread to sew it shut. Tie off the thread when you reach the end.[19]
- To work the slip stitch, insert the needle through the rectangle and over onto the folded side. Then, push it back into the rectangle before bringing it to the folded side again.
Variation: If you’d like to weigh the holder down, put a small beanbag into the square once you’ve stuffed it half full. If you don’t have a beanbag, fill a small bag with rice or beans and seal it shut.
Advertisement
Ask a Question
200 characters left
Include your email address to get a message when this question is answered.
Submit
Advertisement
-
Always check the size of your cell phone before you cut the fabric.
Thanks for submitting a tip for review!
Advertisement
-
Remove sewing pins as you sew or you may damage your sewing machine.
Advertisement
Things You’ll Need
- Fabric
- Felt
- Scissors
- Ruler
- Sewing machine
- Sewing pins
- Pencil
- Cell phone
- Fabric
- Ruler
- Sewing machine
- Scissors
- Cell phone
- Stuffing
References
About This Article
Thanks to all authors for creating a page that has been read 14,777 times.
Did this article help you?
LiveInternetLiveInternet
—Метки
—Рубрики
- Антиквариат (3)
- БИСЕРОПЛЕТЕНИЕ (48)
- Валентинки (13)
- Видео (12)
- ВЫШИВКА (94)
- Вышивка — все виды (6)
- Вышивка бисером (1)
- Вышивка детская (6)
- Вышивка ковровая (гобелены) (10)
- Вышивка крестиком (51)
- Вышивка лентами (16)
- Вышивка объемная (5)
- ВЯЗАНИЕ ДЛЯ ДЕТЕЙ (420)
- Для девочек (120)
- Для малышей (57)
- Для мальчиков (41)
- Носочки тапочки пинетки (47)
- Пледы для детей (35)
- сумки детские (9)
- Сундучок для внуков (3)
- Шапочки шарфики варежки (119)
- ВЯЗАНИЕ ДЛЯ ДОМА (333)
- Скатерти салфетки (89)
- Коврики крючком (39)
- Подушки покрывала пледы (79)
- Полезные мелочи (66)
- Прихватки грелки (43)
- Цветы крючком (16)
- ВЯЗАНИЕ( спицами и крючком) (1499)
- Узоры спицами (61)
- Жакеты жилеты безрукавки (47)
- Ирландское кружево (28)
- Кардиган пальто шазюбль (50)
- Мои желания (12)
- Носочки тапочки сапожки (153)
- Топики майки кофточки (76)
- Узоры крючком (62)
- Бактусы снуды шали пончо (159)
- Береты шапочки шарфы варежки (236)
- Воротнички украшения (11)
- Вязание для женщин (414)
- Вязание для мужчин (72)
- Платья туники сарафаны (65)
- Свитера джемпера пуловеры (74)
- Технология вязания (35)
- Шляпки панамки (13)
- Юбки брюки шорты (11)
- ДАЧА САД ОГОРОД (84)
- Декор интерьера (9)
- Для блога и дневника (132)
- Домашние питомцы (61)
- Живопись (34)
- Животный мир (28)
- Журналы по рукоделию (51)
- ЗДОРОВЬЕ (396)
- Фитнес гимнастика (30)
- Диеты (28)
- Красота и здоровье (53)
- Народная медицина (203)
- Очищение (15)
- Суставы-артриты артрозы. (55)
- Твоя аптечка (19)
- Игра (0)
- Интерьер (58)
- Комнатные растения (59)
- Компьютер (16)
- Красивые места мира (37)
- Путешествия по России (18)
- КУКОЛЬНЫЙ МИР (427)
- Авторские куклы (16)
- Амигуруми (28)
- Игрушки вязаные (282)
- Игрушки из колготок (1)
- Игрушки текстильные (61)
- Кукла Тильда (64)
- КУЛИНАРИЯ (1068)
- безГЛЮТЕНОВОЕ меню (4)
- Вторые блюда (80)
- Выпечка несладкая (24)
- Выпечка сладкая (166)
- Десерт (21)
- Диетические, постные блюда (17)
- Закуски ,салаты, запеканки (149)
- Консервирование (162)
- Лаваш пицца хачапури (61)
- Молочно-сырное (32)
- Мясные рыбные блюда (149)
- Напитки (68)
- Овощные, грибные блюда (54)
- Первые блюда (34)
- Торты рулеты (121)
- Мастер — классы (65)
- Мои творения (0)
- Мудрость. (3)
- Музыка (6)
- На заметку (3)
- Полезные советы (79)
- Поэзия (69)
- Православие (29)
- ПРАЗДНИКИ (97)
- Новый Год! (55)
- Природа / фото (5)
- Притча (0)
- Причёски (14)
- РОДИТЕЛИ И ДЕТИ (74)
- РУКОДЕЛИЕ (369)
- Из газетных трубочек (57)
- Декупаж декор (63)
- Квиллинг (10)
- Лепка — фарфор глина тесто (73)
- Мыловарение (53)
- Очумелые ручки (99)
- Советы по продаже своих творений (6)
- СУМКИ (151)
- Сумки клатчи вязаные (66)
- Фильм фильм фильм (1)
- ШИТЬЕ (442)
- Аксесуары шляпки (23)
- Джинсовые идеи (29)
- Игольницы прихватки пакетницы органайзеры (46)
- Обувь для дома (33)
- Одежда. Выкройки. (65)
- Переделка и декор одежды (34)
- Подушки покрывала пледы (64)
- Полезные мелочи (10)
- Пэчворк , лоскутки (15)
- Стиль БОХО (9)
- Технология шитья (27)
- Чехлы органайзеры (15)
- Шторы скатерти чехлы (22)
- Шьём детям (65)
- Это интересно (81)
- Я — ЖЕНЩИНА (0)
—Цитатник
НЕ ОЧЕНЬ ПРОСТО! НО ВЗГЛЯД НЕ ОТОРВАТЬ! Сердечный узор В этом видео покажу очень красивый, .
3 ВАРИАЦИИ «ПЛЕТЕНКИ» = 3 РАЗНЫХ ДЖЕМПЕРА. ПРОСТЫЕ УЗОРЫ, КОТОРЫЕ ОСВОИТ ДАЖЕ НОВИЧОК
Вязаные малыши: мишка, зайка и собачка. Автор: Мария Гаврилова 2. 3. 4. .
Собачка Клёпочка автор Татьяна Сухановская 2. 3. 4. 5. .
Щенок 2. 3. Нам потребуется: Пряжа Кузя клубочкин, Пряжа Softi baby и нем.
—Ссылки
—Поиск по дневнику
—Интересы
—Друзья
—Постоянные читатели
—Сообщества
—Статистика
Как сшить подставку для мобильного телефона.
Как сшить подставку для мобильного телефона
Вот такой вариант подставки-подушечки для мобильного телефона хочу предложить вам сшить своими руками. Смотрите мастер-класс.
Источник
Как своими руками сделать подставку под телефон: оригинальные идеи
Смартфоны в современном мире заменяют множество привычных еще несколько лет назад предметов. Плеер, часы, навигатор, диктофон, мини-кинотеатр — один гаджет вмещает в себя максимум полезного функционала. Если раньше это приспособление большую часть времени находилось в сумке, то с появлением дополнительных возможностей оно перекочевало на рабочий стол. Как своими руками сделать подставку под телефон и какие материалы предпочтительней использовать, читайте далее.
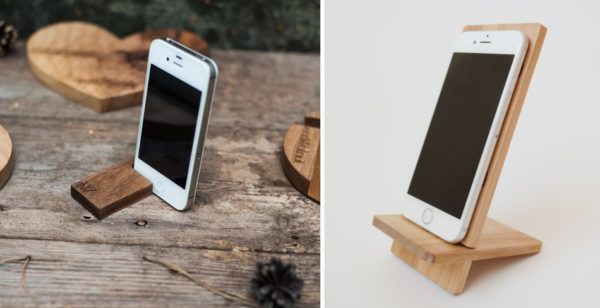
Как своими руками сделать подставку под телефон?
Разновидности моделей
Эпоха развития информационных технологий диктует свои правила. Мобильные стали настолько незаменимы, что люди практически не выпускают их из рук. С увеличением значимости этого прибора у телефонной подставки появились свои преимущества. Во-первых, она организовывает быт. Во-вторых, отучает постоянно держать телефон при себе.
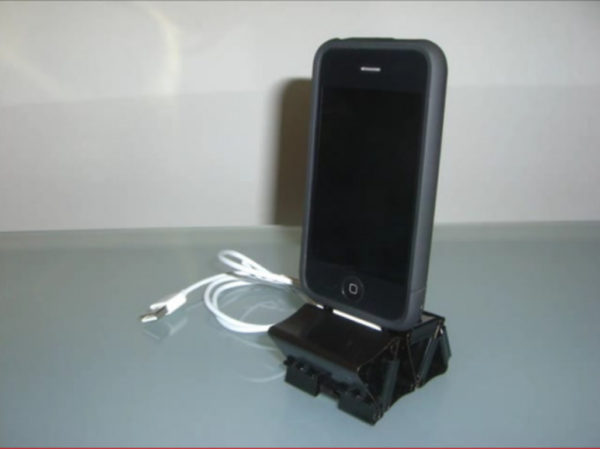
Подставка из канцелярских биндеров
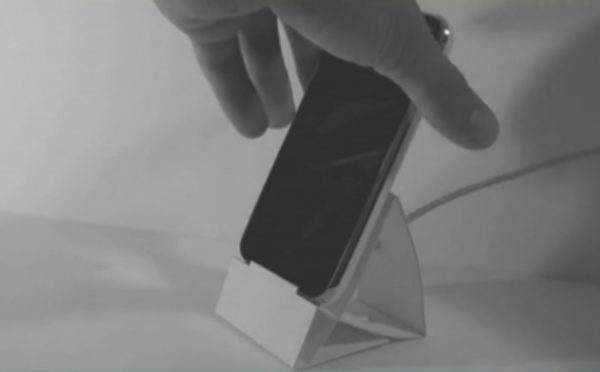
Подставка из листа бумаги
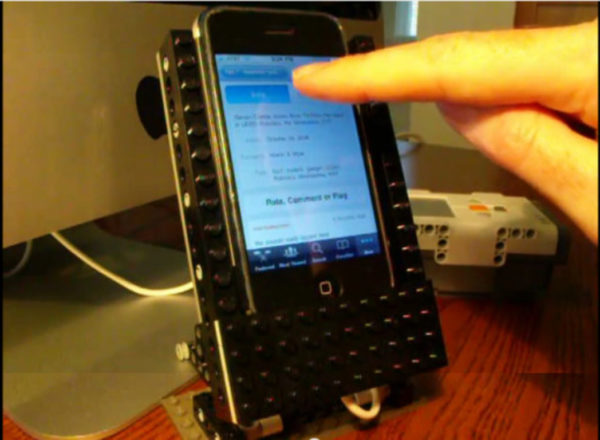
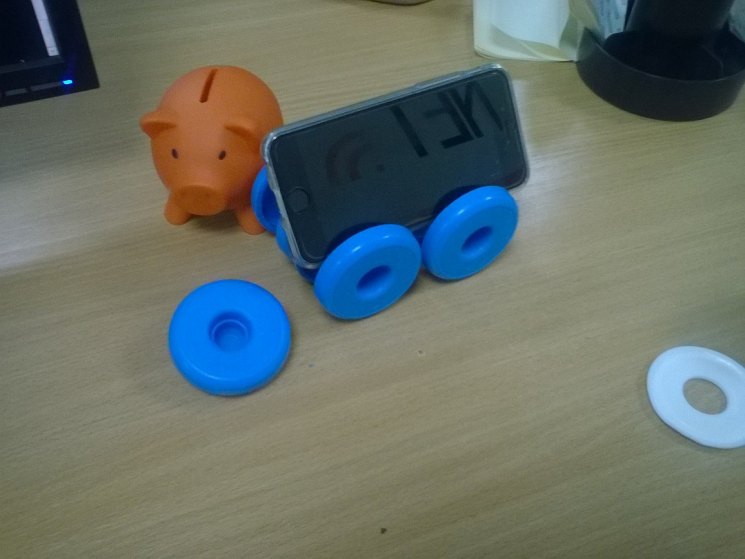
Подставка из конструктора лего
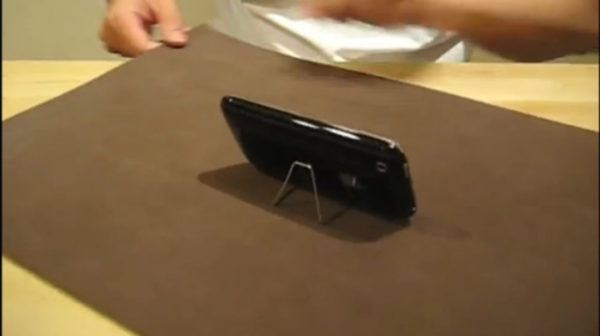
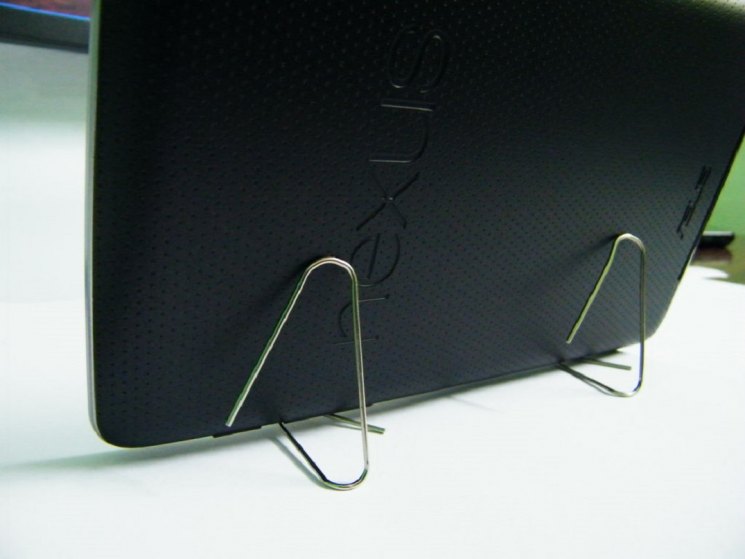
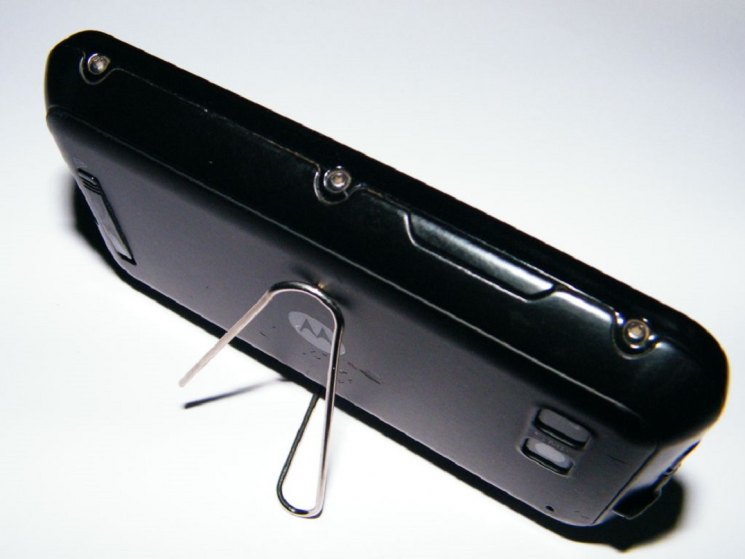
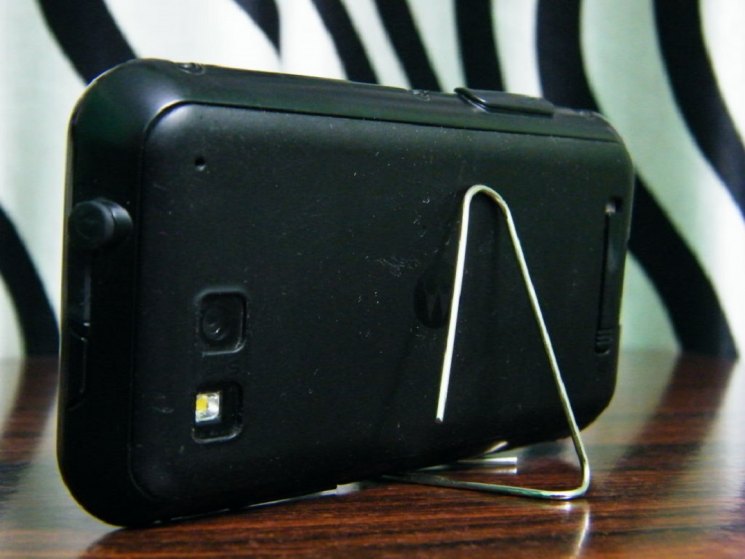
Подставка из канцелярской скрепки
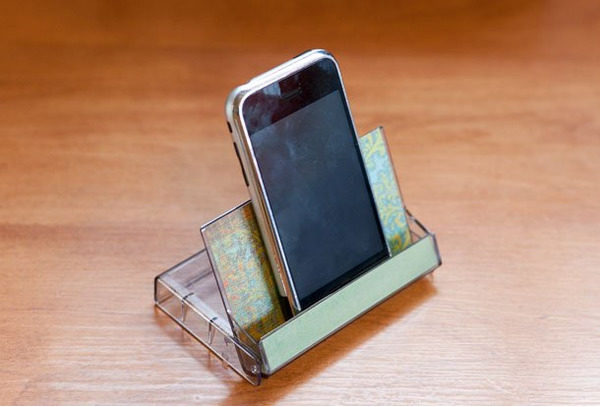
Подставка из футляра для кассеты
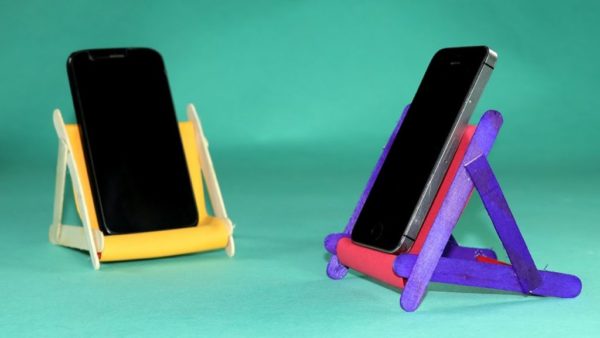
Пошаговая инструкция по изготовлению
Поскольку разработано множество технологий по созданию этого органайзера, предлагаем ознакомиться с наиболее востребованными. Всего несколько часов потребуется для создания подставки. Изделие достаточно бюджетно. В большинстве случаев все необходимые материалы находятся под рукой.
Бумажное оригами
Рекомендованная последовательность действий:
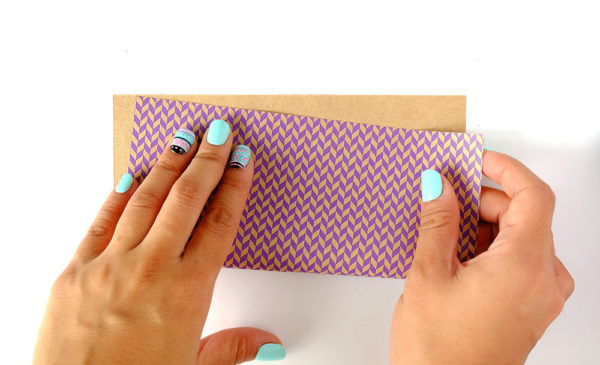
Приобрести квадратный лист для скрапбукинга размером 10*10 или 15*15 см в зависимости от модели телефона и свернуть его пополам
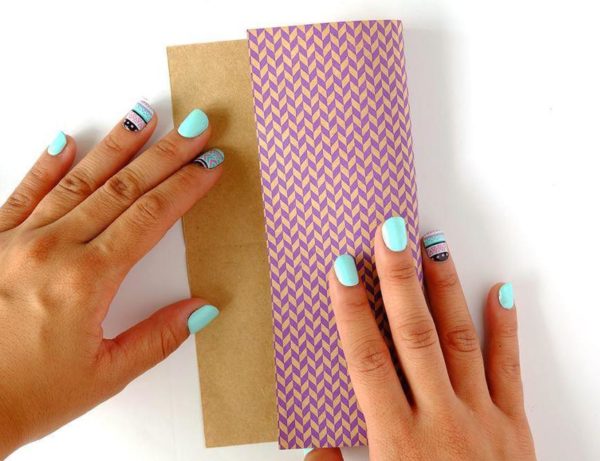
Сложить в 2 части с другой стороны

Развернуть лист и сложить нижнюю, а потом верхнюю половину пополам
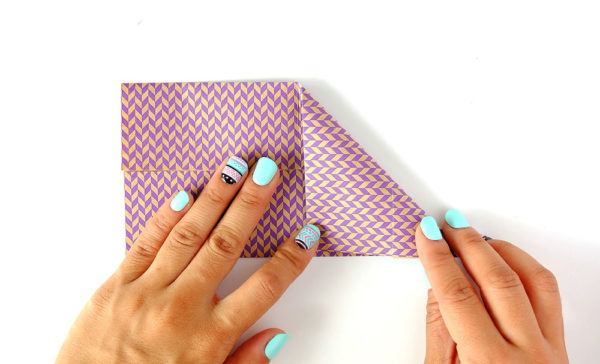
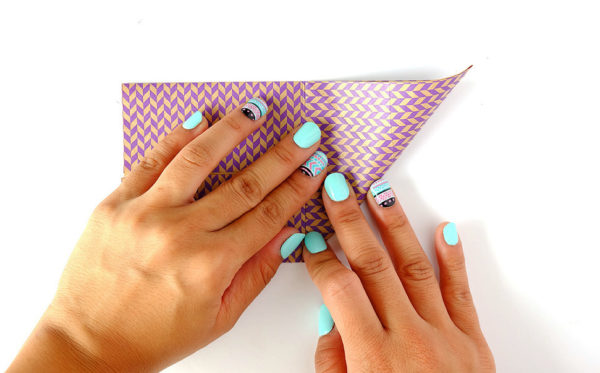
Развернуть бумажное полотно и сделать изгиб с другой стороны

Повторить описанные действия на обратной половине
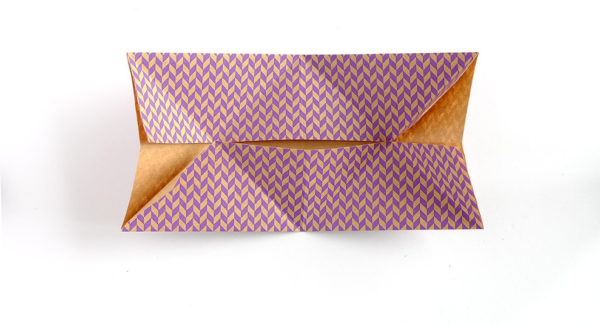
Развернуть лист и проверить ровность складок
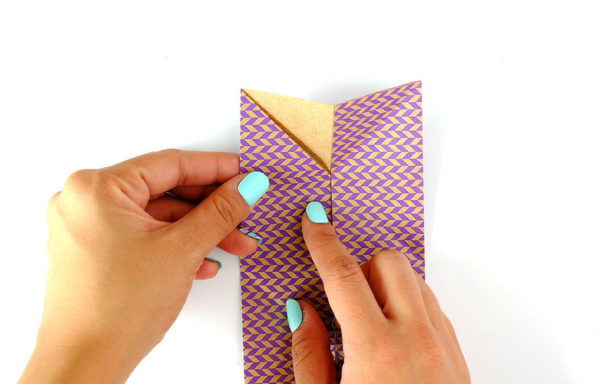
Повернуть бумагу на 90°. Поднять один угол и вложить внутрь конструкции. Получится подобие кармана
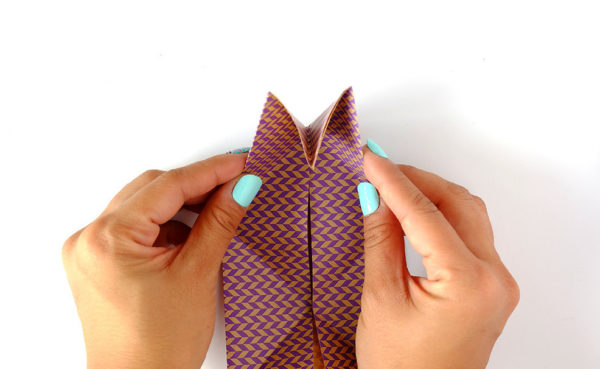
Прижать 2 угла друг к другу. Бумага в этом случае завернется естественным образом
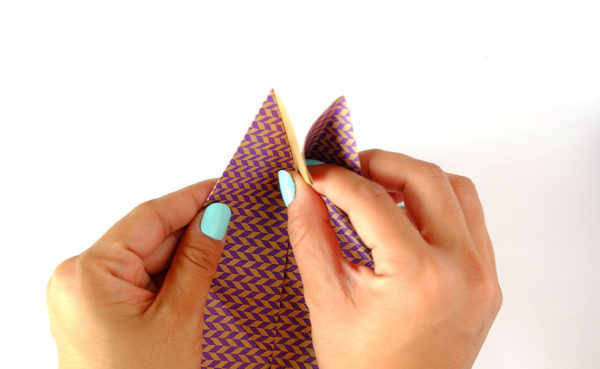
Заправить центральную область под сделанный ранее карман
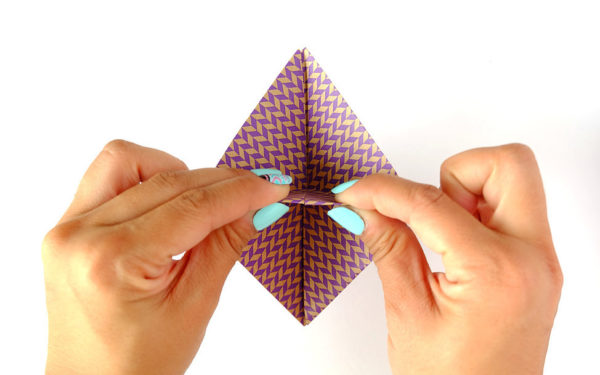
Повторить перечисленные действия с противоположной стороны. На финальном этапе нужно оформить серединную складку, поскольку именно на эту деталь приходится основной вес смартфона
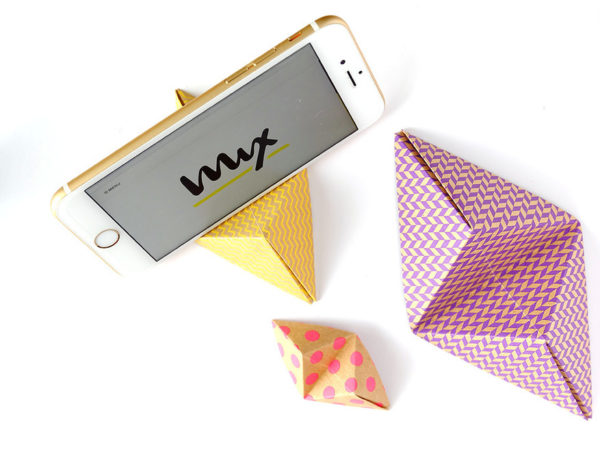
Миниатюрный мольберт
Представляет собой классическую телефонную подставку, внешне похожую на фиксатор для подрамника.
- мини-мольберт;
- карандаш;
- украшения;
- палочки для рукоделия из дерева;
- кисточка;
- клей;
- средство Mod Podge;
- нож;
- акриловые краски.
Для обработки изделия понадобится шлифовальная бумага мелкой зернистости.
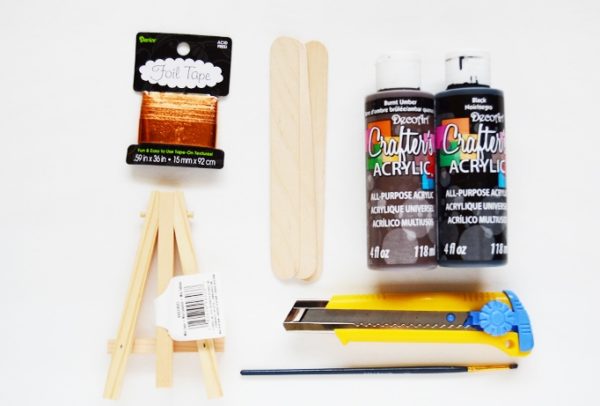
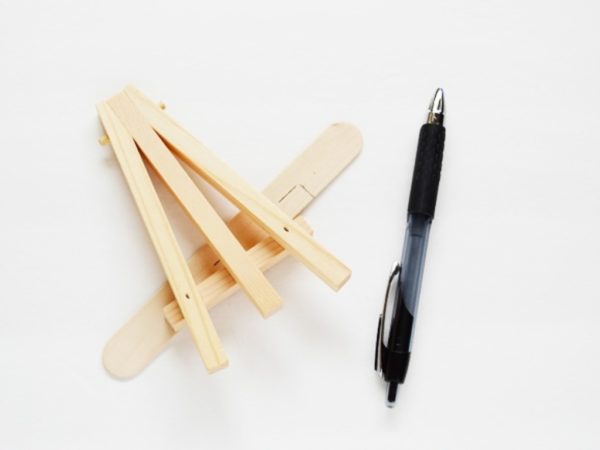
Сделать на деревянной палочке разметку с длиной и высотой перпендикулярной поперечной планке мольберта
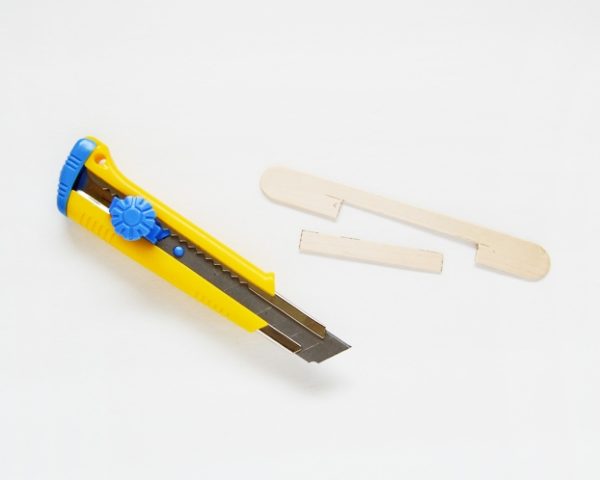
Вырезать деталь согласно отметкам
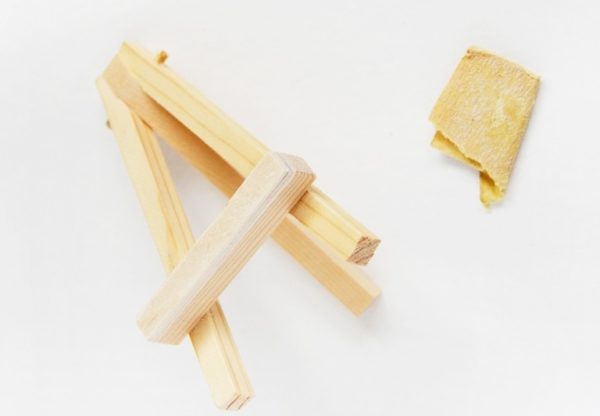
Приклеить к перекладине. Вырезать и зафиксировать несколько кусков палочки так, чтобы ширина органайзера равнялась телефонной. С помощь наждачки удалить все шереховатости
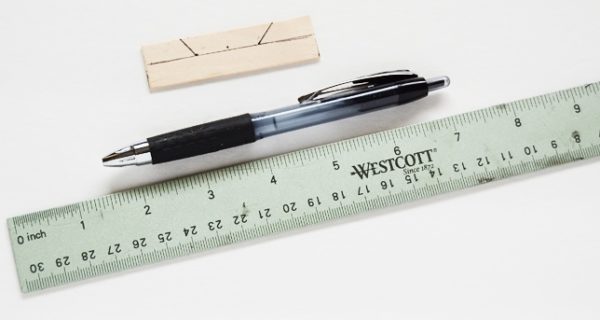
Облицовочный этап. Начертить на палочке длину перпендикулярной планки, наметить центр и в каждую сторону от него отступить 13 мм. От полученных точек нарисовать наружу диагональные линии
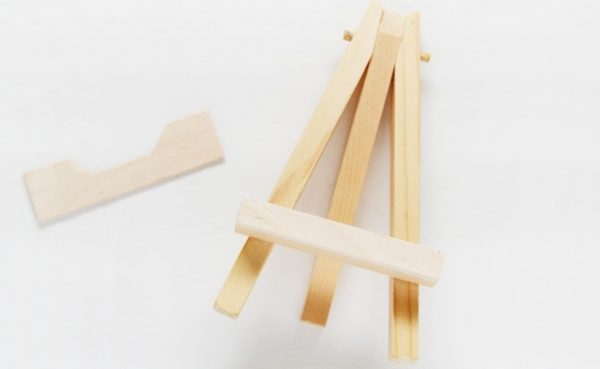
Вырезать и приклеить этот элемент к фронтальной части мольберта
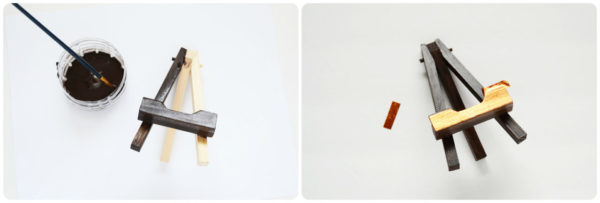
Покрыть краской и задекорировать украшениями
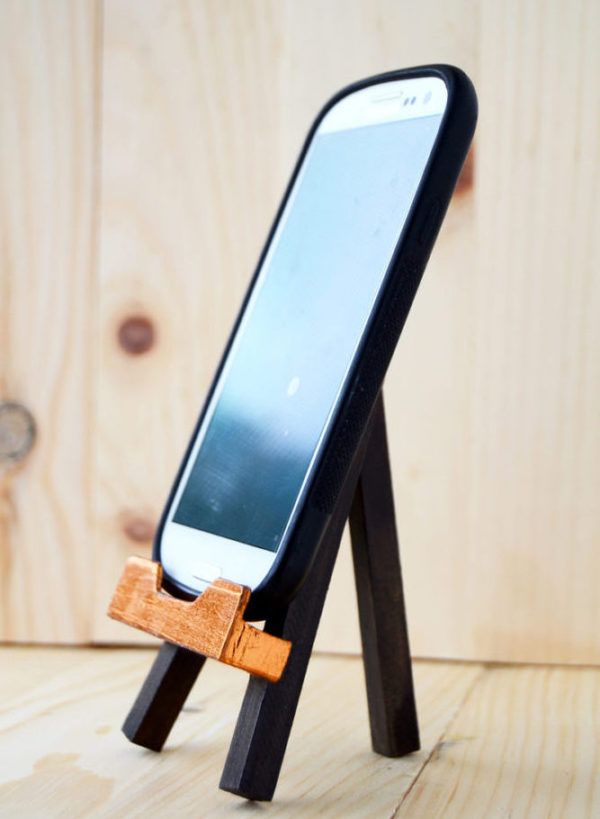
Подставка готова к эксплуатации
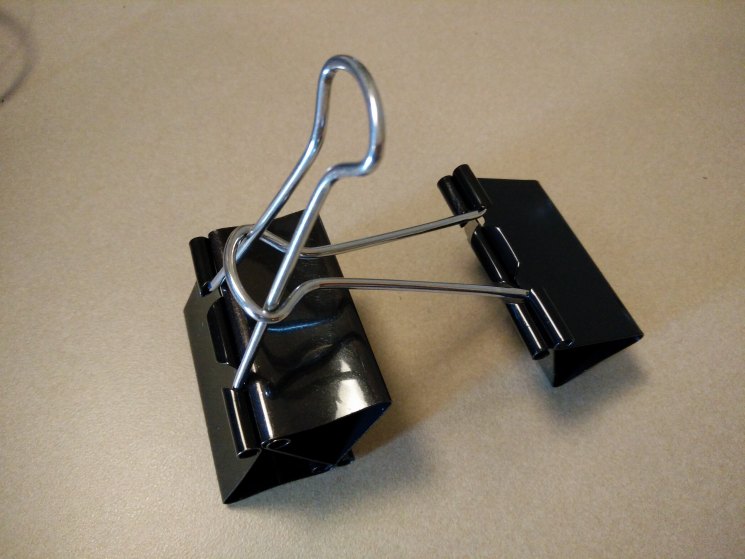
Подставка из биндера
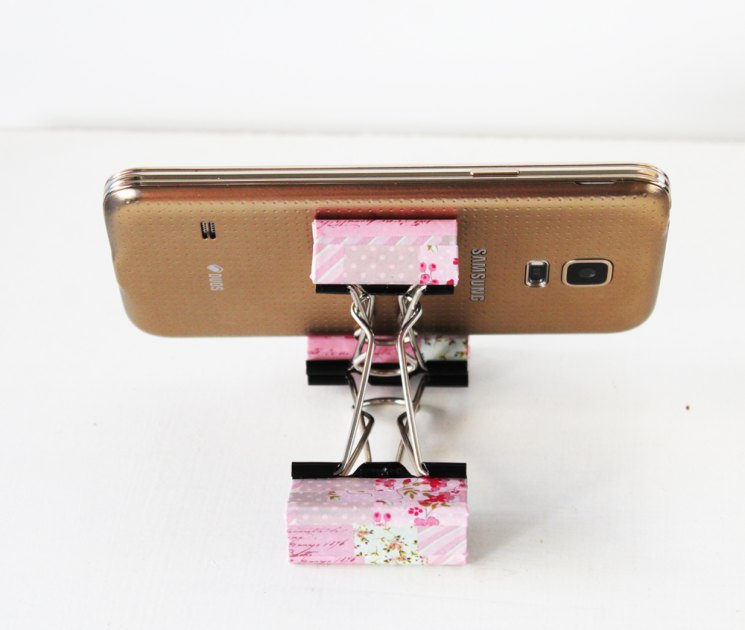
Канцелярские принадлежности — один из наиболее оптимальных вариантов для изготовления органайзера.
Необходимые материалы и инструменты :
- 2 крупных металлических или пластиковых скобы;
- 1 скоба среднего размера;
- ножницы;
- цветной скотч.
Окрашенная в различные цвета БОПП лента продается в любом магазине канцтоваров.
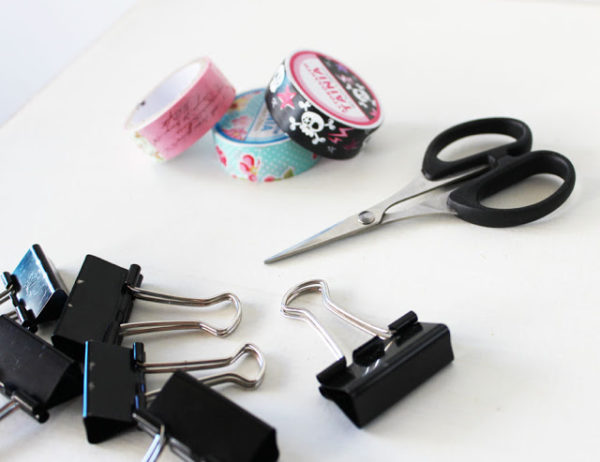
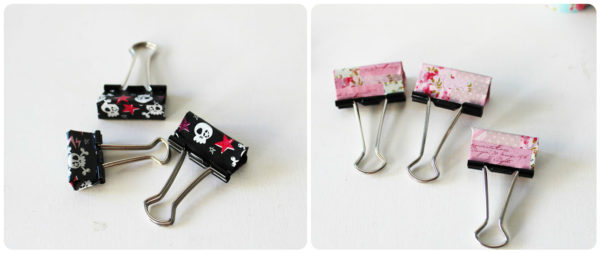
С помощью скотча оклеить биндеры
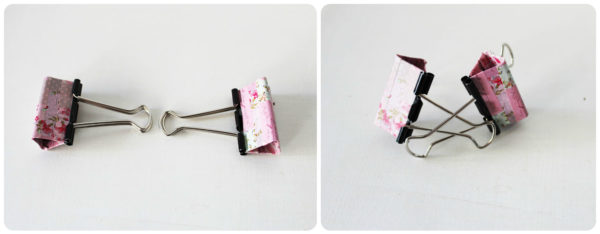
Установить скобы напротив друг друга, приподнять и продеть
Перевернуть другой стороной и положить на рабочую поверхность
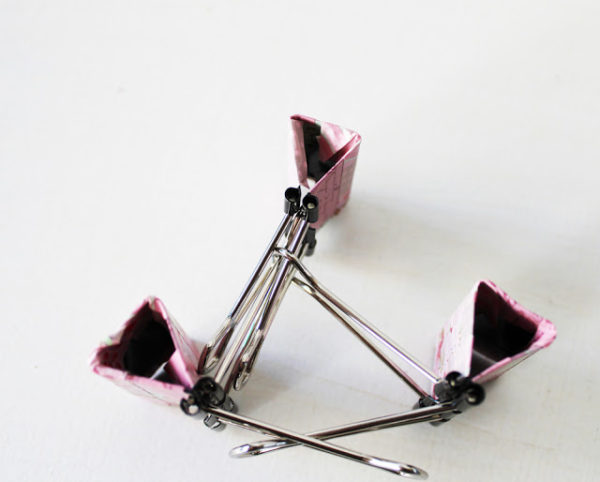
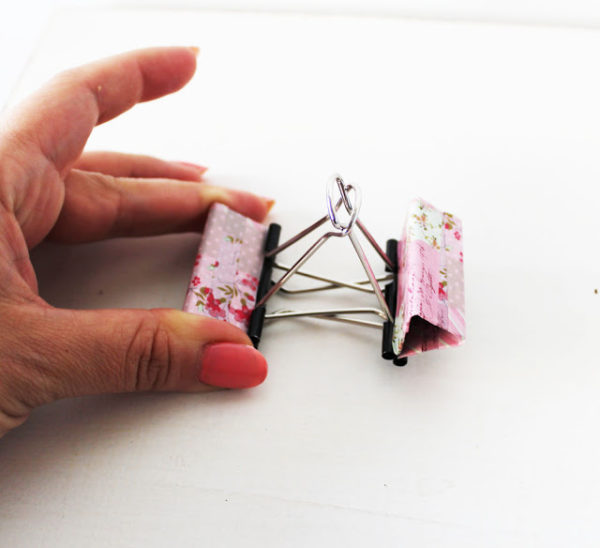
Открыть соединенные элементы и сверху приставить маленькую скобу
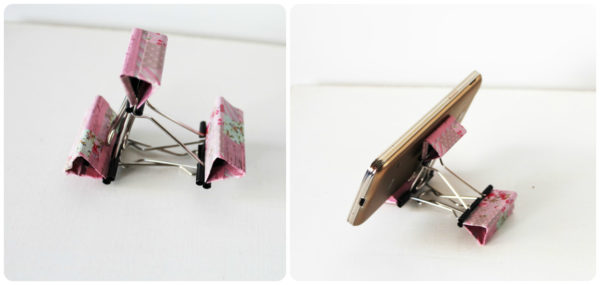
Конструкция в готовом виде
Видео- Урок по изготовлению шезлонга для телефона
Подставка в форме панды
Оригинальное изделие, особенно актуальное для детей. При всей своей утилитарности оно является милой игрушкой.
- 12 овальных картонных заготовок;
- 1 пара пушистых белых 1 пара черных носков;
- румяна;
- вата;
- клей.
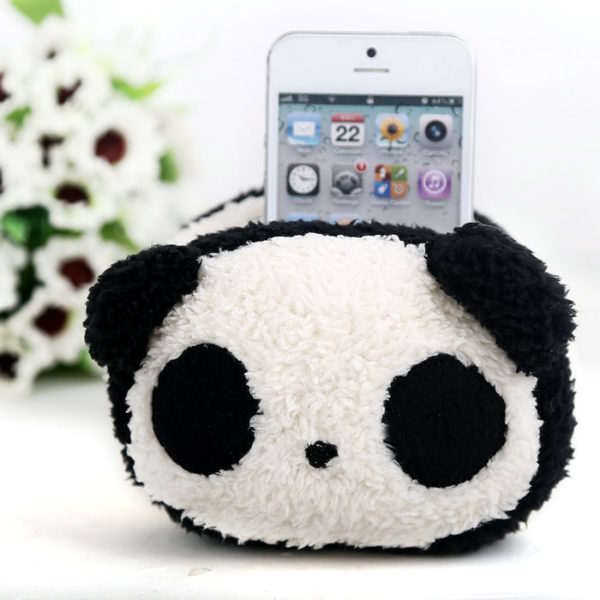
Для этого устройства подойдут махровые носки. По составу они гипоаллергенны, поскольку на 100% сделаны из хлопка. Отличие от хлопковых состоит лишь в технологии плетения волокон.
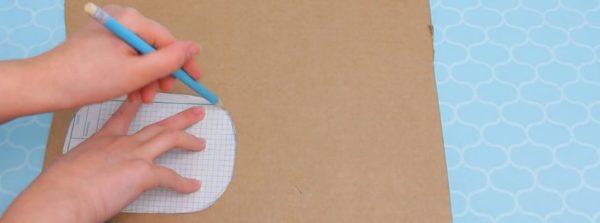
Шаг 1. Вырезать из картонной бумаги 12 овальных элементов и разделить их на 3 группы с равным количеством форм. Взять 1 стопку и на одной из деталей обвести очертания нижней части смартфона, включая отверстие для зарядного провода. Раскроить согласно сделанной разметке. С помощью этого шаблона проделать то же самое с оставшимися 3-мя листами и склеить 4 части между собой.
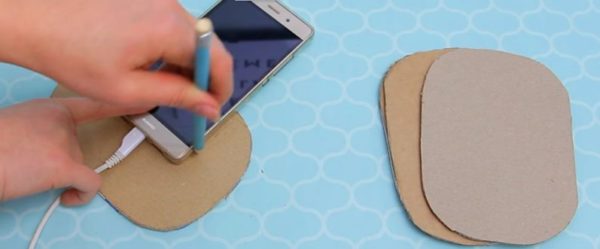
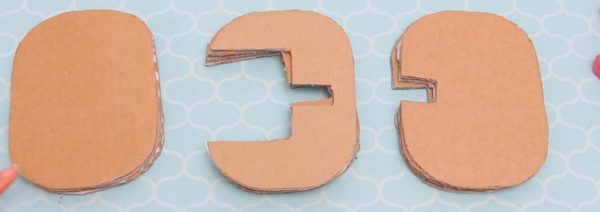
Должны получиться три варианта заготовок
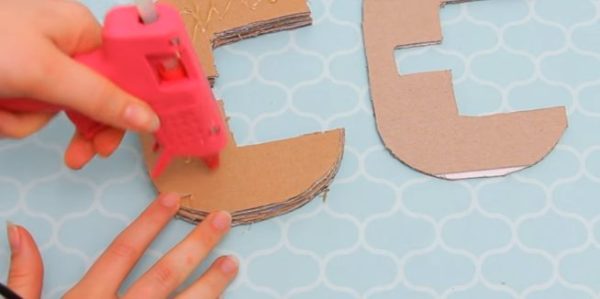
Шаг 2. Вторая группа картонных овалов предназначена для оформления той части телефона, в которой находится провод.

Шаг 3. Отложить от 2-х оставшихся групп по 1 детали. Приклеить оставшиеся к заготовке.
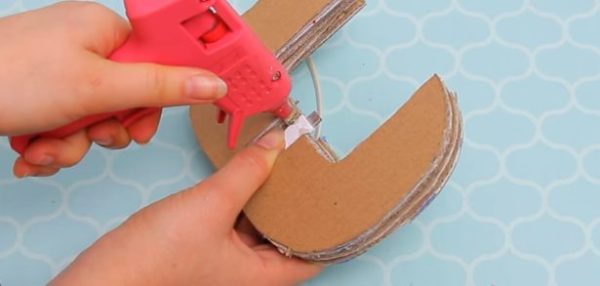
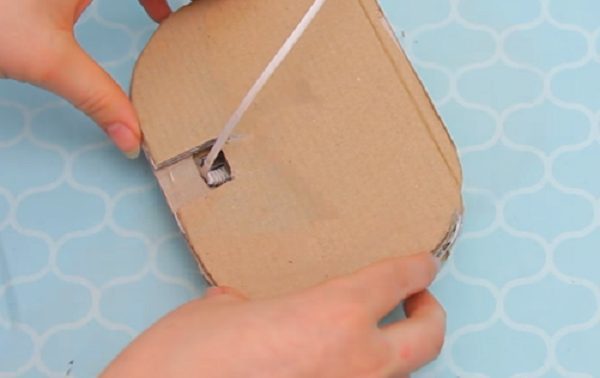
Шаг 4. Зафиксировать на незадействованных элементах вату. Разрезать белый носок и приклеить его на пушистую массу.
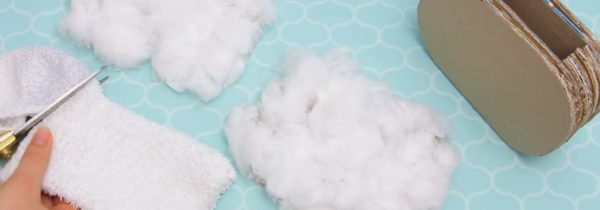
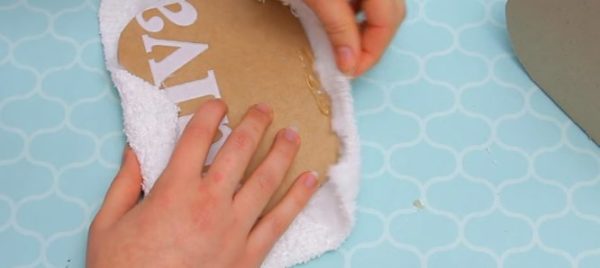
Приклеиваем белый кусок ткани
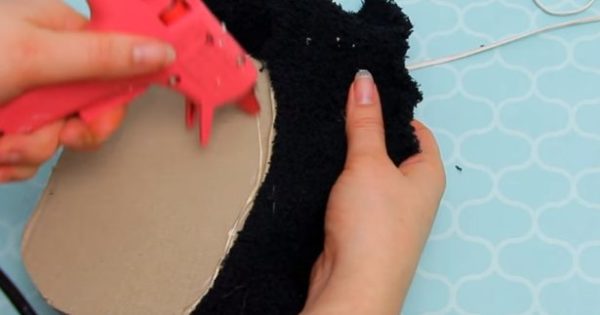
Шаг 5. Половину черного носка приклейте на основную часть изделия.
Шаг 6. Для оформления ушей вырезать 2 овала, обклеить их ватой и украсить черным носком. Для глаз вырезать 2 полукруга и задекорировать черным носком.

Готовую мордочку осталось приклеить на основу
Шаг 7. Склеить все детали между собой. Сзади зафиксировать отложенную белую деталь. При желании из носка и ваты можно сделать хвостик. Щеки разукрасить румянами.
Видео — Панда-подставка под телефон. Мастер-класс
Подставка из дубовых планок
Необходимый инструментарий и материалы:
- планки дубовые;
- измерительная рулетка;
- клей;
- струбцины;
- наждачная бумага мелкой зернистости;
- минеральное масло;
- торцовочная и циркулярная пила;
- маркер;
- стойка для пилы;
- ленточно-шлифовальный станок.
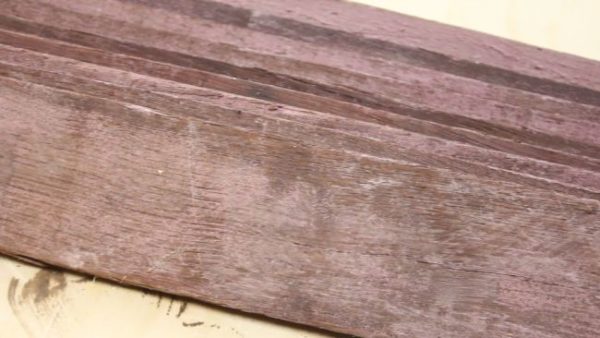
Также понадобится фуговально-рейсмусовый станок для первоначальной и финишной шлифовки деревянных поверхностей.
Шаг 1. Подогнать детали по толщине, торцевать и обрезать по ширине.
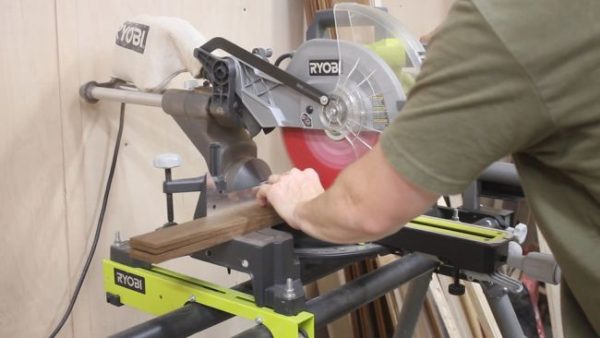
Подгоняем планки по размеру
Шаг 2. Склеить 4 детали вместе.
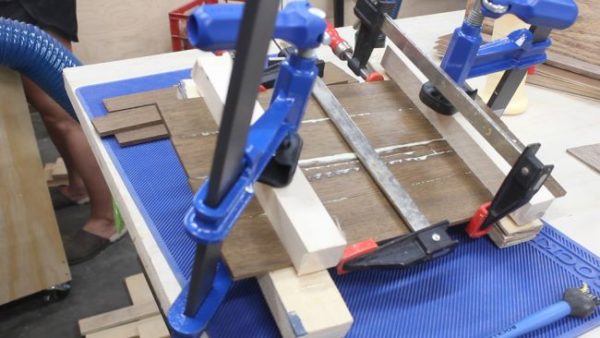
Шаг 3. Обработать заготовку фуговально-рейсмусовым станком и разрезать.
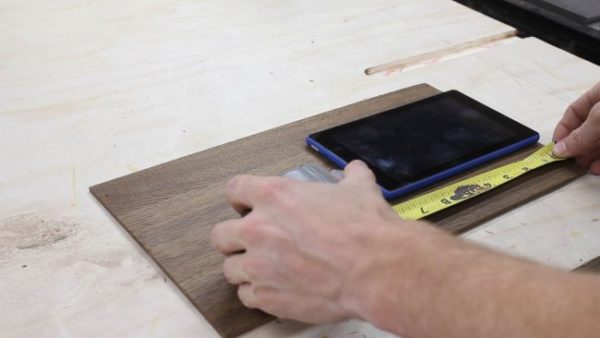
Подгоняем заготовку под размер телефона
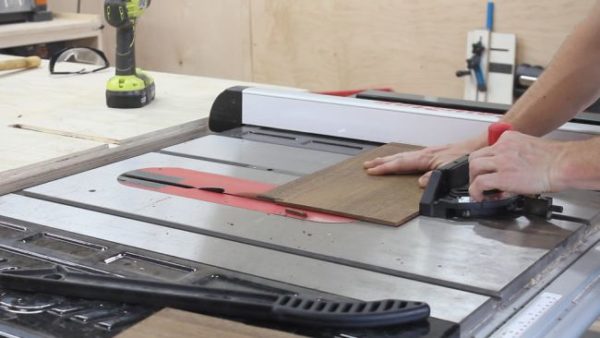
Шаг 4. Разделить один из полученных элементов, склеить в брусок и торцевать.
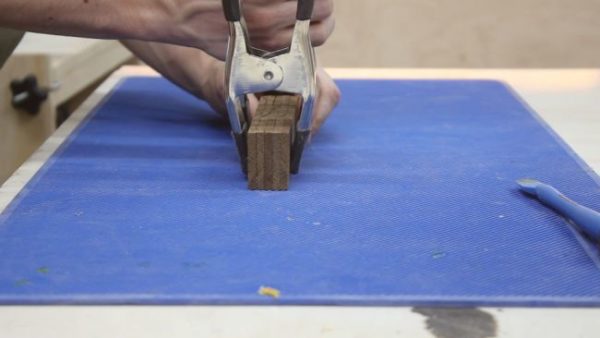
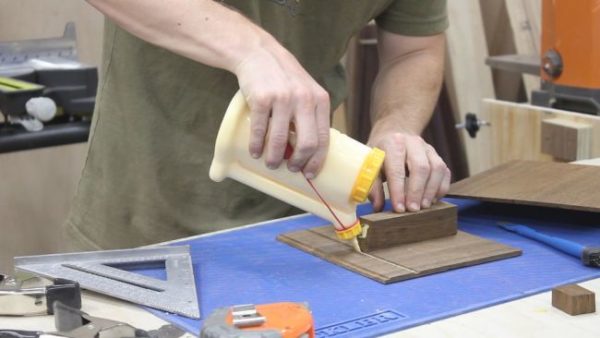
Шаг 5. Склеить заготовки вместе.
Шаг 6. После того, как высохнет клей, отшлифовать изделие и под углом отрезать опорную планку.
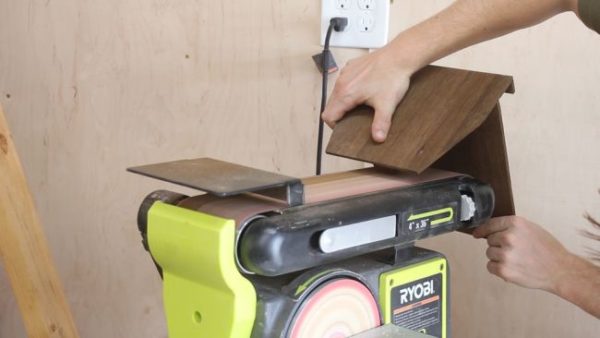
Шаг 7. Обработать края наждачкой и покрыть подставку минеральным маслом.
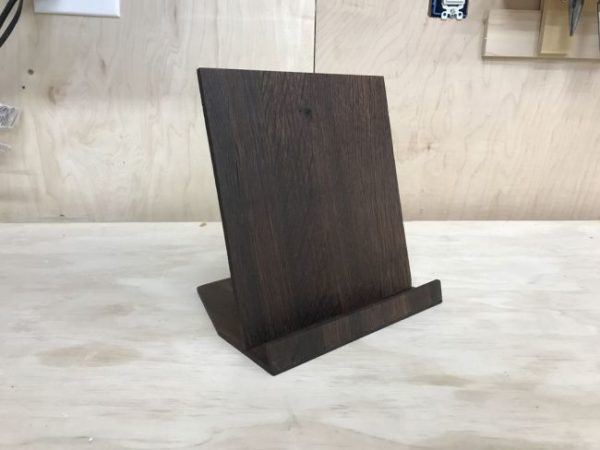
Конструкция в готовом виде
Деревянный органайзер
Особенность конструкции — полки для размещения смартфонов расположены горизонтально. Внешне изделие представляет собой вертикально направленную коробку с закрытой передней стенкой. Несмотря на то, что эта деталь увеличивает расход материала, благодаря ей обеспечивается безопасность хранения телефона.
Подставка собирается из распиленной плиты с помощью евровинтов. При помощи горячего утюга торцевые части закрываются самоклеющейся кромкой. Дно можно сделать из более дешевого сырья. Если у предыдущей модели основа бралась из подручных материалов, то для этой подставки ее нужно приобретать.
Шаг 1. Выбор материала
Таблица 1. Анализ востребованных для изготовления органайзеров лесоматериалов

| Разновидность | Характеристика |
|---|---|
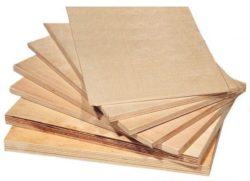
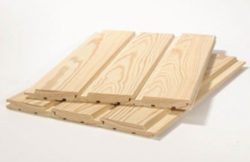
| Популярный материал для изготовления различных домашних органайзеров. Виду того, что минимальная толщина имеющихся в продаже досок составляет от 20 до 25 мм, не самый удачный выбор. Учитывая миниатюрность конструкции, для ее создания понадобятся дощечки толщиной от 12 до 15 мм. В противном случае подставка будет смотреться громоздко. Уменьшить детали до нужных размеров можно лишь с помощью профессионального оборудования, фуговально-рейсмусового станка, например. | |
|
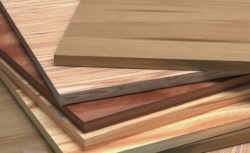
| Оптимальный выбор. Лесоматериал, сделанный из нескольких пластов мелких частиц древесины, связанных между собой синтетическими смолами. Изготавливается из первоклассной ДСП. |
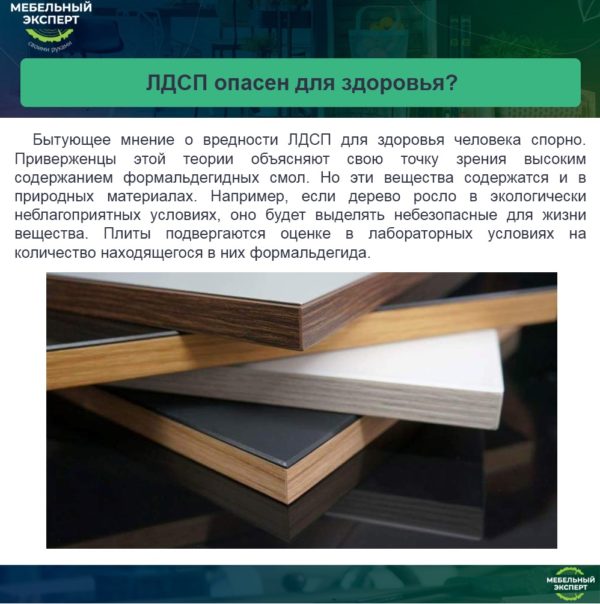
Ввиду специфики технологии создания у ЛДСП есть ряд преимуществ перед приведенным в таблице сырьем. Это касается хороших эстетических качеств и экологической чистоты.
- Жесткость. Благодаря специальной пропитке плохо поддается деформациям. Листы сохраняют внешний вид и форму даже под влиянием отрицательных факторов внешней среды.
- Прочность. Это качество препятствует образованию повреждений вследствие механического воздействия на материал. Он отличается высокой степенью износа. Поверхность много лет сохраняет свой первозданный вид.
- Завершенность обработки. Пластины не требуют последующей отделки. Они продаются в отшлифованном и презентабельном виде.
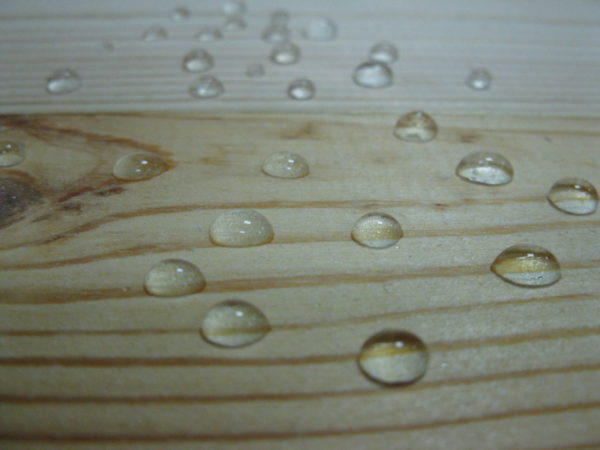
- Влагоустойчивость. Сырье практически не реагирует на длительное нахождение в условиях повышенной влажности. Это обеспечивается за счет покрытия водоотталкивающим лаком.
Шаг 2. Подготовка инструментов и оборудования
- Лобзик. Ручное приспособление, оснащенное сменной пильной поверхностью. Создан для распиливания тонких досок и фанеры.
- Пилки. Стальное лезвие, устанавливаемое в лобзик.
- Сверло. Режущее устройство, принцип действия которого основан на вращательном движении. Используется для создания отверстий.
- Шкурка. Бумага, усыпанная битым стеклом или наждаком. Различается степенью зернистости.
- Конфирмат (евровинт). Крепежный элемент, представляющий собой стержень с наружной резьбой и головкой. Формирует внутренний резной рисунок в углублении присоединяемой детали. Помимо них нужны деревянные шканты.
- Дрель. Электрический или ручной инструмент, выпускаемый для быстрого оформления отверстий.
Помимо перечисленных понадобятся самоклеющаяся мебельная кромка, утюг и клей.
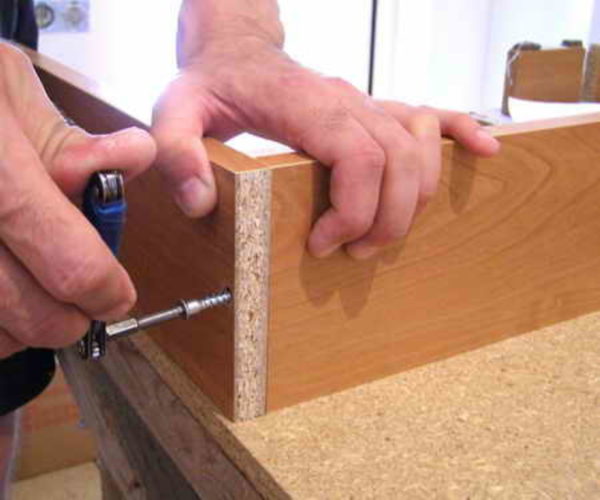
Изделия, скрепленные конфирматами, не выдерживают многократного монтажа
Поделки из веток дерева своими руками – это отличный и легкий в реализации способ украсить жилье, сделать интерьер действительно уникальным. Еще такие поделки могут стать оригинальным подарком для близких, а если вовлечь в процесс детей, то занятие станет истинным полем для творчества!
Шаг 3. Ознакомление с правилами техники безопасности
Перед тем, как приступить к изготовлению подставки, нужно ознакомиться с азами столярной работы:
- Одеть рабочий камуфляж.
- Подготовить место для создания изделия.
- Прочно зафиксировать к верстаку выпиловочный столик.
- Проверить каждый инструмент на исправность.
- Плотно вставить в рамку ручного лобзика пилку.
- В процессе работы нельзя низко склоняться над заготовкой или делать резкие движения инструментарием.
- Приспособления с заостренными хвостиками следует оснастить деревянными рукоятками.
- Во время выполнения работы запрещено отвлекаться.
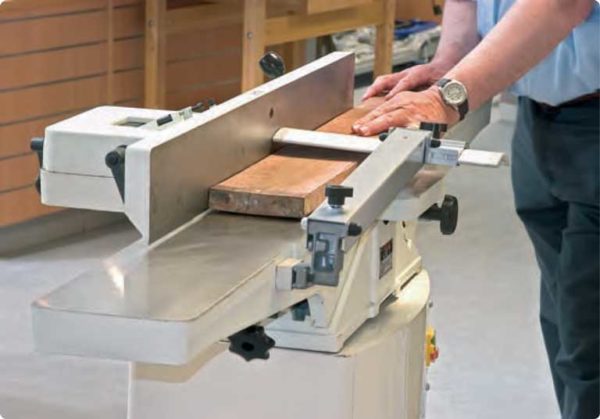
Столярные инструменты можно использовать лишь по их прямому назначению
Шаг 4. Распил и сборка
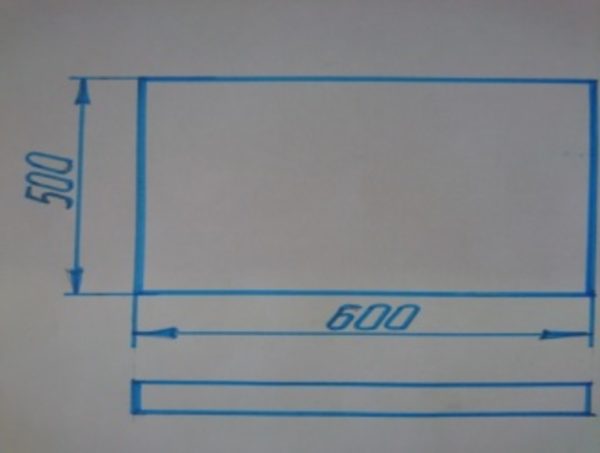
Подготовить 16 мм заготовку из ЛДСП
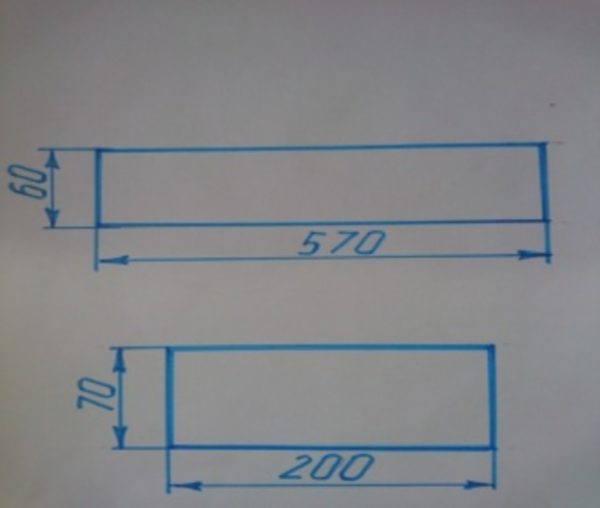
Распилить на станке детали размером 60х570 мм — 6 штук, и 70х200 мм — 2 штуки
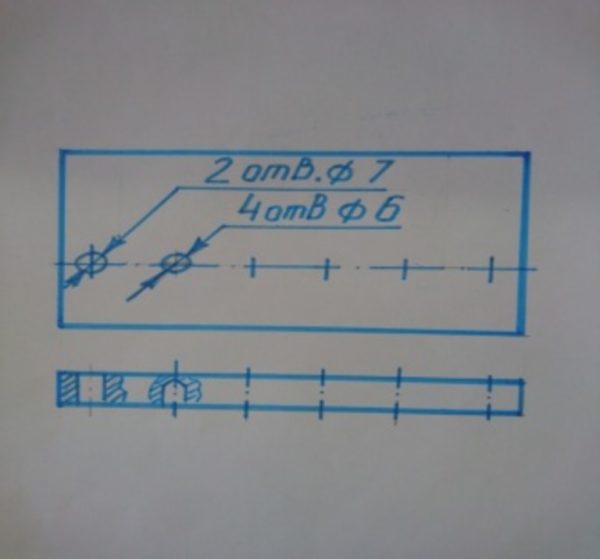
Пометить центры отверстий на выполненных элементах и оформить несквозные углубления под деревянные шканты
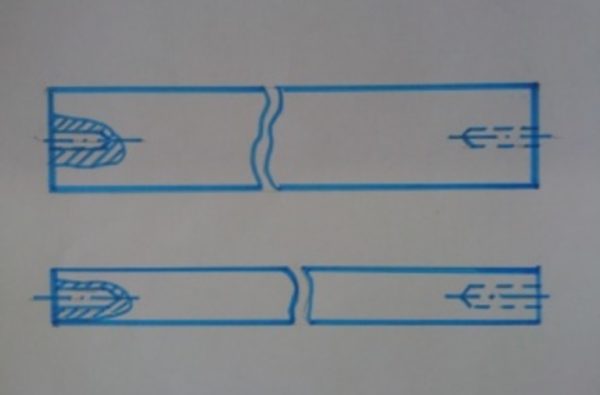
Выполнить сквозные отверстия для осуществления углового соединения с помощью конфирматов. Кромки заготовок хорошо обработать шкуркой
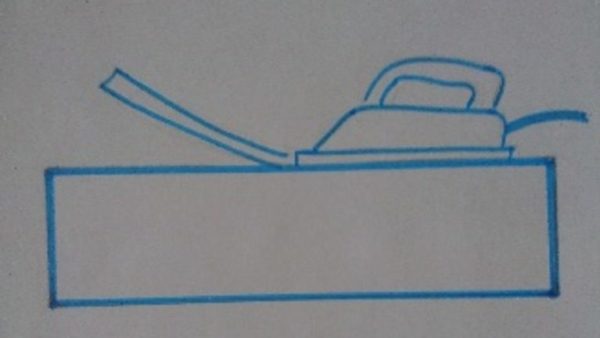
Нанести мебельную кромку при помощи горячего утюга

Выступающую часть кромки удалить и подровнять наждачкой. Вставить шканты в серединные перегородки

Сделать сборку на евровинты. Усилить соединительные элементы клеем. Замаскировать подпятники на винтах и проверить качество монтажа
Видео — Как сделать подставку для телефона. 7 простых способов
Источник
Мобильные телефоны и смартфоны из предмета роскоши стали обязательным аксессуаром каждого современного человека, заменяя записную книжку и компьютер.
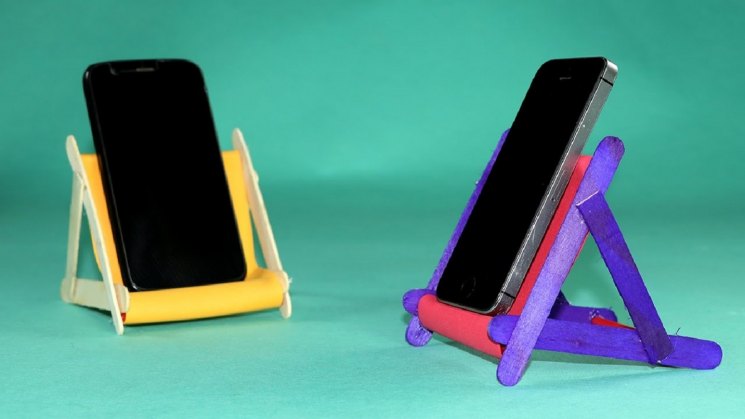
Небольшие по размеру гаджеты приходится постоянно держать в поле зрения, отвечая на важные звонки и текстовые сообщения, своевременно реагируя на все приходящие уведомления.
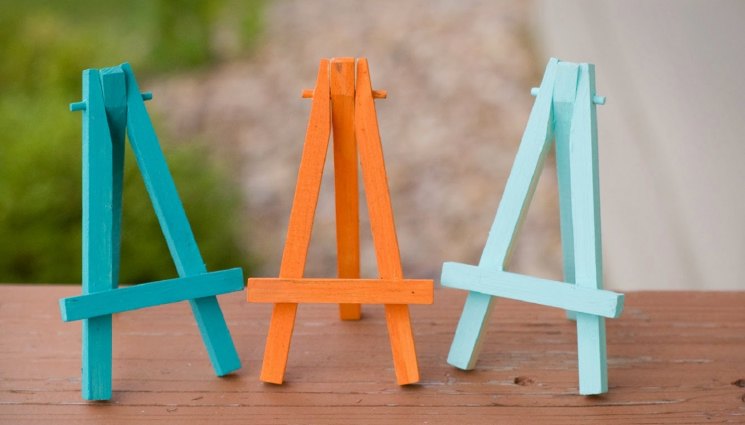
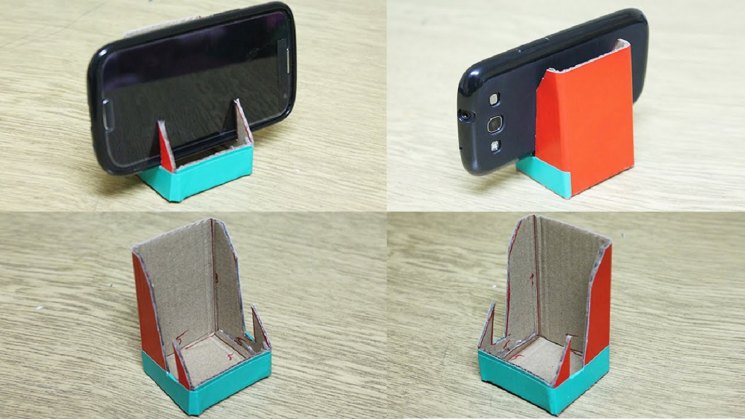
Предлагаемые в большом разнообразии фото подставки для телефона, сделанной своими руками, помогают подобрать лучшую идею для реализации.
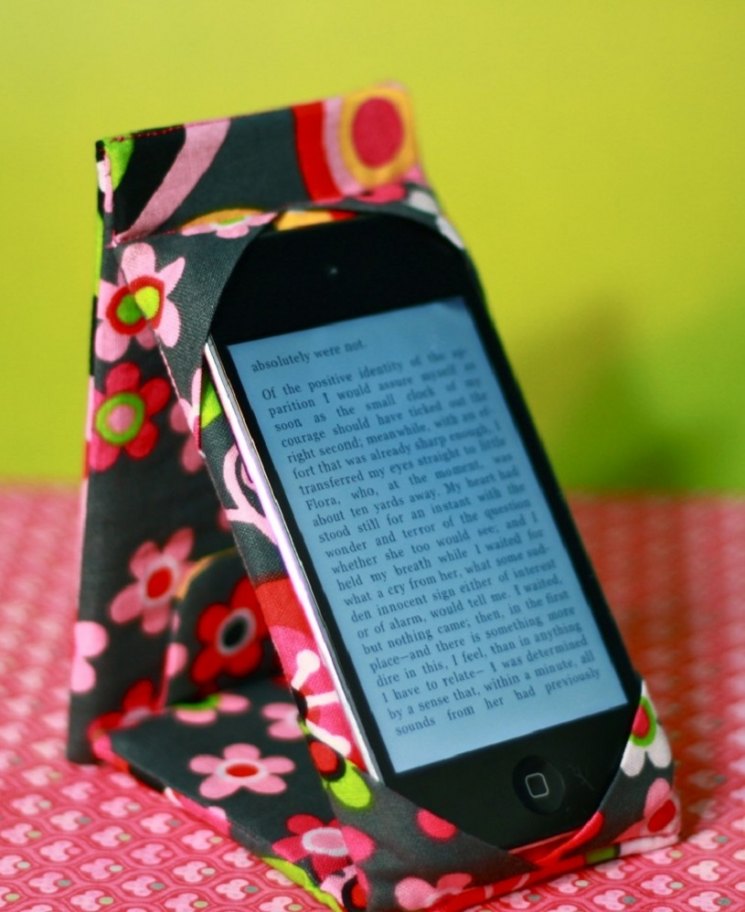
Такой практичный и стильный аксессуар будет использоваться постоянно наряду с зарядным устройством и чехлом, поэтому к нему предъявляются требования функциональности и привлекательности.
- Удобный и практичный аксессуар для мобильного телефона
- Виды подставок и техники их самостоятельного изготовления
- Какие материалы можно использовать для подставки
- Картон и ткань
- Пластиковые бутылки
- Картонная втулка
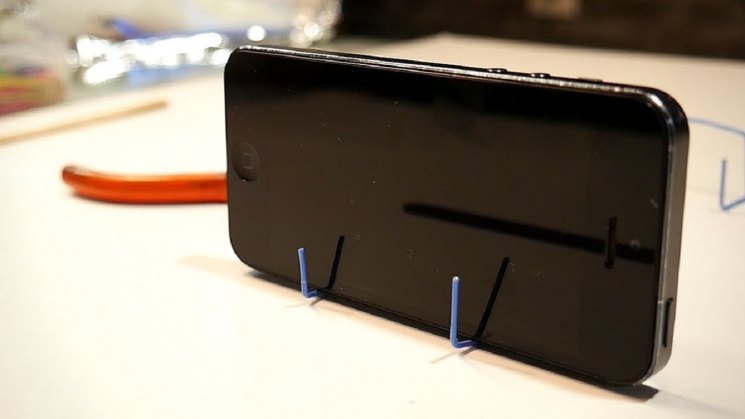
- Гибкая проволока
- Плотная бумага
- Деревянные палочки
- Фото подставки для телефона своими руками
Удобный и практичный аксессуар для мобильного телефона
Технология как сделать подставку для телефона своими руками, полностью зависит от выбранной идеи и используемых материалов.
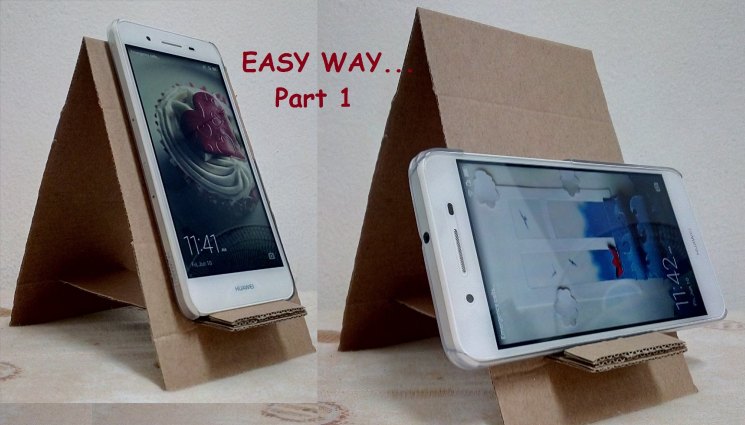
Функциональность таких приспособлений обеспечивает возможность размещения их на рабочем или письменном столе, на полке или даже в подвешенном состоянии, что удобно для каждого человека.
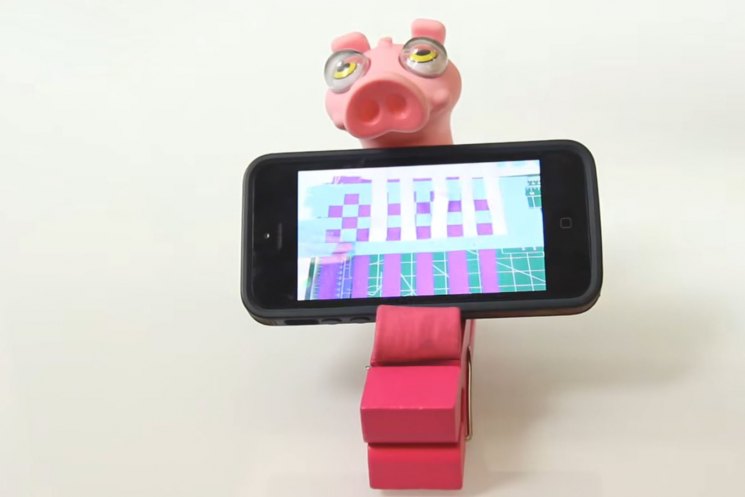
Для повышения декоративности практичного приспособления используются оригинальные схемы и чертежи красивых и привлекательных подставок.
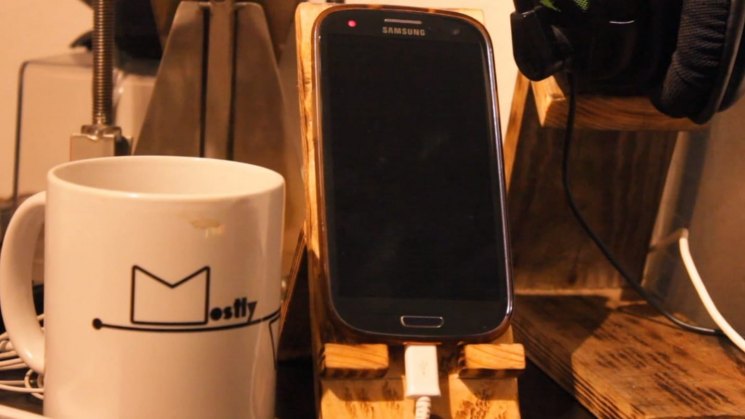
Дополнительное использование техник украшения и декорирования готовых изделий позволяют сделать их максимально оригинальными и эксклюзивными, подчеркивающими вкус своего владельца.
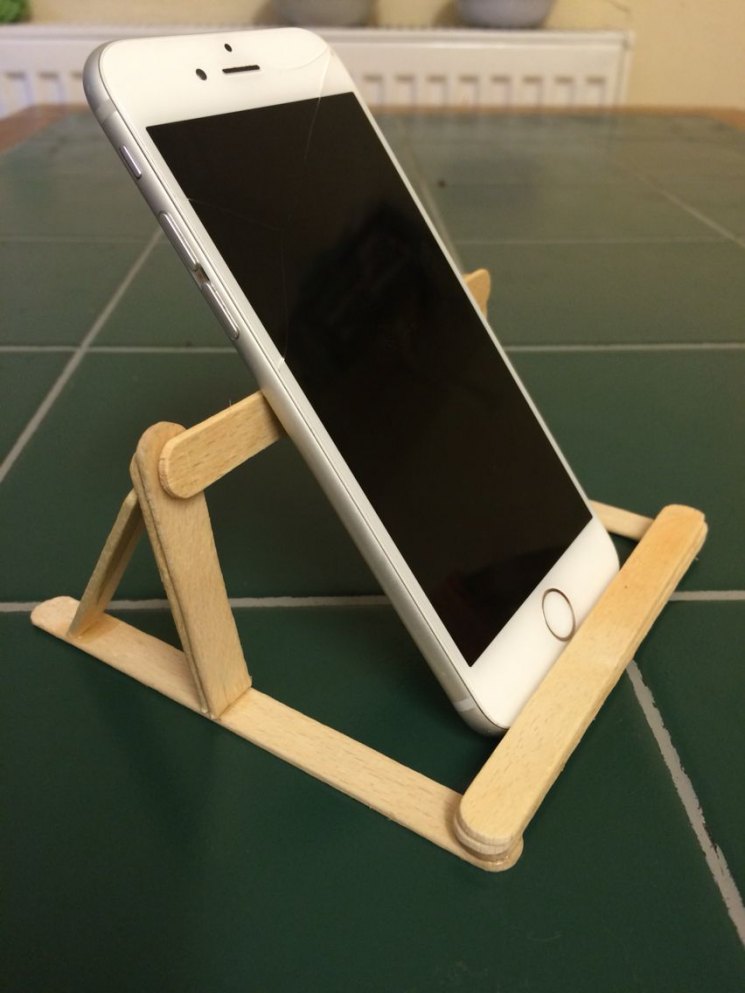
Виды подставок и техники их самостоятельного изготовления
Для удобства использования можно сделать их разной конфигурации и формы, общая классификация предлагает разделение аксессуаров на:
- настольные, такая подставка для телефона на стол своими руками позволит грамотно разместить все вещи на рабочем столе и поддерживать рабочее место в порядке и чистоте;
- подвесные могут иметь разную форму и стиль оформления, они используются для удобной зарядки телефона и освобождения свободного места на письменном столе.
Используя предлагаемые схемы и простые чертежи можно изготовить разные по конструкции и конфигурации подставки с длительным сроком эксплуатации.
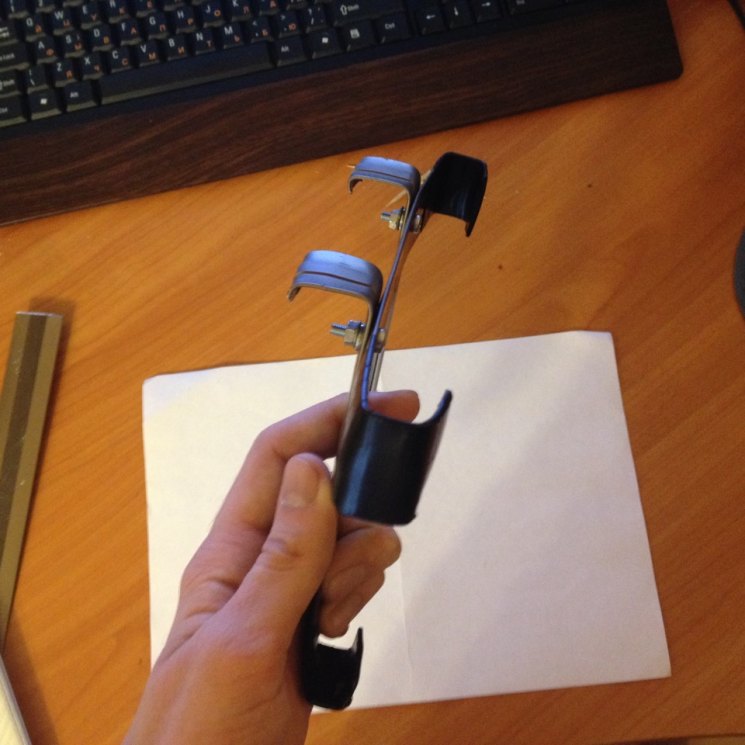
Какие материалы можно использовать для подставки
Дорогостоящие магазинные подставки можно заменить собственноручно изготовленными моделями, которые не уступают заводским по функциональности.
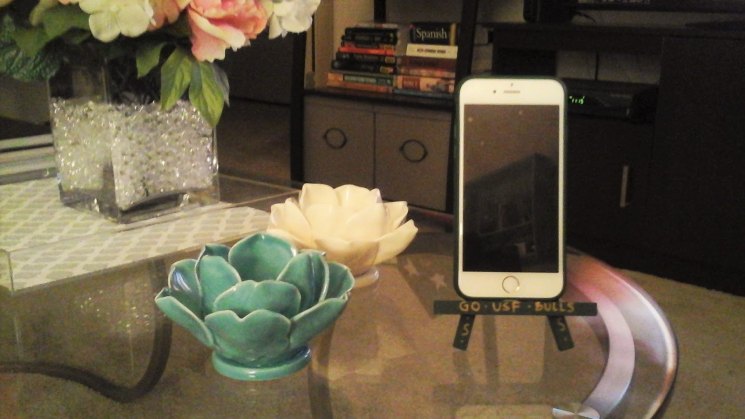
Для творческого процесса можно использовать разные материалы и их сочетания, а начинать работу лучше с выбора идеи и подбора чертежей будущего изделия.
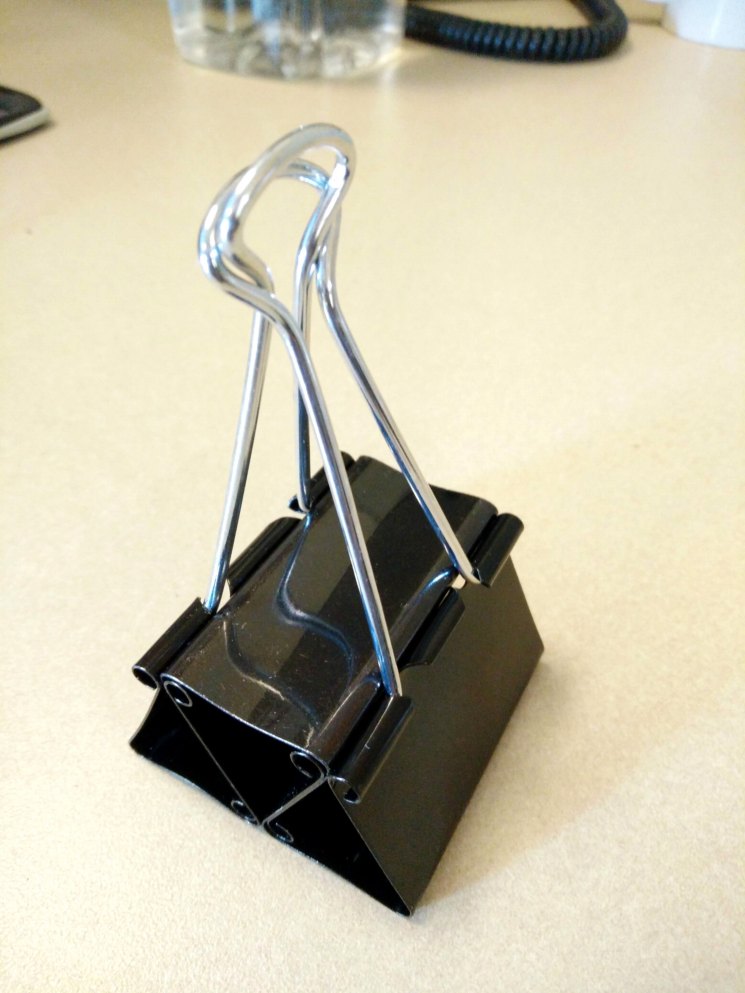
Картон и ткань
Удобная навесная подставка для телефона из картона своими руками представляет собой сложенный кусочек картона, который крепится к стене или полке.

Для удобства использования такого аксессуара в его передней части вырезается прямоугольное окно, которое позволяет управлять функциями смартфона без извлечения его из подставки.
Пластиковые бутылки
Интересная и необычная подставка для телефона из пластика подвесного типа легко делается путем обрезания бутылки из-под шампуня.
Практичная ручка модели похожей на корзинку свободно крепится на блоке зарядного устройства и телефон не придется пристраивать на пол, что исключает возможность его случайного повреждения.
Картонная втулка
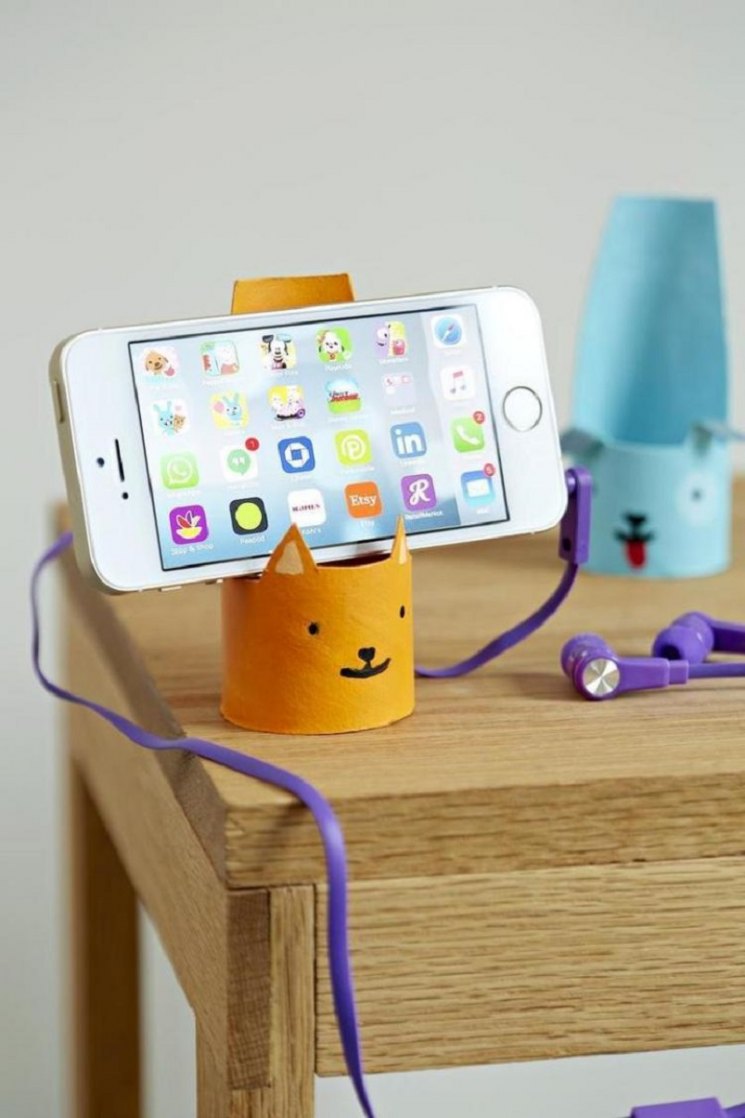
Круглая втулка от туалетной бумаги или бумажных салфеток с красивым декором и прорезанным отверстием фиксируется на поверхности благодаря кнопкам.

В такую подставку легко устанавливать телефон любой формы и размера, меняя горизонтальное и вертикальное расположение гаджета по собственному желанию.
Гибкая проволока
Чтобы подставка для телефона из проволоки своими руками стала настоящим украшением рабочего или письменного стола необходимо тщательно подобрать ее дизайн.

Мягкая и прочная проволока проста в обработке и из нее можно формировать фигуры разной формы и конфигурации, добавляя элементы для закрепления зарядного шнура.
Плотная бумага
Существует немало техник для обработки плотной цветной или белой бумаги, благодаря которым можно изготовить оригинальную подставку.

Изюминка моделей выполненных в технике оригами заключается в возможности их постоянной замены новыми изделиями, органично вписывающимися в интерьер помещения и обустройства рабочего места.
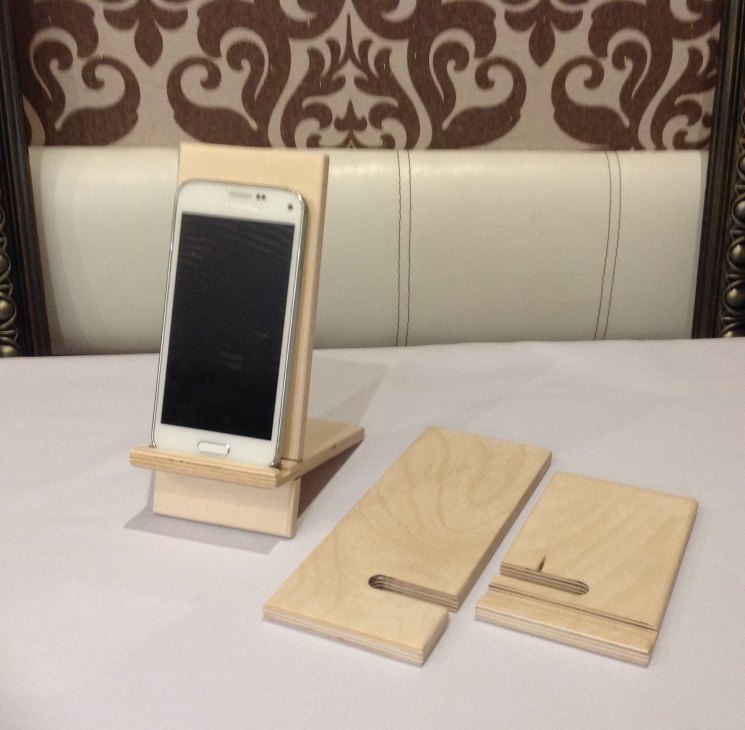
Деревянные палочки
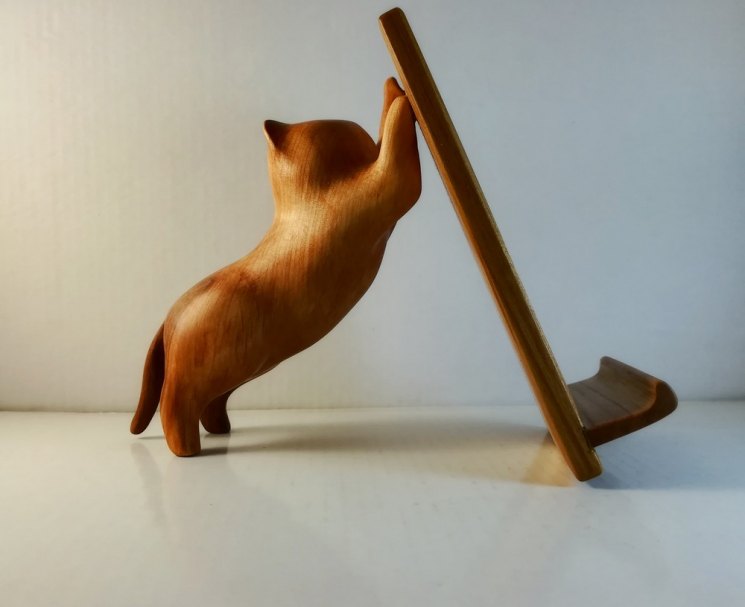
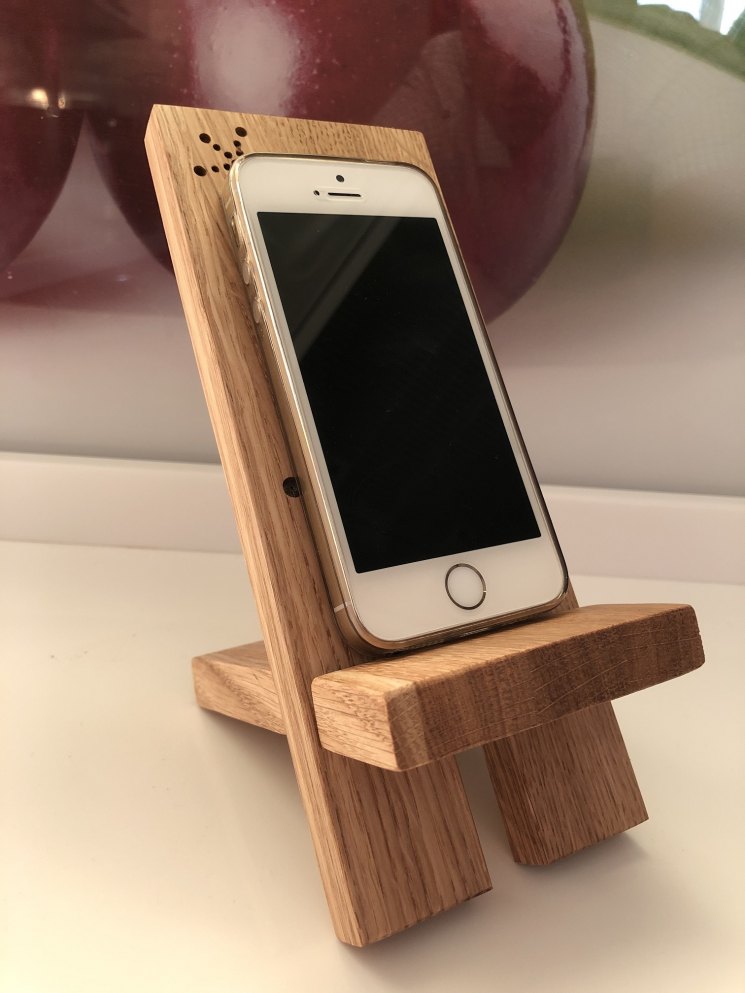
Красивая и стильная подставка для телефона из дерева своими руками отлично дополнит общую концепцию оформления рабочего стола, для этого можно использовать:
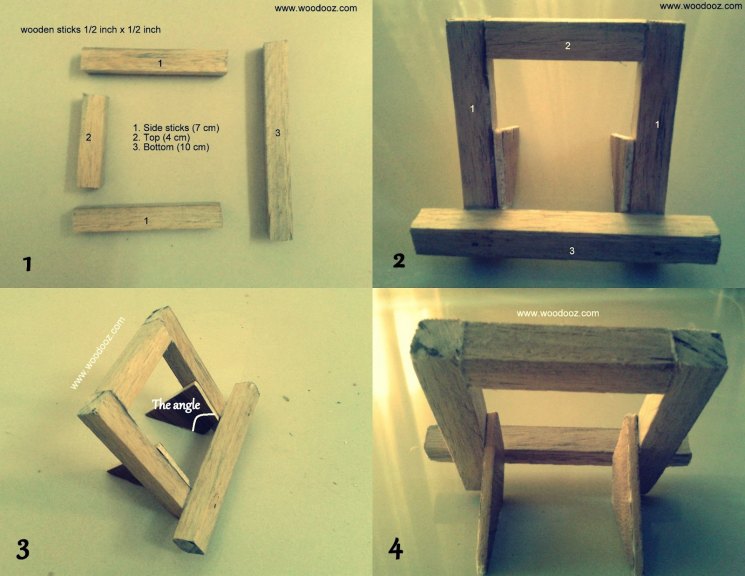
- бамбуковые шпажки, из них формируется оригинальная подставка с бортиками;
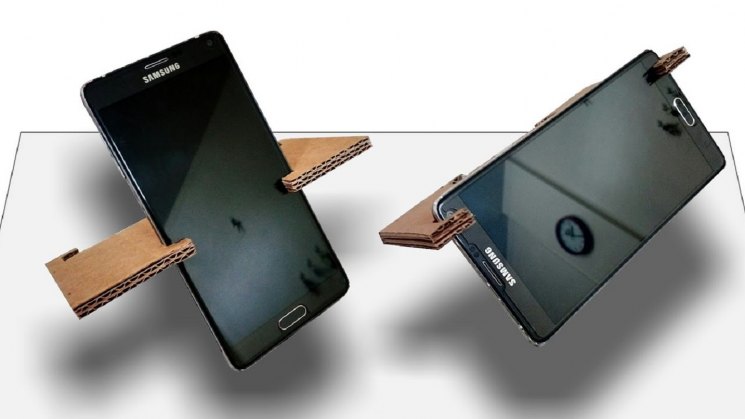
- фанерные детали, соединяемые по эскизу в простой технике моделирования;
- обработанная древесина и поперечные срезы небольших по диаметру веток;
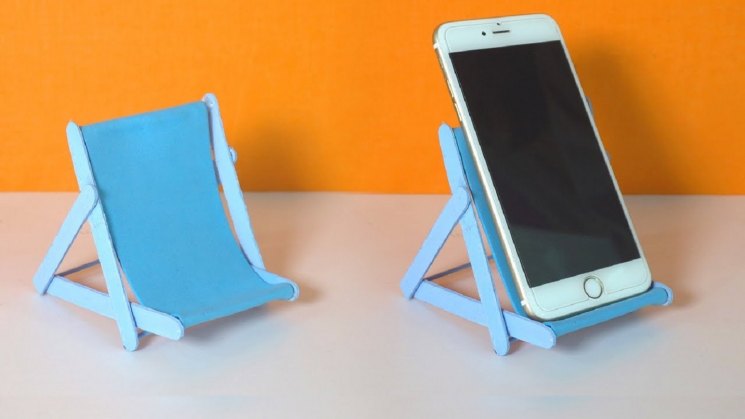
- палочки от мороженного, из них можно изготовить шезлонг для смартфона.
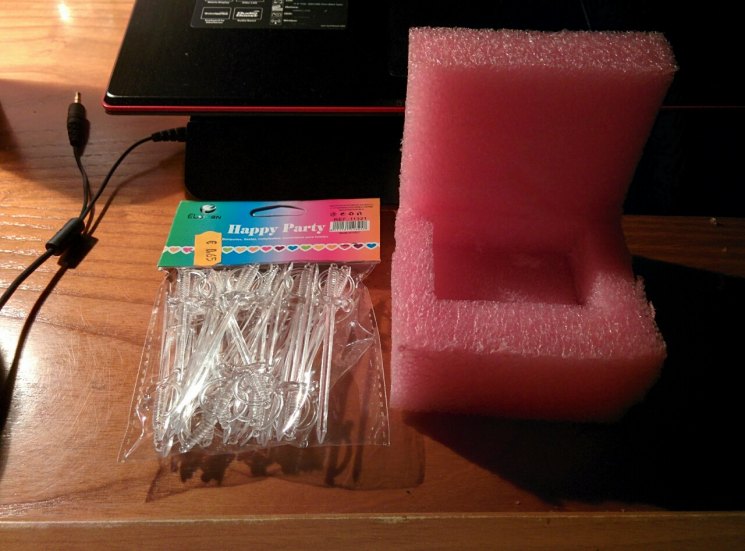
Предлагаемые идеи помогут не только сохранить целостность телефона и всегда держать его под рукой, но и стильно украсить свой стол на работе или дома.
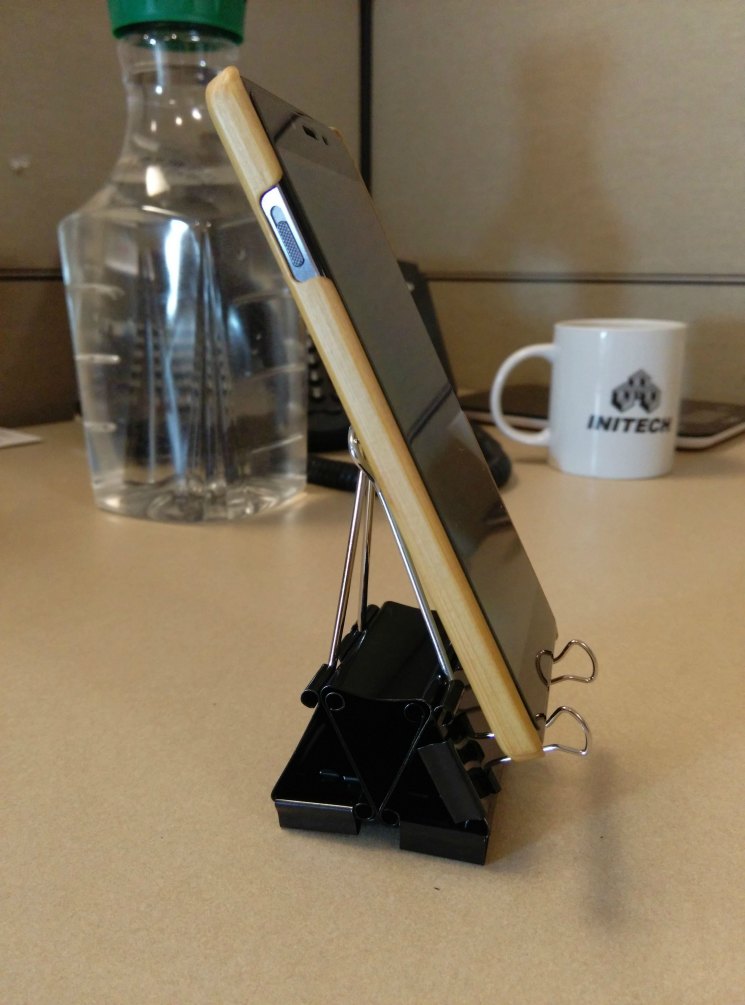
Фото подставки для телефона своими руками
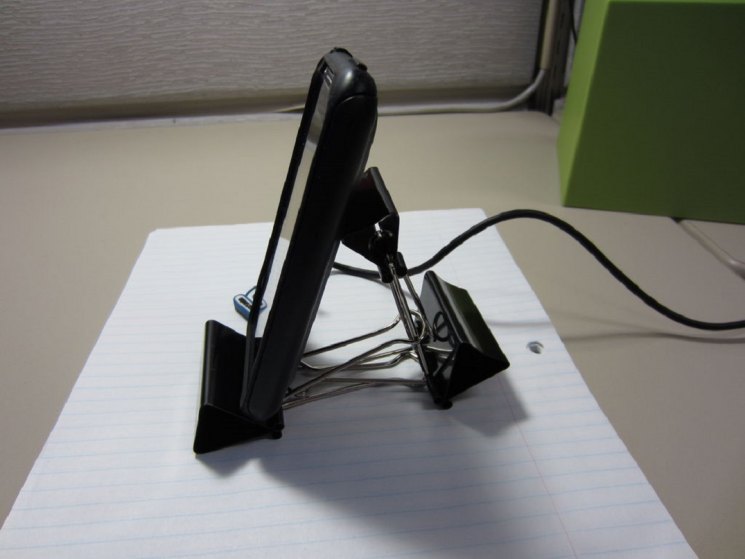
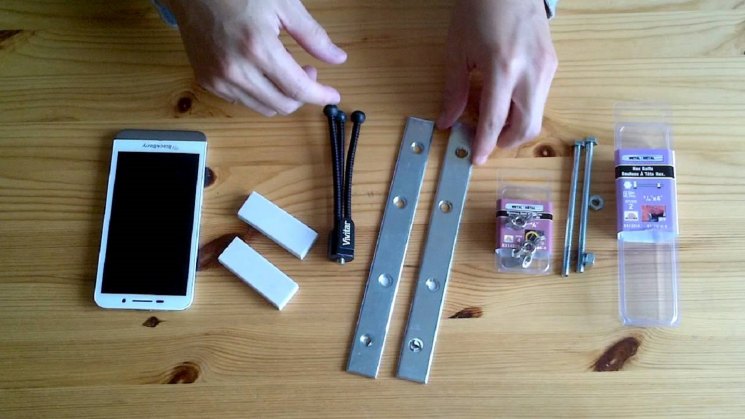

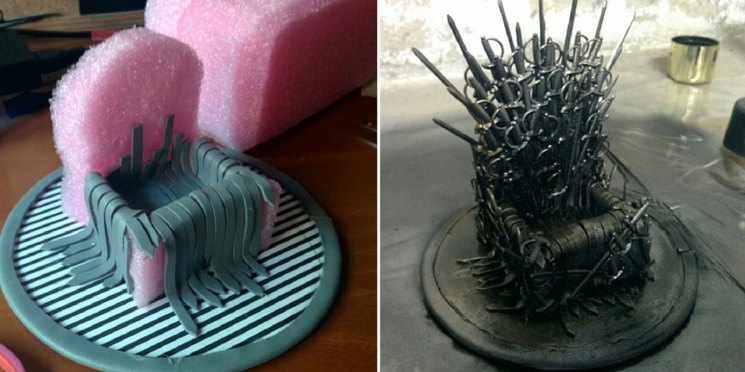
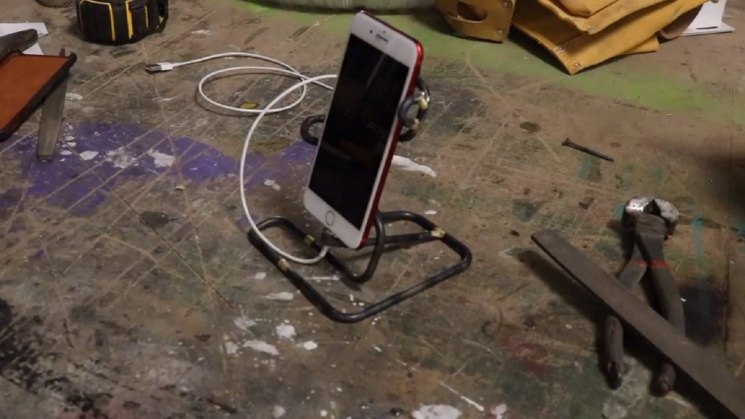

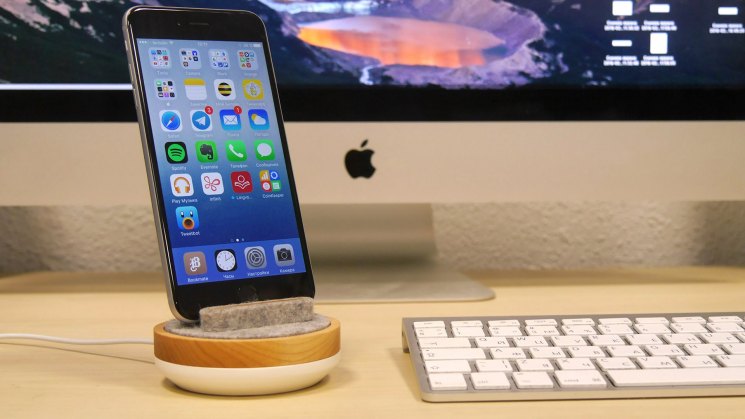
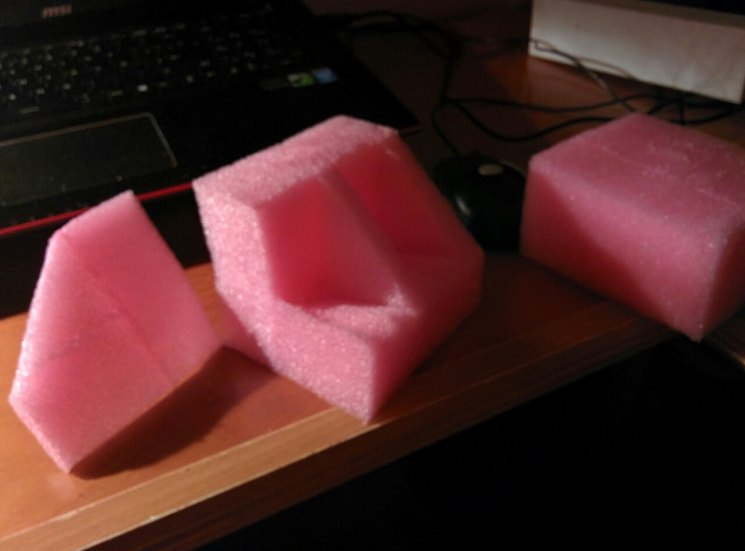
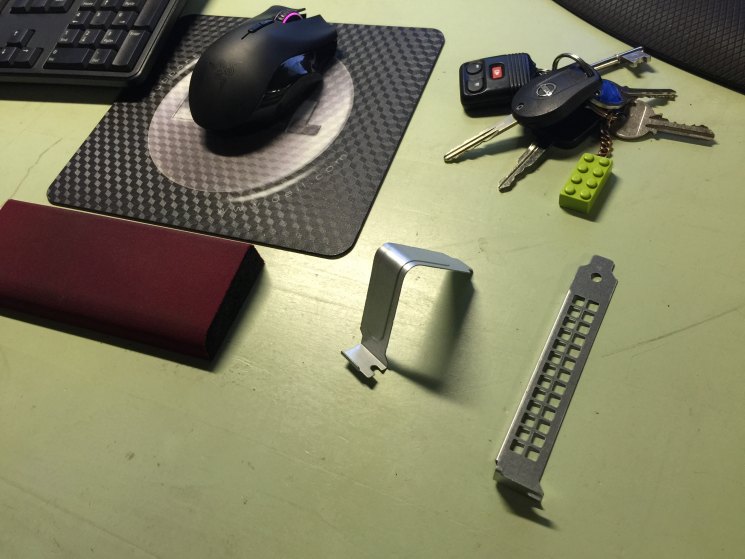
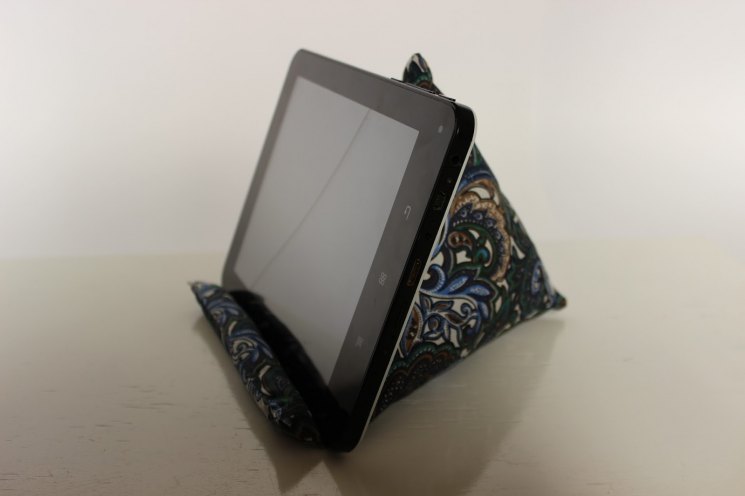

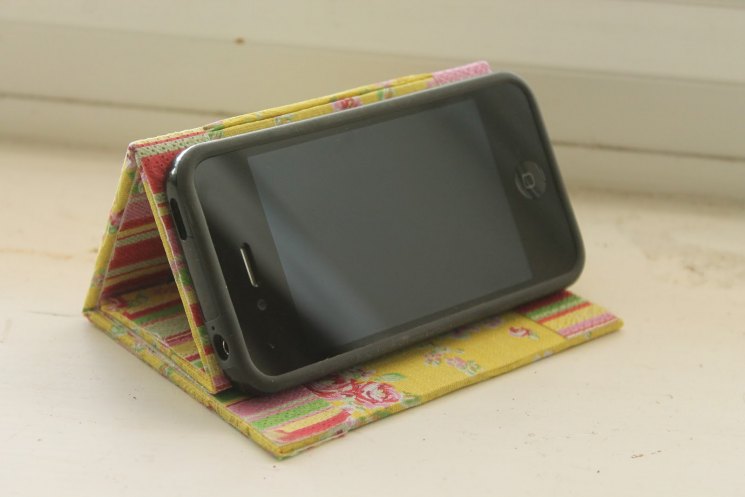

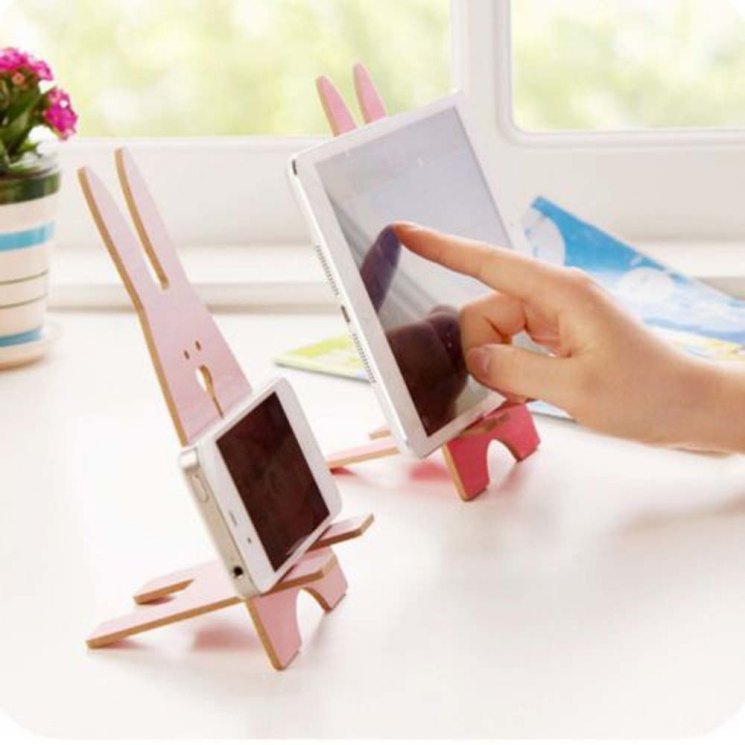
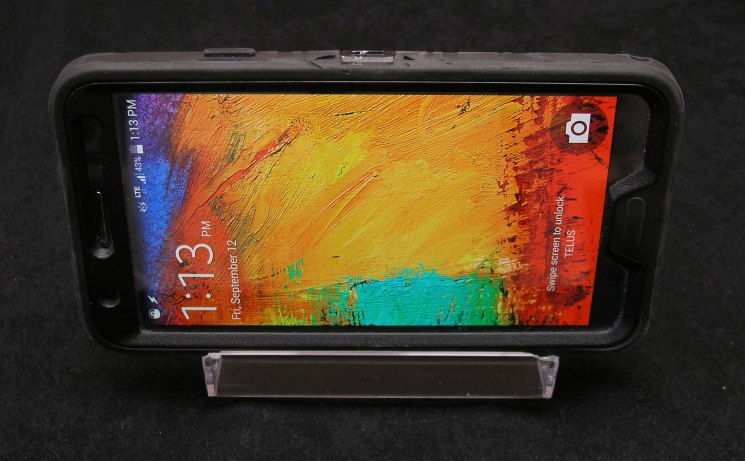
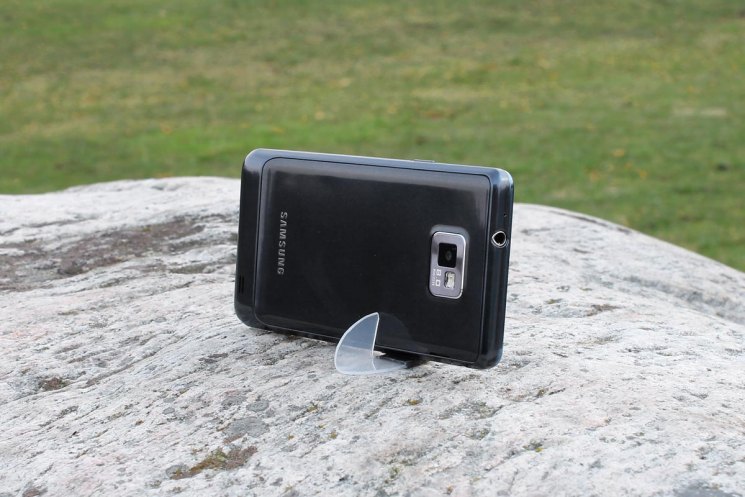

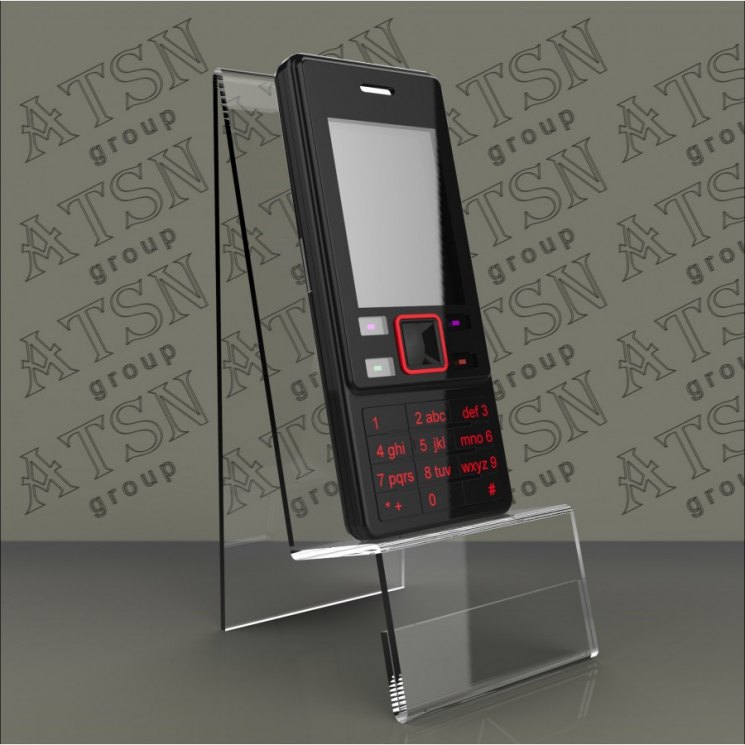
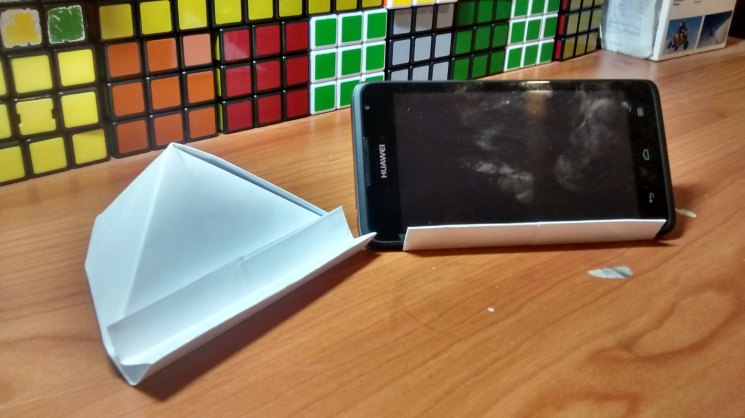
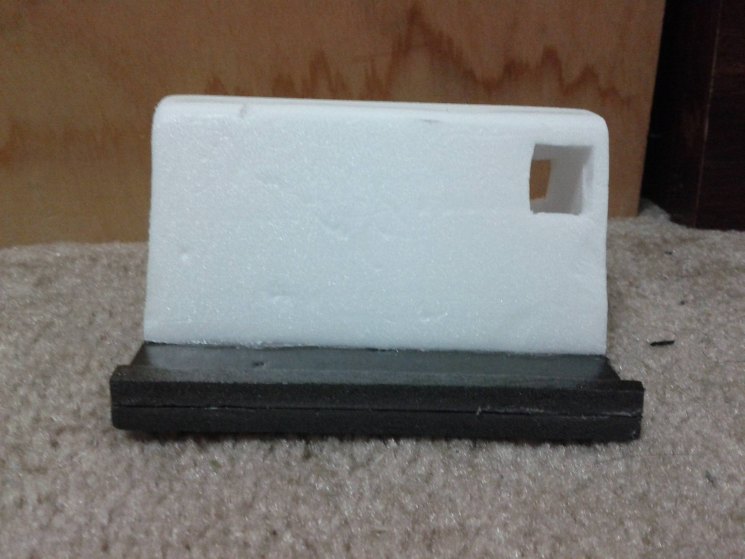



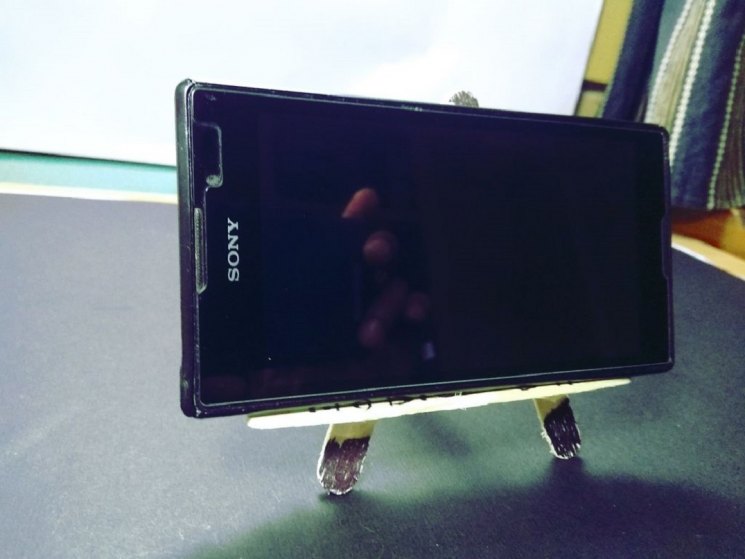
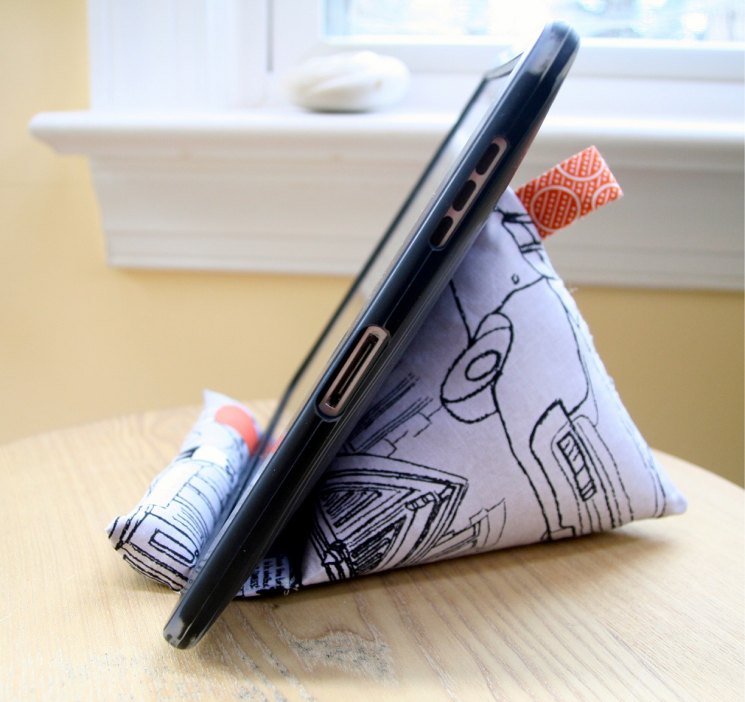
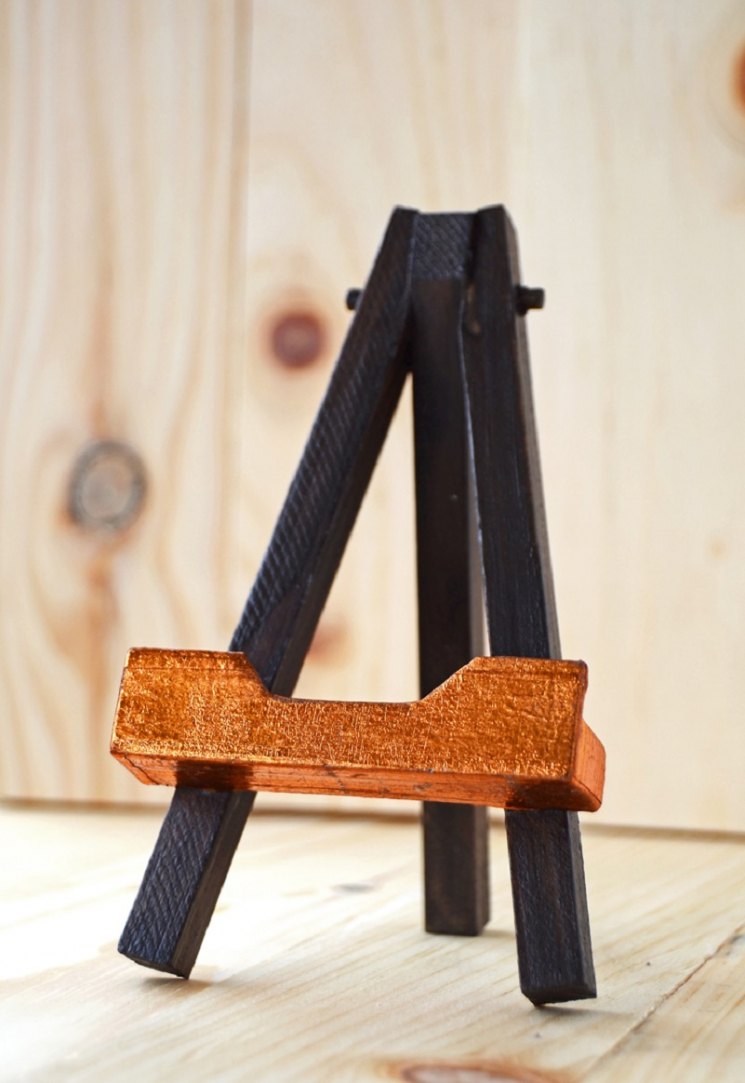
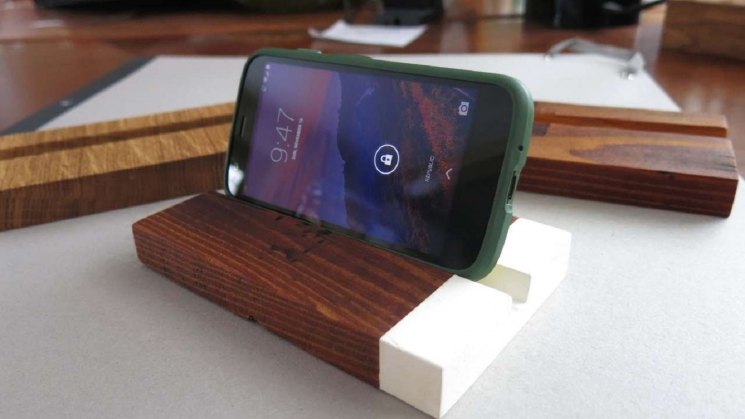
Помогите сайту, сделайте репост 
Introduction: DIY Phone Holder | How to Sew a Triangular Stand for Your Mobile
This project came about after watching videos on my phone whilst lying on my side and propping my phone up on a pillow…only to have the phone fall off the pillow over and over and over….
So this was my solution! It’s a triangular stand that holds the phone at the angle I want without having to prop it on something unreliable. I hope you enjoy this Instructable 
Supplies
— Phone to prop up; Mine is an iPhone 7 but you can make this stand for any phone, any model, by changing the dimensions as I detail below.
— Fabric; The main piece of fabric you need should be fairly sturdy and woven. Denim and canvas work well.
— A small piece of stretchy knit fabric; This fabric is for stretching over the ends of the phone to hold it in place. I used a grey knit jersey.
— Scrap of another light- or medium-weight woven fabric; I just used a small piece of calico.
— Elastic; I used 8mm elastic.
— Stuffing; I used polyester stuffing.
— Plastic pellets/beanbag beans/rice; For adding some weight to the back of the holder.
— Sewing machine & matching thread; It’s possible to hand it if you don’t have a machine though.
— Hand sewing needle
— Scissors
— Ruler
— Sewing pins
— Protractor
— Paper
— Disappearing/magic fabric pen
— Iron & ironing board
— Scraps of cardboard
— Funnel (optional)
— Rotary cutter & cutting mat (optional)
Step 1: Work Out the Dimensions
Obviously if you have an iPhone 7 you can use my dimensions from the photos above (YAY!), but otherwise you’ll have to do a bit of planning. Don’t worry though, I have laid out all of the steps below and in the photos.
You will need to work out how big the 3 sides of the holder are, how big the 2 triangular end pieces are, and how big the 2 pieces of fabric holding the phone at each end need to be.
_ _ _ _ _ _ _ _ _ _ _ _
1) First, measure your phone. I drew around my phone and measured the length and width from there. You will also need the thickness/depth of the phone and the width of the end strips (the strips either end of the phone where there isn’t an image displayed.)
If you don’t have these end strips you will need to imagine you do and that they are at least 15 mm otherwise there won’t be enough area of fabric to hold your phone at each end.
2) Decide on the angle you want your phone to be held at. If you want it held straight up then you would choose 90 degrees. I wanted a little bit of a tilt though so I chose 75 degrees. Using a protractor to help you visualise the angle is useful (note: you can print a protractor off the internet if you don’t own one).
3) You can now work out the size of the side where the phone will be held. This side needs to be the size of the phone plus 2 x the seam allowance. I used a seam allowance of 10 mm, but obviously you can use whatever seam allowance you want. In my case, this side of the holder needs to be 160 mm x 88 mm.
As a result, you now know the length of all of the sides of the holder…because they’re all the same. In my case, they are all 160 mm long.
4) Then you need to draw out the triangular end pieces to scale.
So draw a horizontal line on a piece of paper, then draw a line sloping up from this line that is at the angle you chose in step 2). So I drew a line at 75 degrees. This line needs to be the same length as the width measurement from step 3); in my case 88 mm.
Decide how wide you want the base to be. This should be at least as wide as the side where the phone will be held (88 mm). So I chose 90 mm for this width. Mark this distance from where your horizontal line meets your angled line.
Join this mark to the end of the angled line to create a triangle. The length of the line you just drew is the width of the back piece of the holder. In my case this was 108 mm.
The triangle shape you now have is is the exact size of your triangular end pieces.
5) You now know the sizes of all the side pieces, and the triangular ends. So now we just need the measurements for the stretchy bands that go over the phone ends. The length of these bands needs to be the width of the phone side, which in my case is 88 mm. The width of these bands needs to be (2 x the width of the end strips on the phone) + (2 x seam allowance), which in my case is (2 x 15) + 20 mm = 50 mm
Step 2: Cut Out the Fabric
I recommend first making paper templates of all of the pieces; the 3 sides, the triangular end piece, and the stretchy band.
Mark one side of the triangle template with ‘A’ and write which edges match up with which side (phone/back/base), and do the same on the back of this template but with ‘B’ written on instead. This is because we need 2 of these shapes, but mirror images of each other.
Then draw around each template (using a fabric pen) onto your main fabric. You will need to draw around the stretchy band template onto your stretchy knit fabric rather than the main fabric, and you’ll need 2 of these shapes.
The triangle template will need to be draw around once with the ‘A’ facing upwards, and once with the ‘B’ facing upwards.
Then cut these out, either using scissors or a rotary cutter & ruler on a cutting mat.
Step 3: Add the Stretchy Bands
Cut out 2 pieces of elastic. These need to be 2 cmshorter than the length of the knit fabric pieces (KF). In my case they were 68 mm long.
Place each one lengthwise on each of the KF pieces.
Place these at each end of the ‘phone side’ piece that you cut out of the main fabric. This main fabric piece (MF) should be right side up and the KF pieces should be wrong sides up.
Fold each piece of KF lengthwise over the elastic, making sure that the raw edges of this fabric are pointing towards the shorter ends of the MF.
Line up these raw edges with the matching edges of the MF underneath, and move the pieces of elastic so they are right up against the fold, and the ends of the elastic pieces are lined up with the same side edge of the MF (doesn’t matter which side you choose).
Pin these in place and sew down the side of the MF where the ends of the elastic lie. This is to attach the stretchy bands and the elastic pieces to one side of the MF.
Backstitch at the beginning and end, and backstitch over the elastic to reinforce the stitching at those points.
Use a seam allowance less that what you have chosen for the rest of the project. In my case, I sewed 5 mm from the edge as my chosen seam allowance is 10 mm.
Step 4: Sew the Other Side of the Stretchy Bands
This can be a bit fiddly because the elastic needs to be stretched to the other side of the MF, whilst still being contained in the KF pieces.
You must also make sure the KF edges all still line up with each other and the MF underneath.
Then pin the elastic and KF bands in place and sew along this side. Again, use a seam allowance less that what you have chosen for the rest of the project.
Don’t worry that the MF curls up a bit, it’s supposed to!
Remember to backstitch over the elastic again to reinforce those areas.
You should now have a line of stitching down each long side of the MF.
Step 5: Attach the Triangles
Mark each triangle ‘A‘ or ‘B‘, and write which edge connects to which side piece so that you don’t get mixed up.
Pin the ‘phone’ edge of each triangle to each end of the piece of fabric with the stretchy bands attached.
Make sure the edges line up and the fabrics are right sides together. Also make sure that you pin with the stretchy bands pulled flat inside the fabric ‘sandwich’.
Sew each triangle using your chosen seam allowance for the project, in my case 10 mm.
This stitching should go through the triangle, the ‘phone’ side piece and both edges of the stretchy bands.
Step 6: Add the Remaining Side Pieces
Next, you need to add the other 2 sides to each long edge of the ‘phone’ side.
Start by pinning the ‘base‘ side onto one edge, right sides together.
Then sew using your chosen seam allowance. Start and stop sewing the line a seam allowance distance from the ends of the fabric.
Remember to backstitch at the beginning and end as usual.
Then do the same thing to attach the ‘back‘ piece to the other side of the ‘phone’ side.
At this point, you should be able to try out your phone in the stretchy bands to see if it fits securely. If it doesn’t, now is the time to make alterations.
Step 7: More Sewing 
Then, pin the back and base sides together and sew along this seam. Again, use your chosen seam allowance, and start and end the sewing a seam allowance distance from the ends.
Then pin one of the triangle ends onto the side pieces to close that side of the phone holder.
Sew along these 2 edges using your chosen seam allowance.
Step 8: Add the Weighted Section
To slightly counterbalance the weight of your phone, it’s a good idea to add some weight to the opposite end of the phone holder, on the inside.
Take a piece of woven scrap fabric (in my case calico) and cut a piece a bit shorter (20 mm shorter in my case) than the ‘base‘ paper template.
Fold it in half and pin the edges. Sew along the long edge and one of the short edges.
Pour some kind of weight into this fabric pouch until it is mostly full but still has space at the top. I used a plastic pellet product that is designed to fill toys.
Then pin the open end and sew this shut. Make sure you don’t sew over any pellets!
The pouch needs to be partially empty because in the next step this pouch will need to fold up.
If you decide that you need to add more weight to balance your phone, you can use washers, rice, beanbag beans and other various items. You can also add a wider fabric pouch inside if you need to.
Next, pin & sew this pouch to the seam opposite the ‘phone’ side, so that it lies on the ‘base’ side.
Step 9: Stuffing & Stiffening
Turn the phone holder right-sides-out. Iron the edges to make them crisper & neater.
Push stuffing into the phone holder, but don’t overstuff it because that will mean it won’t be able to sit flat on a surface.
Cut out 2 pieces of cardboard — one a little smaller that the ‘phone’ side, and one a little smaller than the ‘base’.
Push these into their corresponding places inside the phone holder in order to make the ‘phone’ and ‘base’ sides nice and flat.
Test the phone on the holder one last time before finishing in the next step.
Step 10: Invisible Stitch
Use a hand sewing needle & matching thread to sew the remaining triangle onto the sides and close the phone holder.
It’s best to pin the sides in place before you sew, and make sure you fold the edges inside the phone holder as you join them. You don’t want any raw edges on show.
The invisible stitch is the best choice so that the stitches will be barely visible.
Step 11: Finished!
And that’s it!
I hope you enjoy this project 
2 People Made This Project!
Recommendations
Introduction: DIY Phone Holder | How to Sew a Triangular Stand for Your Mobile
This project came about after watching videos on my phone whilst lying on my side and propping my phone up on a pillow…only to have the phone fall off the pillow over and over and over….
So this was my solution! It’s a triangular stand that holds the phone at the angle I want without having to prop it on something unreliable. I hope you enjoy this Instructable 
Supplies
— Phone to prop up; Mine is an iPhone 7 but you can make this stand for any phone, any model, by changing the dimensions as I detail below.
— Fabric; The main piece of fabric you need should be fairly sturdy and woven. Denim and canvas work well.
— A small piece of stretchy knit fabric; This fabric is for stretching over the ends of the phone to hold it in place. I used a grey knit jersey.
— Scrap of another light- or medium-weight woven fabric; I just used a small piece of calico.
— Elastic; I used 8mm elastic.
— Stuffing; I used polyester stuffing.
— Plastic pellets/beanbag beans/rice; For adding some weight to the back of the holder.
— Sewing machine & matching thread; It’s possible to hand it if you don’t have a machine though.
— Hand sewing needle
— Scissors
— Ruler
— Sewing pins
— Protractor
— Paper
— Disappearing/magic fabric pen
— Iron & ironing board
— Scraps of cardboard
— Funnel (optional)
— Rotary cutter & cutting mat (optional)
Step 1: Work Out the Dimensions
Obviously if you have an iPhone 7 you can use my dimensions from the photos above (YAY!), but otherwise you’ll have to do a bit of planning. Don’t worry though, I have laid out all of the steps below and in the photos.
You will need to work out how big the 3 sides of the holder are, how big the 2 triangular end pieces are, and how big the 2 pieces of fabric holding the phone at each end need to be.
_ _ _ _ _ _ _ _ _ _ _ _
1) First, measure your phone. I drew around my phone and measured the length and width from there. You will also need the thickness/depth of the phone and the width of the end strips (the strips either end of the phone where there isn’t an image displayed.)
If you don’t have these end strips you will need to imagine you do and that they are at least 15 mm otherwise there won’t be enough area of fabric to hold your phone at each end.
2) Decide on the angle you want your phone to be held at. If you want it held straight up then you would choose 90 degrees. I wanted a little bit of a tilt though so I chose 75 degrees. Using a protractor to help you visualise the angle is useful (note: you can print a protractor off the internet if you don’t own one).
3) You can now work out the size of the side where the phone will be held. This side needs to be the size of the phone plus 2 x the seam allowance. I used a seam allowance of 10 mm, but obviously you can use whatever seam allowance you want. In my case, this side of the holder needs to be 160 mm x 88 mm.
As a result, you now know the length of all of the sides of the holder…because they’re all the same. In my case, they are all 160 mm long.
4) Then you need to draw out the triangular end pieces to scale.
So draw a horizontal line on a piece of paper, then draw a line sloping up from this line that is at the angle you chose in step 2). So I drew a line at 75 degrees. This line needs to be the same length as the width measurement from step 3); in my case 88 mm.
Decide how wide you want the base to be. This should be at least as wide as the side where the phone will be held (88 mm). So I chose 90 mm for this width. Mark this distance from where your horizontal line meets your angled line.
Join this mark to the end of the angled line to create a triangle. The length of the line you just drew is the width of the back piece of the holder. In my case this was 108 mm.
The triangle shape you now have is is the exact size of your triangular end pieces.
5) You now know the sizes of all the side pieces, and the triangular ends. So now we just need the measurements for the stretchy bands that go over the phone ends. The length of these bands needs to be the width of the phone side, which in my case is 88 mm. The width of these bands needs to be (2 x the width of the end strips on the phone) + (2 x seam allowance), which in my case is (2 x 15) + 20 mm = 50 mm
Step 2: Cut Out the Fabric
I recommend first making paper templates of all of the pieces; the 3 sides, the triangular end piece, and the stretchy band.
Mark one side of the triangle template with ‘A’ and write which edges match up with which side (phone/back/base), and do the same on the back of this template but with ‘B’ written on instead. This is because we need 2 of these shapes, but mirror images of each other.
Then draw around each template (using a fabric pen) onto your main fabric. You will need to draw around the stretchy band template onto your stretchy knit fabric rather than the main fabric, and you’ll need 2 of these shapes.
The triangle template will need to be draw around once with the ‘A’ facing upwards, and once with the ‘B’ facing upwards.
Then cut these out, either using scissors or a rotary cutter & ruler on a cutting mat.
Step 3: Add the Stretchy Bands
Cut out 2 pieces of elastic. These need to be 2 cmshorter than the length of the knit fabric pieces (KF). In my case they were 68 mm long.
Place each one lengthwise on each of the KF pieces.
Place these at each end of the ‘phone side’ piece that you cut out of the main fabric. This main fabric piece (MF) should be right side up and the KF pieces should be wrong sides up.
Fold each piece of KF lengthwise over the elastic, making sure that the raw edges of this fabric are pointing towards the shorter ends of the MF.
Line up these raw edges with the matching edges of the MF underneath, and move the pieces of elastic so they are right up against the fold, and the ends of the elastic pieces are lined up with the same side edge of the MF (doesn’t matter which side you choose).
Pin these in place and sew down the side of the MF where the ends of the elastic lie. This is to attach the stretchy bands and the elastic pieces to one side of the MF.
Backstitch at the beginning and end, and backstitch over the elastic to reinforce the stitching at those points.
Use a seam allowance less that what you have chosen for the rest of the project. In my case, I sewed 5 mm from the edge as my chosen seam allowance is 10 mm.
Step 4: Sew the Other Side of the Stretchy Bands
This can be a bit fiddly because the elastic needs to be stretched to the other side of the MF, whilst still being contained in the KF pieces.
You must also make sure the KF edges all still line up with each other and the MF underneath.
Then pin the elastic and KF bands in place and sew along this side. Again, use a seam allowance less that what you have chosen for the rest of the project.
Don’t worry that the MF curls up a bit, it’s supposed to!
Remember to backstitch over the elastic again to reinforce those areas.
You should now have a line of stitching down each long side of the MF.
Step 5: Attach the Triangles
Mark each triangle ‘A‘ or ‘B‘, and write which edge connects to which side piece so that you don’t get mixed up.
Pin the ‘phone’ edge of each triangle to each end of the piece of fabric with the stretchy bands attached.
Make sure the edges line up and the fabrics are right sides together. Also make sure that you pin with the stretchy bands pulled flat inside the fabric ‘sandwich’.
Sew each triangle using your chosen seam allowance for the project, in my case 10 mm.
This stitching should go through the triangle, the ‘phone’ side piece and both edges of the stretchy bands.
Step 6: Add the Remaining Side Pieces
Next, you need to add the other 2 sides to each long edge of the ‘phone’ side.
Start by pinning the ‘base‘ side onto one edge, right sides together.
Then sew using your chosen seam allowance. Start and stop sewing the line a seam allowance distance from the ends of the fabric.
Remember to backstitch at the beginning and end as usual.
Then do the same thing to attach the ‘back‘ piece to the other side of the ‘phone’ side.
At this point, you should be able to try out your phone in the stretchy bands to see if it fits securely. If it doesn’t, now is the time to make alterations.
Step 7: More Sewing 
Then, pin the back and base sides together and sew along this seam. Again, use your chosen seam allowance, and start and end the sewing a seam allowance distance from the ends.
Then pin one of the triangle ends onto the side pieces to close that side of the phone holder.
Sew along these 2 edges using your chosen seam allowance.
Step 8: Add the Weighted Section
To slightly counterbalance the weight of your phone, it’s a good idea to add some weight to the opposite end of the phone holder, on the inside.
Take a piece of woven scrap fabric (in my case calico) and cut a piece a bit shorter (20 mm shorter in my case) than the ‘base‘ paper template.
Fold it in half and pin the edges. Sew along the long edge and one of the short edges.
Pour some kind of weight into this fabric pouch until it is mostly full but still has space at the top. I used a plastic pellet product that is designed to fill toys.
Then pin the open end and sew this shut. Make sure you don’t sew over any pellets!
The pouch needs to be partially empty because in the next step this pouch will need to fold up.
If you decide that you need to add more weight to balance your phone, you can use washers, rice, beanbag beans and other various items. You can also add a wider fabric pouch inside if you need to.
Next, pin & sew this pouch to the seam opposite the ‘phone’ side, so that it lies on the ‘base’ side.
Step 9: Stuffing & Stiffening
Turn the phone holder right-sides-out. Iron the edges to make them crisper & neater.
Push stuffing into the phone holder, but don’t overstuff it because that will mean it won’t be able to sit flat on a surface.
Cut out 2 pieces of cardboard — one a little smaller that the ‘phone’ side, and one a little smaller than the ‘base’.
Push these into their corresponding places inside the phone holder in order to make the ‘phone’ and ‘base’ sides nice and flat.
Test the phone on the holder one last time before finishing in the next step.
Step 10: Invisible Stitch
Use a hand sewing needle & matching thread to sew the remaining triangle onto the sides and close the phone holder.
It’s best to pin the sides in place before you sew, and make sure you fold the edges inside the phone holder as you join them. You don’t want any raw edges on show.
The invisible stitch is the best choice so that the stitches will be barely visible.
Step 11: Finished!
And that’s it!
I hope you enjoy this project 
2 People Made This Project!


