![]()
Download Article
![]()
Download Article
Want to add some extra pizazz to your phone? Phone charms and wrist straps are trendy gadgets that are super cute and practical. In this article, we’ll take you through the motions of attaching a phone charm to just about any case and even explain how to make a simple phone charm yourself. Read on to get started!
-

1
Take your phone out of its case. Working with an empty phone case will allow you to attach the charm correctly and ensure that your phone doesn’t get damaged in the process. So, pop your phone out and set it aside.
-

2
Locate the mute button hole on the phone case. This hole is usually above the volume buttons on the phone’s left edge.[1]
- If your phone case doesn’t have a mute button hole, no worries! See if there are any other holes in the case you’d be able to attach a charm to, such as the audio jack or charging port.
Advertisement
-

3
Slide the looped end of the phone charm through the mute button hole. Hold the phone case in one hand while grasping the charm in the other. Pull the looped string at the end of the charm through the mute button’s hole until the string is on the other side.[2]
- The beads or charm should not go through the hole.
-

4
Tie a knot using the phone charm’s loop. Use the hand holding the case to open the charm’s string loop. Gather the charm or beads with your other hand and weave them through the loop. This will create a simple knot, tying your phone charm or strap to the case.[3]
-

5
Pop the phone back into the case. And that’s it! Your phone should slide into the case with ease. Now, all that’s left to do is show off your beautiful charm.
Advertisement
-

1
Decide where you want the phone charm to be. Some people prefer the charm to dangle from the top of their phone, while others like the charm hanging from the bottom. Remove your phone from the case, and mark on the case where you’d like the charm to go with a fine-tip permanent marker.[4]
-

2
Pierce two holes in a soft or hard plastic case with a needle. Heat the sharp end of a sewing needle over an open flame. The flame can be from a candle or lighter. Hold the needle over the flame for a few seconds, and then quickly press it onto the mark you put on the case. Apply gentle pressure to create the first hole, and move onto the second.[5]
- The process of heating and pushing the needle through may take a few times, depending on the thickness of your case.
- Place the two holes about a centimeter apart. They’ll be close but not touching.
-

3
Use a 5/64 drill bit to drill a hole into a plastic case. Set a piece of cardboard on the inside backing of the phone case. Position the drill on the mark you previously made and drill at a 45-degree angle.[6]
- This method is riskier as the drill could scratch the case if you don’t have a steady hand, but is known to work on sturdier cases like those from OtterBox.
-

4
Slide the phone charm’s string through the hole(s) you’ve created. Thread the loop of the phone charm through the hole. If the loop doesn’t fit, no worries! Attach the loop to a string and needle and pull the needle through the hole.[7]
- If you made two holes, slide the charm’s loop through both holes.[8]
- If you made two holes, slide the charm’s loop through both holes.[8]
-

5
Secure the phone charm to the case with a simple knot. Thread the charms or beads through the loop, and voila! You attached a phone charm to a case without a hole.[9]
Advertisement
-

1
Locate the audio jack on your phone. The audio jack is where you plug in your headphones and can be found on the bottom or top edge of your phone, depending on the model.
- Newer phones don’t have audio jacks, so this method works best on older models or Android devices.
-

2
Insert a premade phone jack charm. There are hundreds of already made audio jack charms on the market. Simply pop the charm’s base into the audio jack.[10]
- Go for a charm that’s your favorite color, animal, or sport.
-

3
Pop in a phone jack charm holder. If you want to attach a dangling charm or bracelet to your phone, insert an audio jack plug with a lobster claw or ring. These will let you connect any charm seamlessly, and all you do is tie the charm to the end of the plug.
Advertisement
-

1
Determine how long you want your phone charm to be. Are you planning on making a phone charm strap to wear on your wrist? Do you want a long or short charm? Now’s your time to decide! Use a ruler to measure the desired length of your charm to find how long your pattern of beads needs to be.
- If you’re making a phone charm strap, use a cloth measuring tape to measure around your wrist.
- Think of this like starting a charm bracelet.
-

2
Line up your beads and charms. The great thing about making your own phone charm is customizing it! Layout a pattern of your desired length to visualize what the final product will look like.[11]
- For example, if you want your charm to be 5 inches (13 cm) long, layout a row of beads that’s 5 inches (13 cm).
- Try using all different types of beads for a funky, colorful look everyone will be dazzled by.
- Consider a simple color pattern that matches your phone case for a more sophisticated look.
-

3
Thread a stretchy string or elastic cord through the beads. Start with the bead at the top of your pattern, as this will be the top of your charm. Follow your pattern until all the beads are on the string.[12]
- Use a transparent string to emphasize the color of your beads or go for a colored cord for even more fun.
- Keep the string on the roll while you thread the beads. This way, you’re sure to have plenty of string to finish your design.[13]
-

4
Fold and tie the ends of the beaded string together for a phone charm strap. Cut the string from the roll, leaving about 4 to 6 inches (10 to 15 cm) of excess string, and secure the beads with a double knot. With the excess string, make another double knot to create a smaller loop about 1 inch (2.5 cm) long.[14]
- The first double knot creates the bracelet-like portion of the phone charm.
- The second double knot forms the loop to connect the phone charm to the phone.
- If making two double knots is tricky, use a keychain lariat by attaching the lobster claw end to the first double knot.[15]
-

5
Rethread the string through the beads for a single-stringed charm. Bring the end of the string through the bead you last threaded, repeating the rethreading process until you reach the top of the pattern. Cut the string from the roll once you’re done—you’ll be left with two ends of string sticking out of the top bead.[16]
- Leave roughly 2 inches (5.1 cm) of excess string.[17]
- Leave roughly 2 inches (5.1 cm) of excess string.[17]
-

6
Fasten a jump ring and lariat to the charm for a single-stringed phone charm. Secure the beads in place by tying a surgeon’s knot. Cut the excess string away from the knot and slip an open jump ring through it. Attach the lariat to the jump ring, and close the jump ring with a pliers.[18]
- To make a surgeon’s knot, make an overhand knot, passing the right cord over the left and under. Then, pass the left cord over the right and wrap it under twice.[19]
- To make a surgeon’s knot, make an overhand knot, passing the right cord over the left and under. Then, pass the left cord over the right and wrap it under twice.[19]
-

7
Attach the phone charm to your phone case. Congratulations! You’ve made your very own super cool and trendy phone charm. Now, don’t be afraid to show off your hard work.
Advertisement
Ask a Question
200 characters left
Include your email address to get a message when this question is answered.
Submit
Advertisement
Things You’ll Need
- Fine tip permanent marker
- Needle
- Candle or lighter
- Drill (optional)
-
Beads and/or charms
-
Stretchy string or elastic cord
- Scissors
-
Keychain lariat (optional)
-
Jump ring (optional)
-
Lariat (optional)
About This Article
Thanks to all authors for creating a page that has been read 57,081 times.
If you buy through links on our site, we may earn a commission.
Is this article up to date?
![]()
Download Article
![]()
Download Article
Want to add some extra pizazz to your phone? Phone charms and wrist straps are trendy gadgets that are super cute and practical. In this article, we’ll take you through the motions of attaching a phone charm to just about any case and even explain how to make a simple phone charm yourself. Read on to get started!
-
1
Take your phone out of its case. Working with an empty phone case will allow you to attach the charm correctly and ensure that your phone doesn’t get damaged in the process. So, pop your phone out and set it aside.
-
2
Locate the mute button hole on the phone case. This hole is usually above the volume buttons on the phone’s left edge.[1]
- If your phone case doesn’t have a mute button hole, no worries! See if there are any other holes in the case you’d be able to attach a charm to, such as the audio jack or charging port.
Advertisement
-
3
Slide the looped end of the phone charm through the mute button hole. Hold the phone case in one hand while grasping the charm in the other. Pull the looped string at the end of the charm through the mute button’s hole until the string is on the other side.[2]
- The beads or charm should not go through the hole.
-
4
Tie a knot using the phone charm’s loop. Use the hand holding the case to open the charm’s string loop. Gather the charm or beads with your other hand and weave them through the loop. This will create a simple knot, tying your phone charm or strap to the case.[3]
-
5
Pop the phone back into the case. And that’s it! Your phone should slide into the case with ease. Now, all that’s left to do is show off your beautiful charm.
Advertisement
-
1
Decide where you want the phone charm to be. Some people prefer the charm to dangle from the top of their phone, while others like the charm hanging from the bottom. Remove your phone from the case, and mark on the case where you’d like the charm to go with a fine-tip permanent marker.[4]
-
2
Pierce two holes in a soft or hard plastic case with a needle. Heat the sharp end of a sewing needle over an open flame. The flame can be from a candle or lighter. Hold the needle over the flame for a few seconds, and then quickly press it onto the mark you put on the case. Apply gentle pressure to create the first hole, and move onto the second.[5]
- The process of heating and pushing the needle through may take a few times, depending on the thickness of your case.
- Place the two holes about a centimeter apart. They’ll be close but not touching.
-
3
Use a 5/64 drill bit to drill a hole into a plastic case. Set a piece of cardboard on the inside backing of the phone case. Position the drill on the mark you previously made and drill at a 45-degree angle.[6]
- This method is riskier as the drill could scratch the case if you don’t have a steady hand, but is known to work on sturdier cases like those from OtterBox.
-
4
Slide the phone charm’s string through the hole(s) you’ve created. Thread the loop of the phone charm through the hole. If the loop doesn’t fit, no worries! Attach the loop to a string and needle and pull the needle through the hole.[7]
- If you made two holes, slide the charm’s loop through both holes.[8]
- If you made two holes, slide the charm’s loop through both holes.[8]
-
5
Secure the phone charm to the case with a simple knot. Thread the charms or beads through the loop, and voila! You attached a phone charm to a case without a hole.[9]
Advertisement
-
1
Locate the audio jack on your phone. The audio jack is where you plug in your headphones and can be found on the bottom or top edge of your phone, depending on the model.
- Newer phones don’t have audio jacks, so this method works best on older models or Android devices.
-
2
Insert a premade phone jack charm. There are hundreds of already made audio jack charms on the market. Simply pop the charm’s base into the audio jack.[10]
- Go for a charm that’s your favorite color, animal, or sport.
-
3
Pop in a phone jack charm holder. If you want to attach a dangling charm or bracelet to your phone, insert an audio jack plug with a lobster claw or ring. These will let you connect any charm seamlessly, and all you do is tie the charm to the end of the plug.
Advertisement
-
1
Determine how long you want your phone charm to be. Are you planning on making a phone charm strap to wear on your wrist? Do you want a long or short charm? Now’s your time to decide! Use a ruler to measure the desired length of your charm to find how long your pattern of beads needs to be.
- If you’re making a phone charm strap, use a cloth measuring tape to measure around your wrist.
- Think of this like starting a charm bracelet.
-
2
Line up your beads and charms. The great thing about making your own phone charm is customizing it! Layout a pattern of your desired length to visualize what the final product will look like.[11]
- For example, if you want your charm to be 5 inches (13 cm) long, layout a row of beads that’s 5 inches (13 cm).
- Try using all different types of beads for a funky, colorful look everyone will be dazzled by.
- Consider a simple color pattern that matches your phone case for a more sophisticated look.
-
3
Thread a stretchy string or elastic cord through the beads. Start with the bead at the top of your pattern, as this will be the top of your charm. Follow your pattern until all the beads are on the string.[12]
- Use a transparent string to emphasize the color of your beads or go for a colored cord for even more fun.
- Keep the string on the roll while you thread the beads. This way, you’re sure to have plenty of string to finish your design.[13]
-
4
Fold and tie the ends of the beaded string together for a phone charm strap. Cut the string from the roll, leaving about 4 to 6 inches (10 to 15 cm) of excess string, and secure the beads with a double knot. With the excess string, make another double knot to create a smaller loop about 1 inch (2.5 cm) long.[14]
- The first double knot creates the bracelet-like portion of the phone charm.
- The second double knot forms the loop to connect the phone charm to the phone.
- If making two double knots is tricky, use a keychain lariat by attaching the lobster claw end to the first double knot.[15]
-
5
Rethread the string through the beads for a single-stringed charm. Bring the end of the string through the bead you last threaded, repeating the rethreading process until you reach the top of the pattern. Cut the string from the roll once you’re done—you’ll be left with two ends of string sticking out of the top bead.[16]
- Leave roughly 2 inches (5.1 cm) of excess string.[17]
- Leave roughly 2 inches (5.1 cm) of excess string.[17]
-
6
Fasten a jump ring and lariat to the charm for a single-stringed phone charm. Secure the beads in place by tying a surgeon’s knot. Cut the excess string away from the knot and slip an open jump ring through it. Attach the lariat to the jump ring, and close the jump ring with a pliers.[18]
- To make a surgeon’s knot, make an overhand knot, passing the right cord over the left and under. Then, pass the left cord over the right and wrap it under twice.[19]
- To make a surgeon’s knot, make an overhand knot, passing the right cord over the left and under. Then, pass the left cord over the right and wrap it under twice.[19]
-
7
Attach the phone charm to your phone case. Congratulations! You’ve made your very own super cool and trendy phone charm. Now, don’t be afraid to show off your hard work.
Advertisement
Ask a Question
200 characters left
Include your email address to get a message when this question is answered.
Submit
Advertisement
Things You’ll Need
- Fine tip permanent marker
- Needle
- Candle or lighter
- Drill (optional)
-
Beads and/or charms
-
Stretchy string or elastic cord
- Scissors
-
Keychain lariat (optional)
-
Jump ring (optional)
-
Lariat (optional)
About This Article
Thanks to all authors for creating a page that has been read 57,081 times.
If you buy through links on our site, we may earn a commission.
Is this article up to date?
Расскажите, как часто вы роняете свои смартфоны? Лично я человек рассеянный, могу не подумать, забыть, не удержать, неудачно положить. Плюс телефон у меня в руке почти всегда, хотя иногда (например, если я перехожу дорогу с двумя сумками в руках) лучше было бы убрать его подальше в карман. В общем, мои трубки падают время от времени. По крайней мере – падали.
Есть похожие люди. А есть те, кто удивлённо восклицают «Как вы вообще это делаете?! Никогда не ронял телефон!». Увы, практика показывает, что процентов 20 из них рано или поздно таки роняют и даже разбивают. Больше не удивляются. Случайности случаются.
Лично я с покупкой Galaxy S8 (мои впечатления тут ) твёрдо решила его не ронять. Ну знаете, как-то обидно отдать 800 баксов и расколотить устройство. Тем более что ввиду сильно скошенных краёв экрана у него нельзя использовать полностью защищающий стекло чехол. Защитные стекла тоже не использую – сколько отзывов читала, из-за них снижается чувствительность экрана. Да и был у меня опыт с 3D-стеклами для айфона – смотрятся не очень, под края забивается грязь.
В общем, встал вопрос – как не ронять телефон? Первой идеей был шнурок. Обычный шнурок на шею. Помните, в начале 2000-х было модно носить на них трубки? А ещё их прямо с шеи воровали.
В общем, пошла в первый попавшийся салон с аксессуарами и спросила про шнурок. Продавец удивился, залез куда-то под стол и достал мешок шнурков (видимо, их выдают на каких-то презентациях). В итоге бесплатно отдал мне шнурок с логотипом Alcatel.
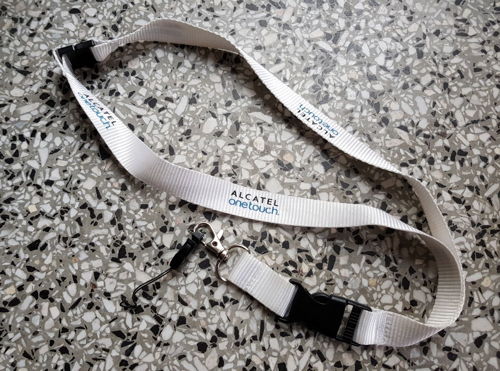
«Куда ты его цепляешь?» – спрашивали меня несколько раз. К чехлу – на них всех есть специальные отверстия. А без чехла я телефон не использую вообще. Таким образом, на телефоне болтался компактный коннектор, к которому я прицепляла шнурок, если использовала устройство на улице на ходу. Если не использовала – отцепляла, конечно. Такой вариант не лучший для холодного времени года – неудобно надевать шнурок через шапку, носить поверх куртки и шарфа.
Какие есть ещё варианты? Сейчас довольно много чехлов со встроенными «держалками». Например, в виде разнообразных колец, в которые требуется поместить палец. Либо чехлы со специальным «ремешком» для ладони или пальца. Либо эти самые кольца и ремешки отдельно для приклеивания к вашим чехлам (или прямо к телефонам).
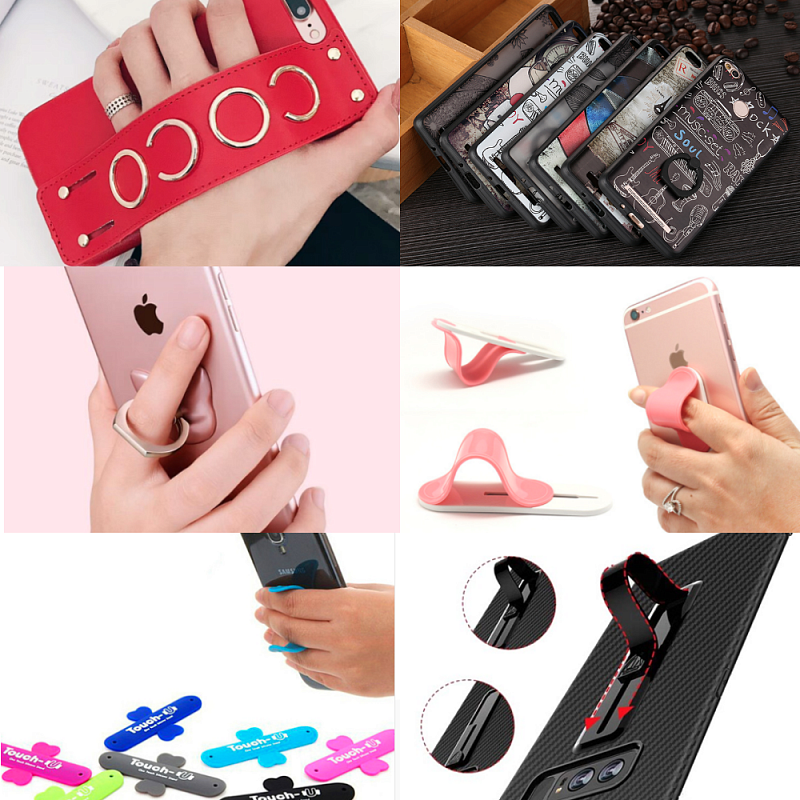
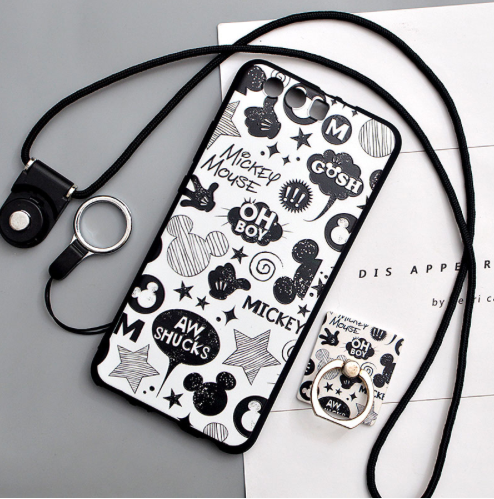
Попадался и такой интересный вариант – кольцо крепится к чехлу и в него можно вставить шнурок на шею.
В общем, выбор хорош, но лично мне такие варианты не кажутся удобными. Твердые, зафиксированы на одном месте (а большой телефон часто бывает нужно перехватывать в руке).
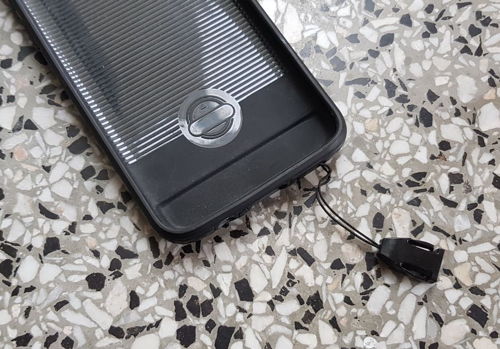
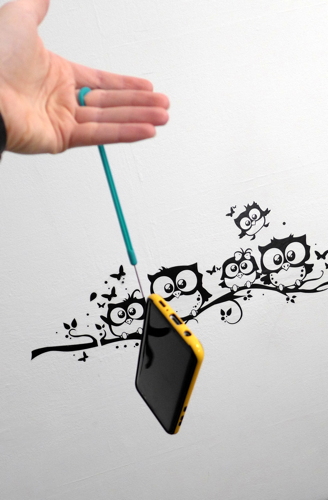
Я совершенно случайно нашла для себя иной вариант – компактный силиконовый шнурок Baseus Q. Он крепится к чехлу, не мешается, надевается на палец и крепко на нем сидит. При этом легко тянется, не давит и вообще комфортен. У пальца при этом полная свобода движений.
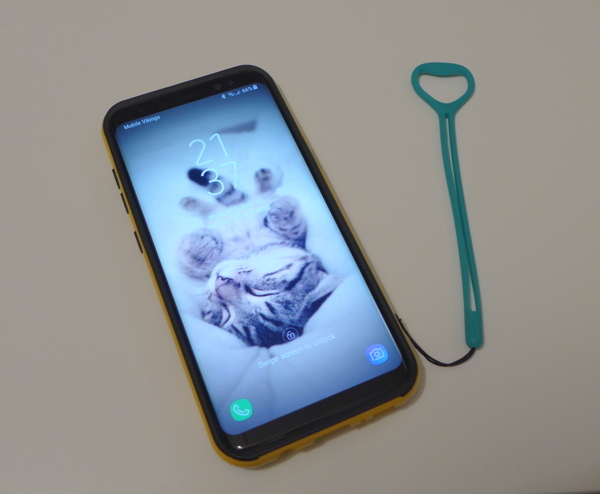

Так что я теперь всегда ношу этот шнурок на пальце, даже если использую телефон дома и недолго. Надеть-снять его стало уже автоматическим действием.
Покупала все на том же Алиэкспресс (не реклама), но почему-то сейчас этого шнурка в официальном магазине Baseus нет (и в других тоже, и аналогов от других производителей тоже). Но еще можно найти на eBay – на днях заказала там несколько штук про запас.
Вот, собственно, и весь опыт. Телефон пока ни разу не роняла – даже шнурку не пришлось его страховать. Думаю, дело еще в том, что стараюсь быть ответственнее и внимательнее. Но все равно приятно, что на случай чего есть «бэкап».
А вы как-то заботитесь защитой телефона от падений? Хотя бы прочные чехлы?
Держатель смартфона на шею Hands Free .
Благодаря такому держателю ваши руки теперь будут свободны. Вы можете делать обзоры товаров, снимать на видео как вы катаетесь с горки, летите на параплане, гоняете на гидроскутере, велосипеде или просто прогуливаетесь. Закрепите смартфон в держателе, отрегулируйте угол съемки, включите запись видео и повесьте на шею.
Держатель на шею выполнен из прочной пластмассы, без люфтов и скрипов. Крабик, который удерживает смартфон — имеет резиновые рифленые накладки, благодаря чему телефон не выскользнет даже при тряске и не поцарапается. Гайка-барашек прочно затягивает и фиксирует краб в нужном вам положении. Краб поворачивается на оси – поэтому смартфон можно установить на любой угол, чтобы его камера смотрела либо вниз, либо вверх или прямо.

Южнокорейская корпорация Samsung является одним из самых крупных производителей смартфонов во всем мире. Она создает невероятно крутые мобильные устройства, оснащенные по последнему слову техники. За счет огромного капитала она может легко создавать, а затем выпускать на рынок какие-то экспериментальные смартфоны, одним из которых станет Samsung CouPhone. Судя по всему, это первый в мире телефон, который можно мешать на шею и пользоваться им таким образом.
На днях компания Samsung подала документы на регистрацию торгового знака CouPhone на территории Европы. Как можно легко заметить, такое название было образовано путем сложения двух слов. Первое, «Сou», с французского переводится как «шея», а второе слово – это привычный всем «телефон». Таким образом, получается, что южнокорейская корпорация создала первый в мире смартфон, который можно вешать на шею и использовать его таким образом.

На это также указывает от факт, что торговая марка, которую просит зарегистрировать Samsung, относится к портативной электронике – телефонам, планшетам, аксессуарам и прочим устройствам. Это значит, что CouPhone – это действительно смартфон, который уже совсем скоро могут представить публике. Велика вероятность, что анонс новинки состоится в рамках выставки CES 2018, где этот производитель должен представить несколько своих новых разработок.
Смартфон Samsung CouPhone, который можно вешать на шею, может стать крайне популярным и востребованным на рынке. Например, если южнокорейская корпорация оснастит его защитой от воды и пыли по стандарту IP68, а также добавит в эту связку противоударный корпус, который устойчив к перепадам температур, то новинка может оказаться невероятной популярной среди путешественников, любителей экстремальных видов спорта, серфингистов, а также сотрудников различных компаний и организаций.
До 22 декабря включительно у всех желающих есть возможность совершенно бесплатно получить спортивный браслет Xiaomi Mi Band 4, потратив на это всего 1 минуту своего личного времени.
Присоединяйтесь к нам в Twitter, Facebook, ВКонтакте, YouTube, Google+ и RSS чтобы быть в курсе последних новостей из мира технологий будущего.