Активные пользователи обожают не только просматривать страницы в интернете, но и играть в различные онлайн-игры, где они общаются между собой с помощью микрофона. Это необходимо для того, чтобы всегда быть на связи с товарищами по команде или с игроками на сервере. Теперь необходимые функции можно использовать не только с ПК. Если вам необходимо общаться в играх с мобильных устройств, нужно лишь скачать Тим Спик на телефон. TS позволит общаться с другими юзерами по сети, одновременно играя в любимую игру.
Оглавление:
- Функция VoIP для общения в Тим Спик 3
- Особенности TeamSpeak 3
- Основные возможности
- Системные требования
- Преимущества
- Скачать TeamSpeak 3 на телефон
Функция VoIP для общения в Тим Спик 3
TeamSpeak использует возможности VoIP для общения с помощью звукозаписывающих устройств. Основная особенность, которая отличает программу от звонков по обычному телефону, это то, что одновременно может общаться множество зарегистрированных клиентов. На этот раз обновленная и переделанная версия Тим Спик 3 создана и для Андроид-платформ. Чаще всего ТС используется игроками для координации командных действий, однако ее можно использовать и в других случаях, когда нужно согласовывать различные задачи.
С момента выпуска приложения в Гугл Плей Маркете зарегистрировано более 150 000 скачиваний, и средняя оценка пользователей превышает отметку 4,3.
Основные возможности
К тому же, в любое время можно узнать необходимые сведения об используемом канале. Общаться вы будете через мобильный девайс, находясь одновременно в игровом или ином приложении. Можно включить постоянный прием голоса, тогда не нужно будет постоянно нажимать на клавишу для передачи голоса с микрофона другим пользователям. Для этого достаточно скачать Тим Спик на телефон, бесплатно загрузить его можно по ссылке.
Системные требования
Данное приложение работает не на всех устройствах, необходимо провести соответствие с минимальными требованиями:
- Минимальная версия ОС Android – 2.3.3 или выше;
- Требуемая память: 17 Мб;
- Ограничений по возрасту не предусмотрено;
- Файл относится к категории «Связь»;
- Разработчик: TeamSpeak Systems GmbH;
- Последнее обновление: 17.12.2017
Преимущества
- Общение с другими пользователями без выключения необходимых приложений;
- Быстрое подключение и хорошая связь;
- Свободная лицензия.
Заключение
Недостатков у программы мало, поэтому стоит установить программу Тим Спик 3 на мобильное устройство и общаться с друзьями во время игры.
Скачать TeamSpeak 3 на телефон
Скачать приложение для телефона бесплатно
3.6 5 голоса
Рейтинг статьи
Общаться с друзьями через TeamSpeak можно не только находясь за компьютером. Предлагаем скачать TeamSpeak 3 для Android на русском языке, версию «Client» для мобильных устройств (телефонов и планшетов) под управлением этой операционной системы.

Разговаривайте через TeamSpeak с «Андроида» с участниками, использующими клиент на других операционных системах (Windows, Linux, iOS – не важно), в программе нет разграничений по платформам. Можно ехать в транспорте, к примеру, общаться через TS 3 на телефоне со своей игровой командой, быть в курсе всех игровых событий, тактических решений, потерь и побед на поле боя, затем приехать домой, запустить игру и TeamSpeak уже на компьютере и присоединиться к своим товарищам в виртуальном мире, не прерывая связи с ними.
Тоже самое относится и к деловым переговорам с помощью программы. Оставайтесь на связи с коллегами, даже если отошли от своего рабочего места, на обед или по другим делам. В чатах TeamSpeak 3 можно читать и участвовать в служебной переписке, она будет дублироваться и на телефон, и на ПК версию клиента, просматривать статус собеседников и принимать звонки.
Возможности TeamSpeak 3 для Android
- поддерживается подключение к любым серверам и каналам, просмотр информации о них, и о других подключенным к ним пользователям;
- активировать микрофон, если вы уже подключены к серверу и находитесь на одном из его каналов, можно голосом или кнопкой (функция «нажми-и-говори» — PTT);
- поддерживаются основные функции администрирования каналов, также как и на ПК версии;
- можно одновременно подключаться к нескольким серверам и держать эти подключения открытыми в отдельных вкладках;
- сохранение важных серверов в закладки;
- получение уведомлений о смене статуса участников («отошел», «подключился» и тому подобное), даже когда программа свернута.
Плюсы
- В чем преимущество Тим Спик 3 для Андроид перед тем же Скайпом или другой «программой-звонилкой»? В том, что вы можете превратить свой телефон в рацию и говорить (и, соответственно, расходовать дорогостоящий мобильный трафик) только тогда, когда нажмете на специальную кнопку или произнесете первое слово (зависит от настроек);
- Разговоры через TS 3 полностью бесплатны, они не тарифицируются и не привязываются к номеру вашего телефона;
- В приложении нет рекламы.
Минусы
- Иногда, после оплаты и установки TeamSpeak, при попытке его запустить, появляется ошибка «Не удалось проверить статус платежа. Ошибка 256» (текст может немного отличаться). Если запустить приложение через некоторое время, ошибка сама по себе пропадает. Также помогает изменение времени и даты в настройках Android – включение опции синхронизации их из сети.
Скачайте TeamSpeak 3 для Android по ссылке ниже. Чтобы сделать язык интерфейса русским, используйте русификатор (инструкция как русифицировать находится в архиве с русификатором).
- Обзoр
- Обновления (5)
- История версий
- Обсуждение
Страница 1 из 3
- TeamSpeak 3 клиент для Android
TeamSpeak — самый известный клиент для голосового общения среди геймеров. Теперь появился и официальный клиент для Android. Думаю, многие пользовались TeamSpeak, когда играли в Counter-Strike или любые другие онлайновые игры, чтобы координировать свои действия с действиями своих товарищей по команде. Теперь появилась возможность пользоваться для этого и клиентом для Android.
Возможности:
- Закладки
- Возможность подключения к нескольким серверам
- Push-To-Talk (PTT) и голосовая активация
- Управление идентификацией
- Информация о канале и пользователе
- Уведомление о статусе пользователя
P.S.Также поддерживаются основные административные функции канала, возможность просмотра детальной информации о канале и игроке и т.д.
Системные требования:
- ARMv7 устройство (Android OS не ниже 2.3.3)
- Частота процессора не менее 800 МГц
- Google Play должен быть установлен
- Микрофон
- Рекомендуется Wi-Fi/3G подключение
-
 Нравится x 1
-
Нет, но русификатор есть в соответствующем разделе.
-
прошу простить за нубство, а хде этот раздел:)?
спасибо огромное за предоставленное приложение — супер!
- Нравится x 1
-
-
Возник вопрос. ТС для андроида платный или нет?
-
Это единоразовая покупка или мне надо платить абонентскую плату? Просто я скачал с другого локального ресурса и установил ТС для андроида совершенно бесплатно.
-
Пират! Ты будешь сидеть в тюрьме! :redcarded:
-
А ссылочку дайте,на бесплатную ))))
-
рабочий клиент
 СПАСИБО!!!!!
 -
всем привет! как включать запись? не могу разобраться ( спасибо!
-
За неё ведь платить не нужно?
-

Sasha174
Пользователь
- Регистрация:
- 20 мар 2014
- Сообщения:
- 1
- Симпатии:
- 0
- Баллы:
- 21
Ребят не подключается к сервам(
-
спасибо за предоставленную программу:):):)
- Нравится x 1
-
-
Карим
Пользователь
- Регистрация:
- 19 апр 2014
- Сообщения:
- 1
- Симпатии:
- 0
- Баллы:
- 12
помогите пож как исправить? «we could not find any suitable audio device» выдаёт это когда захожу
в первый раз норм зашло а после вообще не заходит -
Беда:( Скачал, мне пишет: «ни одно приложение не может открыть данный файл»
Андроид версия 2.3.6
Частота 800мгц
Есть гугл плэй и микрофон с 3G
Пожалуйста, объясните в чем проблема -
Это архив, прежде чем установить приложение — его надо распаковать)
Страница 1 из 3
- Описание
- Скриншоты
TeamSpeak 3 – это популярная программа для бесплатного общения, наиболее востребованная среди геймеров. Создав TeamSpeak 3 для Android разработчики позволили пользователям со всего мира общаться друг с другом не только находясь у компьютера, но и вдали от него. Причем вы можете использовать клиент даже для управления голосовым сервером.
Среди возможностей Тим Спик 3 для Андроид – просмотр полной информации о подключенных пользователей, уведомление о смене статусов, поддержка подключений к нескольким серверам одновременно и открытие их в закладках. Микрофон в приложении можно активировать голосом или нажатием на кнопку на экране (приложение в этом случае должно быть открыто и развернуто на экране).
Примечательно, что многие пользователи TeamSpeak 3 для телефона используют также его версию для компьютера, когда находятся дома. Мобильная версия Тим Спик позволяет оставаться на связи с друзьями во время поездок и путешествий.
Преимущества
- поддерживает все функции администрирования сервера и каналов;
- стоит намного дешевле версии для iOS;
- во время входящего звонка статус в приложении автоматически меняется на «отошел».
Недостатки
- нет настроек микрофона и динамиков.
Если вы хотите скачать TeamSpeak 3 на Android на русском языке, скачайте сначала официальную версию с Google Play по ссылке ниже, затем скачайте русификатор. Инструкция по русификации ниже.
- Последняя версия: 3
- Совместимость: Android 2.3.3 и выше
- Язык: Русский/RUS
- Сообщить о нерабочей ссылке!
*ссылки на скачивание взяты с официального сайта программы
Как русифицировать:
- Скачайте русификатор (он находится в архиве «zip»), откройте его и извлеките файл Russian.xml в папку с установленным приложением, в подпапку «TS3/content/lang»;
- Перезапустите приложение, откройте настройки, в пункте меню «Language» выберите появившийся язык «Russian»;
- Еще раз перезапустите приложение – язык должен поменяться на русский.
Многие пользователи привыкли общаться через скайп. Но популярными становятся и другие приложения для общения, например, Teamspeak. Это удобный способ передачи голосом. Применение такой программы актуально для многих геймеров, которые используют ее во время игрового процесса. Тимспик представляет собой программу с отличным функционалом для конференций, возможностями для настройки и небольшое потребление компьютерных ресурсов.
В нашем обзоре рассказано, как пользоваться удобным приложением, о его функционале и особенностях настройки.

Содержание
- 1 Регистрация в Тим Спик
- 2 Основные настройки и работа с Teamspeak
- 2.1 Настройка прав
- 2.2 Создать комнату
- 2.3 Создать сервер
- 2.4 Как активировать микрофон
- 2.5 Трансляция музыки
- 2.6 Добавление друзей
- 2.7 Запись разговора
- 2.8 Блокировка пользователей
- 2.9 Отключение оповещений
- 2.10 Настройка кнопки разговора
- 2.11 Настройка темы
- 2.12 Как отключить голосовые уведомления женским голосом
- 3 Возможные проблемы при работе с Teamspeak
- 3.1 Ошибка при установке
- 3.2 Ошибка подключения
- 3.3 Задержка
- 3.4 Не работает микрофон
- 4 Аналоги Teamspeak
- 4.1 Телеграм
- 4.2 Tunngle
- 4.3 Skype
Регистрация в Тим Спик
Скачать программу можно на официальном сайте по ссылке — www.teamspeak.com/en/downloads.
При первом запуске Teamspeak возникает предложение пройти регистрацию и создать аккаунт. Если первый вход выполнен в качестве гостя, то прохождение регистрации будет возможно через меню настроек клиента, которые следует открыть.

Для прохождения процедуры регистрации следует посетить вкладку Мой Teamspeak, а затем нажать кнопку «создать аккаунт».

Затем заполните существующий электронный адрес и запишите пароль. Особой внимание стоит уделить надежности кода. Можно применять как маленькие, так и большие буквы, а также символы и цифры. Это позволит защитить аккаунт от взлома.

Затем в последнем окошке блока необходимо ввести имя пользователя. Логин должен быть неповторимым, а также составляться из латинских букв. Иногда для уникализации имени можно добавить цифры. После этих манипуляций следует нажать кнопку «создать».

При правильном заполнении всех вкладок на почтовый ящик прибудет письмо с подтверждением. Для завершения процесса нужно пройти по указанной ссылке. После того как подтверждение осуществиться, следует нажать на вход.

Установить приложение стоит ради следующих плюсов:
- Аккаунт имеет специальный идентификатор, позволяющий узнавать пользователя.
- Привилегии восстанавливаются при следующих подключениях.
- При входе в приложение с другого устройства происходит синхронизация идентификаторов.
Теперь выясним, как подключиться и настроить данную программу. Основная цель приложения — общение сразу нескольких пользователей.
Чтобы пользоваться тим спик сначала следует скачать приложение из интернета. После установки необходимо сделать некоторые настройки. Подобные мероприятия позволят улучшить качество общения и воспроизведения.
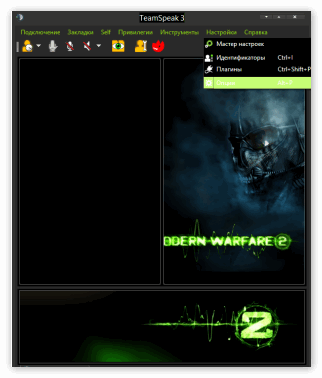
Следует зайти во вкладку инструменты, а затем в параметры. Здесь можно произвести настройки под себя.

Нужно нажать на клавишу «settings».

Затем следует перейти в раздел «Sound Input/Output Settings» или горячие клавиши.

После этого выбирается клавиша «Push to talk».

Для настройки кнопки для разговора необходимо выбрать в настройках «set». Нужная клавиша выбирается на раскладке. После подключения к каналам можно общаться с другими пользователями. Для этого перед началом разговора необходимо нажать кнопку.
Настройка прав
Для подключения расширенного функционала нужно зайти в Инструменты и основные настройки. Затем следует проставить галочку на вкладке «расширенная система привилегий».

Существует несколько уровней привилегий. Это права для группы сервера, специальные привилегии канала и клиента, группы каналов. Существуют и специальные разрешения для каждого пользователя.

Изначально рекомендуется создать новую группу без привилегий. Это позволит избежать лишней работы по исключению неиспользуемых разрешений. Разрешения проще потом добавить, чем исправлять.
При работе с раннее созданной группой необходимо почистить ее от ненужных разрешений и отключить допуски.
Создать комнату
При подключении к серверу можно посмотреть перечни созданных каналов. К некоторым можно присоединится, так как они находятся в свободном доступе. Есть каналы, созданные специально для конкретных конференций.
Можно создать канал или комнату на сервере, а затем позвать туда друзей для общения. Для проведения данной процедуры необходимо щелкнуть правой кнопкой мыши в блоке с перечнем комнат и нажать «создать канал».

Затем нужно произвести настройку и подтвердить создание. После этого можно приступать к общению. Создатель комнаты может организовывать конференции между группой пользователей для различных целей. Стоит учитывать, что при закрытии окна приложения, оно автоматически отключится. Поэтому при необходимости лучше его свернуть.
Создать сервер
Давайте разберемся, как происходит создание сервера в тим спик 3 на примере Windows 10. Сначала нужно скачать приложение. А затем необходимо получить информацию для подключения к нему.
Данные следует записать. Особенно важно — Server Admin Token. Затем необходимо зайти на сервер. Запустить Teamspeak3 client нужно через меню подключение.
После этого нужно ввести ip адрес компьютера и обозначить логин.
Для получения прав администратора нужно ввести ключ токен, который был получен во время первого запуска сервера.
Предложение ввести ключ поступит уже при первом включении приложения.
Ввести ключи можно и с помощью меню. Для этого требуется зайти в пункт «привилегии», а затем нажать использовать ключ.

Для настройки прав можно зайти во вкладку «параметры виртуального сервера».

Здесь можно сменить ник, поставить пароль, а также настроить защиту от антиспама.
Затем можно пригласить знакомых и друзей для общения на сервере. Для этого нужно сообщить пользователям ip–адрес.
Также можно подключиться к любому другому серверу. Для этого необходимо знать пароль и адрес. Информацию можно получить у администратора конкретного сервера. Затем нужно нажать вкладку подключения и подключиться.
Если нет своего сервера, можно найти общедоступный сервер и создать там комнату.
Как активировать микрофон
Если другие пользователи не слышат вашего голоса, значит неправильно настроен микрофон. И даже в ситуации, когда звук транслируется, необходимо провести проверку настроек по такому перечню:
- Определить устройство для записи.
- Подобрать режим активации микрофона.
- Проверить работу по передаче звука на сервер.
- Выполнить регулировку чувствительности.
Прежде всего, нужно подсоединить микрофон к компьютеру. Если требуются драйвера, их следует установить. Затем нужно зайти в верхнее меню в инструменты и в параметры, а затем открыть вкладку запись.

Режим записи не рекомендуется менять, а устройство нужно изменить на свое. Можно выбрать вариант «по умолчанию». Следует проверить, как звук передается через программу. Для этого следует нажать вкладку «начать тестирование». При правильной работе микрофона, в процессе разговора на шкале возникнет зеленая полоса. В это время в наушниках или колонке можно услышать собственный голос. Перемещая ползунок по шкале, можно произвести регулировку чувствительности микрофона. Следует подобрать значение, при котором голос станет приятным для восприятия. В завершение нужно остановить процесс тестирования и сохранить выполненные настройки.

Также можно улучшить качество записи голоса. Стоит использовать опцию для подавления фоновых шумов и эха.
Трансляция музыки
В приложении Teamspeak не предусмотрено радио и плеера. Поэтому для трансляции музыки придется воспользоваться программами со сторонних ресурсов. При этом звучание будет происходить на одном канале.
Сначала потребуется установка программы виртуального кабеля. Затем происходит подсоединение к серверу и вхождение на канал. Это позволит передавать сигнал без фонового шума.
Итак, программу Virtual Audio Cable можно скачать с официального сайта (https://virtual-audio-cable.ru.uptodown.com/windows/download), а затем запустить инсталлятор.

После этого произойдет установка устройства. После этого следует запустить VAC Control Panel и проверить наличие виртуального кабеля.
Затем нужно выбрать подходящий аудиоплеер для трансляции. Это может быть AIMP. В данном приложении можно слушать треки с компьютера или интернета. Скачать программму можно на сайте https://www.aimp.ru/.
Обязательно нужно изменить устройство на WASAPI: Line 1.

Затем следует сохранить все выполненные изменения и запустить проигрывание аудиофайла. Звук не появится, так как он отправлен на кабель.
Кабель необходимо соединить с сервером. Для этого нужно зайти во вкладку инструменты и идентификаторы. Нужно создать новый идентификатор и дать ему имя.

Затем следует открыть настройки и во вкладке «воспроизведение» добавить профиль. Громкость нужно убрать до минимальных значений.

Аналогичный профиль нужно создать в записи, а затем поменять устройство на виртуальный кабель. После этого бот следует подключить к серверу. Нужно выбрать созданный идентификатор.

После всех манипуляций следует зайти на сервер, на канал и запустить аудиоплеер. Для регулировки громкости нужно подключиться к серверу в другой вкладке.
Добавление друзей
Чтобы добавить друзей сначала нужно подключиться к серверу. Во вкладке «инструменты» нужно выбрать кнопку «пригласить друга». В появившемся блоке нужно скопировать ссылку и переслать ее другому пользователю.
Сохранить друзей можно в списке личных контактов. Необходимо кликнуть по имени и выбрать вкладку «добавить как друга».
Друзья отображаются зеленым цветом, а заблокированные пользователи красным.
Запись разговора
Программа teamspeak 3 позволяет передавать только слова человека без посторонних шумов. Для этого применяется автоматическая активация микрофона.
Нужно зайти во вкладку «запись». Здесь устройство записи должно отображать ваш микрофон, а также должна стоять отметка «по умолчанию».
Затем необходимо выбрать опцию для активации голоса, а затем начать тестирование. Полученные настройки следует сохранить.

После этого нужно зайти на канал и проверить голос. В процессе разговора кружок у логина будет голубого цвета.


Можно поменять способ активации на ручной. Для этого применяется кнопка.
Блокировка пользователей
Разберемся, как можно забанить. Нужно зайти в группы сервера и выделить группу, которая требует редактирования. Затем следует нажать пользователь, админ. А после этого на I client ban max. Здесь нужно поставить галочку negate или установить значение 75.
Отключение оповещений
Некоторые голосовые уведомления сильно надоедают. Чтобы их выключить следует пройти в настройки, а затем в опции и уведомления. После этого необходимо нажать Sounds deactivated и применить.

Настройка кнопки разговора
Микрофон можно настроить и на ручную передачу звука. Это позволит передавать звук только при нажатии определенной кнопки. Во вкладке запись нужно выбрать опцию «кнопка разговора». Затем нужно обозначить горячую клавишу любой буквой или цифрой на клавиатуре. Этот способ для передачи звука называют «нажми и говори».
Настройка темы
В приложении teamspeak 3 можно использовать темы из онлайн каталога. Понравившийся файл нужно выбрать, а затем нажать на кнопку для загрузки файла. При запуске файла возникает окно инсталлятора. Необходимо нажать на клавишу Instal, а затем обновить teamspeak 3. После этого будет установлена новая тема. Для возвращения старого варианта нужно открыть раздел внешнего вида.
Темы, которые присутствуют на официальном сайте ТимСток доступны для оперативной установки. В параметрах следует открыть раздел Аддоны. В Browse online можно найти все доступные дополнения. Здесь выбирается подходящая тема. Все описания выполнены на английском, но дополнительно прилагаются скриншоты. Для установки следует кликнуть на Install.
Процесс происходит в фоновом режиме в программе. При этом не придется запускать инсталлятор.
Как отключить голосовые уведомления женским голосом
Отключить нежелательные уведомления можно настройках клиента. Для этого не требуется установка дополнительных плагинов. Нужно зайти во вкладку уведомления. Затем следует поменять пакет звуков на Sounds Deactivated и нажать на галочку справа. Это позволит установить закладки по умолчанию. Здесь же можно выбрать звуковой пакет на русском языке.
Возможные проблемы при работе с Teamspeak
Программа Тим Спик позволяет одновременно общаться большому количеству пользователей, но общению могут помешать некоторые проблемы. Часто возникает ошибка при запуске программы. Подобные неприятности могут быть результатом присутствия вирусов на компьютере. В некоторых случаях ошибка может проявиться при конфликте библиотек и файлов приложения.
Стоит проверить наличие файлов DirectX и NetFramework. Рекомендуется проверить следующие параметры:
- работу Bios;
- присутствие битых участков;
- драйвера;
- функции модуля ОЗУ.
Проблема может возникнуть и при аварийном завершении работы системы.
Чтобы исправить проблему стоит воспользоваться антивирусом. Может помочь и переустановка. Затем следует произвести перезагрузку компьютера.
Как вариант, стоит попробовать ввести вручную айпи.
Ошибка при установке
Для устранения ошибки можно применить переустановку клиента. Приложение следует сначала удалить с компьютера, а затем установить программу. Затем следует обновить приложение.
Устаревшие компоненты могут спровоцировать проблемы с установкой. Их переустановку рекомендуется выполнять ручным способом.

Ошибка подключения
Программа teamspeak 3 сохраняет данные о подключениях в лог файлах. Важная информация дублируется в нижней части окна. Если появляется сообщение о том, что не удалось подключиться без подробностей, проблема, скорее всего, в сервере, а не в компьютере.
В данной ситуации нужно выполнить следующие действия:
- Нужно проверить правильно ли написан адрес. Не должно быть точек, лишних букв и пробелов.
- Можно подключиться через мобильные версии.
- Стоит попробовать выполнить перезагрузку роутера или компьютера.
- Рекомендуется подключиться к интернету напрямую.
- Нужно отключить брандмауэр и антивирус.
Можно выяснить у провайдера не блокируются ли какие-то порты. С проблемой стоит попробовать обратиться и в техподдержку. Стоит попробовать и просто подождать. Возможно сервер подвис из-за большого количества обращений.
Можно попробовать подсоединиться к интернету через VPN. Найти сервис можно в гугле. Многие из них предлагают услуги бесплатно на первый месяц.
Иногда ошибки подключения могут возникнуть при поврежденных файлах или удаленных записях. Можно попробовать удалить приложение с настройками, а затем перегрузить компьютер.
Задержка
Задержка в teamspeak 3 часто бывает связана с нерегулярными записями в реестре и неправильно встроенными системными настройками. Такая ошибка может быть исправлена специальным программным обеспечением.
Не работает микрофон
Если микрофон не работает можно сделать следующее:
- Важно убедиться в том, что устройство подключено к компьютеру.
- Можно изменить микрофон в параметрах записей.
- Нужно проверить предоставлено ли право голоса на сервере.
- Профили горячих клавиш и записей можно поменять на «по умолчанию».
- Следует поменять режим активации на трансляцию постоянного типа.
Аналоги Teamspeak
Существуют и альтернативные варианты программы teamspeak 3. Чтобы выбрать приложение, нужно сначала определиться для чего оно требуется. Это может быть вариант для общения с товарищами по игре или быстрый мессенджер.
Телеграм
Один из популярных мессенджеров – телеграмм. Подходит, как для приватного общения в группах, так и с одним человеком. Преимущества программы:
- Множество платформ. Общаться с одного аккаунта можно с планшета, ПК или телефона.
- Предусмотрены голосовые сообщения.
- Доступ к переписке только у собеседников.
- Программа доступна на русском языке.

Для общения в реальном времени и игр нужно выбрать что-то другое.
Tunngle
Данная программа имеет много общего с Тим Спик. Изначально приложение использовалось в качестве эмулятора локальной сети.
Стоит отметить следующие возможности приложения:
- Общение в чате и специальной комнате. Предусмотрена настройка по кнопке или автоматическое включение микрофона.
- Применение локальной сети.
- Возможности социальных сетей. Можно добавлять друзей, а также создавать белые и черные списки.
- Оформление на русском языке.

Приложение подходит для сообществ геймеров.
Skype
Это одно из самых популярных приложений. Подходит для общения по сети. Отличается следующими преимуществами:
- Большое количество платформ. Программа доступна на пк и мобильных устройствах. Подходит для любого оборудования с ОС. Может применяться на кнопочных телефонах.
- Полностью адаптирована для русскоязычных пользователей.
- Возможность общаться с помощью веб-камеры, а также демонстрация экрана.
- Удобство при тестировании связи и создании групп.

Тим Спик – это замечательная программа, обладающая большим функционалом, а при необходимости можно найти и альтернативные варианты.
![]()
Download Article
![]()
Download Article
Using a voice chat application is a must if you enjoy online gaming or just want to talk to a group of people online. The ability to keep in constant contact, without having to type out lengthy updates or instructions, will allow your team to maintain a competitive edge. This wikiHow teaches you how to use TeamSpeak as well as set up a TeamSpeak server.
-

1
Go to https://www.teamspeak.com/en/downloads/ in a web browser. You can use this web site to download the TeamSpeak installer for any operating system you are using.
-

2
Click Download next to the operating system you use. If you are using Windows, click Download next to «Client 64-bit» or «Client 32-bit» below the «Windows» header, depending on what version of Windows you use. If you are using Mac, click the Download next to the MacOS client. There is also a version of TeamSpeak available for 32-bit and 64-bit versions of Linux. You can download the mobile version of TeamSpeak for $0.99 from the Google Play Store on Android, or the App Store on iPhone and iPad.
- If you are using a 64-bit version of Windows, download the 64-bit client for best performance.
Advertisement
-

3
Install TeamSpeak for Windows. Use the following steps to install TeamSpeak for a Windows PC:
- Click TeamSpeak3-Client-win64-3.5.3.exe in your web browser or Downloads folder.
- Click Next.
- Scroll to the bottom of the License agreement.
- Click the checkbox next to «I agree to the terms of the License Agreement».
- Select «Install for anyone on this computer» or «Install just for me» and click Next.
- Click Browse to select an install location (optional).
- Click Next.
- Click Next.
- Click Install.
- Click Finish
-

4
Install TeamSpeak for Mac: If you are using a Mac, use the following steps to download and install TeamSpeak:
- Click TeamSpeak3-Client-macosx-3.5.3.dmg in your web browser or Downloads folder.
- Click Agree to agree to the terms in the License agreement.
- Drag the TeamSpeak 3 Client icon to the Applications folder.
Advertisement
-

1
Launch the TeamSpeak client. After the installation is complete, launch TeamSpeak for the first time. It has a blue icon that resembles a person wearing a headset and microphone. Click the icon in the Windows Start menu, or Applications folder on Mac to launch TeamSpeak. Before you connect to a server, you will need to configure TeamSpeak to get the optimal quality from your headphones and speakers.
-

2
Scroll to the bottom of the License Agreement and click I accept. The I accept button is in the lower-right corner of the install wizard. You must scroll to the bottom of the License agreement before you can click this button.
-

3
Click Continue. It’s at the bottom of the my TeamSpeak introduction window.
-

4
Login or create an account. If you already have a TeamSpeak account, enter the email address and password associated with your TeamSpeak account and click Login in the lower-right corner. If you do not have an account, use the following steps to create an account.
- Click Create account in the lower-right corner.
- Enter a valid email address in the top line.
- Enter your desired password.
- Enter your desired password again.
- Enter your desired username.
- Click Create.
- Check your email and open the verification email.
- Click the link in the email.
- Enter your email address and password to log in.
- Click Login on the TeamSpeak client.
- Enter your email and password and click Login
-

5
Save the recovery key. The first time you open TeamSpeak, it asks you to save a recovery key that you can use if you forget your password. It is recommended that you store the recovery key on a USB flash drive and keep it in a safe location. Click Save to file if you to save the recovery key as a text tile. Click Copy to clipboard to copy the recovery key and paste it to a separate file.
-

6
Open the Options menu. The options menu allows you to set up your hotkeys, microphone activation and sensitivity settings, and more. Use the followings steps to open the options menu.
- Click Tools in the menu bar.
- Click Options.
-

7
Click Capture. This allows you to set up your Microphone settings. It’s in the panel to the left of the Options menu.
-

8
Choose your microphone activation settings and click Apply. There are three different ways to activate your microphone so that you can talk: Voice Activity Detection (VAD), Push-to-Talk (PTT), and Continuous Transmission (CT). VAD automatically activates your microphone when it detects sound. PTT requires you to set a hotkey which will activate the microphone while it is being held down. Continuous transmission means your mic is always on. Most TeamSpeak servers prefer that people use PTT to prevent accidental broadcast of background noise. Use one of the following steps to set your microphone activation settings:
- Push-to-Talk (PTT): Click the radio option next to Push to talk. Then click the button that says No hotkey assigned. Press the keyboard key you want to use to activate your microphone.
- Voice Activity Detection (VAD): Click the radio option next to «Voice Activity Detection». Then use the drop-down menu to select the mode. If you select «Volume Gate» or «Hybrid», use the slider bar to select what decibel level you want to activate the microphone. Click Begin Test to test your settings.
- Note: If you are getting an echo or feedback, click the checkbox next to «echo cancelation» and/or «echo reduction».
-

9
Create hotkeys. Hotkeys assign functions to keyboard keys. If you use VAD, it’s recommended you assign a hot key to mute your microphone incase it gets too loud, or you need to mute something you don’t want others in the server to hear. Use the following steps to assign hotkeys:
- Click Hotkeys to the left in the Options menu.
- Click + Add at the bottom of the menu.
- Click > next to function category (i.g «Microphone») to expand the options.
- Click a function (i.g. «Toggle Microphone Mute») to select it.
- Click No hotkey assigned at the top.
- Press the keyboard key you want to assign the function to.
- Click Ok.
-

10
Adjust the sound volume. Use the following steps to adjust the sound settings:
- Click Playback in the Options menu.
- Use the slider bar below «Voice Volume Adjustment» to adjust the voice sound.
- Use the slider bar below «Sound Pack Volume» to adjust the sound of the sound packs.
- Click Apply
- Click Ok.
-

11
Choose the sound pack. TeamSpeak will say when users join or leave the channel, as well as notify you when you have been «poked». You can choose between a male or female voice for the notifications. You can hear the example for each notification by pressing the Play button. Use the following steps to select a sound pack:
- Click Self in the menu bar at the top.
- Click Sound packs.
- Click Default sound pack (male) or Default sound pack (female).
-

12
Download and install the Overwolf overlay (optional). This Overlay allows you to access the TeamSpeak interface on top of your current program, which can allow you to see who is speaking. This is particularly useful in large groups. Volume Control will automatically lower the volume of your game while a teammate is speaking, which can be useful for loud games or music players. Use the followings steps to download and install the Overwolf overlay:
- Click Tools.
- Click Install Overwolf Overlay.
- Click Download.
- Open the install file in your web browser or Downloads folder.
- Agree to the terms in the license agreement.
- Follow the instructions to complete the installation.
Advertisement
-

1
Click Connections. It’s the first menu in the menu bar at the top of TeamSpeak.
-

2
Click Connect. This opens the Connect window. This window will allow you to enter in the server information.
- Alternatively, you can press You can also press «Ctrl + S» to quickly open the window.
-

3
Enter in the required information. You will need to enter the channel address, which may be a name or it may be an IP address. Make sure to include the port of the server, denoted by a «:» followed by the port number. If the server requires a password, you will need to enter it into the «Server Password» field.
- The nickname displayed will be your requested nickname. If that name is already taken by someone in the server, your name will be altered.
-

4
Click the Connect button. TeamSpeak will attempt to connect to the server, and you will see the main window start to fill with information. You can check the status of the connection in the status frame at the bottom of the window.
-

5
Navigate the server. On the left side of the window, you will see a list of channels on the server. Channels can be password protected, and you may need to be granted access by an admin. A list of users will be displayed beneath each channel.
- Most larger gaming groups will have the server broken into channels for different games that the group plays, along with an Senior-only section if the group is particularly large. Server setups will vary wildly from group to group.
-

6
Double-click on a channel to join it. You will only be able to talk with users in the same channel as you.
-

7
Text chat with other users. Besides being able to voice chat, there is a basic text chat for each channel. This can be accessed by clicking on the tab at the bottom of the window. Avoid putting important, time-sensitive information or commands in the text chat, as many players will not see it in-game.
-

8
Bookmark frequently used servers. If you plan on connecting to the server you are using on a frequent basis, you can make connecting much easier by bookmarking it. This will allow you to connect in the future with a single click. If you are currently connected to a server, use the following steps to bookmark it:
- click Bookmarks.
- Click Add to Bookmarks. to add the current server to your bookmark list.
- Click Ok.
-

9
Download the server client. The TeamSpeak server client is free to anyone using it for non-profit use, such as gaming groups. You can run the server client on your own machine or hosted server for up to 32 people, or you can run it on a dedicated hosted server for up to 512 people. If you need a server larger than this, you will need to rent one from TeamSpeak. Use the following steps to download the TeamSpeak server client:
- Go to https://www.teamspeak.com/en/downloads/#server in a web browser.
- Click Download next to your operating system.
-

10
Extract the zip file. The file that you downloaded is an archive that contains multiple files. Extract the archive so that you can use the files contained within. Extract it somewhere that is easy to access, such as your desktop.
-

11
Start the server client. Run the application in the extracted folder. You will see several files and folders get created, and then a window will appear with several important pieces of information. You will see your server admin username, password, and privilege key. Use the following steps to start the server client.
- Click the ts3server application in the extracted folder to start the server.
- Click Accept to accept the license terms.
- Click the icon that resembles two sheets of paper to Copy the different values.
- Paste each value to a blank Notepad document.
-

12
Connect to the server. Open up your TeamSpeak client. Then use the following steps to connect to the server.
- Click Connections
- Click Connect
- Enter localhost into the address bar.
- Change your nickname to whatever you’d like.
- Make sure the server password field is empty.
- Click the Connect button.
-

13
Claim server admin rights. When you first connect to your server, you will be prompted for the privilege key that you copied into Notepad. Copy and paste the privilege key and click Ok. This will allow you to change the configuration of the server and grant permissions to other users. After entering the key, a server administrator icon will appear next to your name on the users list.
Advertisement
-

1
Configure your server. You have a variety of options to help make your server feel more like «yours». Use the following steps to configure your server:
- Right-click on the server name at the top of the channel list.
- Select Edit Virtual Server from the menu that appears.
- Enter in the name for your server in the «Server Name» field.
- Set a password for your server in the «Password» field.
- Write a short message In the Welcome Message field.
-

2
Add customizations. While you are still in the «Manage Virtual Server» menu, use the following steps to add customizations to your server.
- Click the More in the lower-left corner of the «Manage Virtual Server» window.
- The Host tab, you can set a banner image for your server that all of your users will see. You can also create a Host button that will appear in the upper-right corner. Many servers use this button to direct users to the team’s website.
- The Integration tab allows you to link your Twitch account to your server.
- The Transfer tab allows you to set limits on downloads and uploads.
- The Anti-flood tab allows you to set policies that limit the number of posts people can posts to prevent bots from flooding your server.
- The Security tab allows you to select a security level for your server. The details of each level are listed in the tab.
-

3
Create new channels. If your group has a variety of interests, you may want to create multiple channels to help keep people on topic for the game at hand. For example, if your group primarily plays two games, you can create a channel for each game, as well as a general «lounge» channel. When people are playing, they can move to the appropriate channel, and when they’re relaxing between games, they can use the lounge and not bother people who are playing. You can even create sub-channels within channels. Use the following steps to create channels for your server:
- Right-click on the server name in the channel
- Click Create Channel.
- Enter channel name in the «Name» field.
- Enter a description for the channel in the «Description» box.
- Enter a password in the «Password» field.
- Set the channel type (i.g. Temporary, Permanent, Semi-permanent) below «Channel Type».
-

4
Open ports. While most clients should be able to connect to your server, opening a few ports can make sure the most people possible can connect without issue. Access your router settings, and open the following ports: UDP 9987 & TCP 30033. UDP 9987 helps allow incoming connections, while TCP 30033 allows for easier file transferring between users.
-

5
Set up dynamic DNS. You can give your teammates your server’s IP address so that they can connect, but this IP address is liable to change sometime in the future. It’s also not very easy to remember. You can use services such as DynDNS to assign a hostname to your IP address, which will automatically forward people even when your IP address changes.
Advertisement
Add New Question
-
Question
How do I configure overlay?

Download Overwolf. The software should guide you through the setup, and you can download extra themes using the built in store.
Ask a Question
200 characters left
Include your email address to get a message when this question is answered.
Submit
Advertisement
-
Using a headset with an attached microphone will alleviate nearly all distortion, feedback and echoing sound problems. If you choose to use your computer’s on-board or external speakers with a separate microphone, make sure to activate the «Push-to-talk» option. Otherwise, your voice coming through your own speakers will create a looping echo effect.
Thanks for submitting a tip for review!
Advertisement
-
Closing the TeamSpeak client window will exit the program. Make sure to minimize the window to your taskbar instead of closing it.
Advertisement
About This Article
Article SummaryX
1. Download and install Teamspeak from https://teamspeak.com/en/downloads/.
2. Open the TeamSpeak client.
3. Click Tools followed by Options to open the Options menu.
4. Use the Capture menu to configure your microphone and microphone activation settings.
5. Use the «Playback menu to adjust the volume settings.
6. Use the «Hotkey» menu to assign keys to different functions.
7. Click Connections followed by Connect to open the connect window.
8. Enter the server address, and port number.
9. Enter your nickname.
10. Click Connect.
Did this summary help you?
Thanks to all authors for creating a page that has been read 156,134 times.
Did this article help you?
![]()
Download Article
![]()
Download Article
Using a voice chat application is a must if you enjoy online gaming or just want to talk to a group of people online. The ability to keep in constant contact, without having to type out lengthy updates or instructions, will allow your team to maintain a competitive edge. This wikiHow teaches you how to use TeamSpeak as well as set up a TeamSpeak server.
-
1
Go to https://www.teamspeak.com/en/downloads/ in a web browser. You can use this web site to download the TeamSpeak installer for any operating system you are using.
-
2
Click Download next to the operating system you use. If you are using Windows, click Download next to «Client 64-bit» or «Client 32-bit» below the «Windows» header, depending on what version of Windows you use. If you are using Mac, click the Download next to the MacOS client. There is also a version of TeamSpeak available for 32-bit and 64-bit versions of Linux. You can download the mobile version of TeamSpeak for $0.99 from the Google Play Store on Android, or the App Store on iPhone and iPad.
- If you are using a 64-bit version of Windows, download the 64-bit client for best performance.
Advertisement
-
3
Install TeamSpeak for Windows. Use the following steps to install TeamSpeak for a Windows PC:
- Click TeamSpeak3-Client-win64-3.5.3.exe in your web browser or Downloads folder.
- Click Next.
- Scroll to the bottom of the License agreement.
- Click the checkbox next to «I agree to the terms of the License Agreement».
- Select «Install for anyone on this computer» or «Install just for me» and click Next.
- Click Browse to select an install location (optional).
- Click Next.
- Click Next.
- Click Install.
- Click Finish
-
4
Install TeamSpeak for Mac: If you are using a Mac, use the following steps to download and install TeamSpeak:
- Click TeamSpeak3-Client-macosx-3.5.3.dmg in your web browser or Downloads folder.
- Click Agree to agree to the terms in the License agreement.
- Drag the TeamSpeak 3 Client icon to the Applications folder.
Advertisement
-
1
Launch the TeamSpeak client. After the installation is complete, launch TeamSpeak for the first time. It has a blue icon that resembles a person wearing a headset and microphone. Click the icon in the Windows Start menu, or Applications folder on Mac to launch TeamSpeak. Before you connect to a server, you will need to configure TeamSpeak to get the optimal quality from your headphones and speakers.
-
2
Scroll to the bottom of the License Agreement and click I accept. The I accept button is in the lower-right corner of the install wizard. You must scroll to the bottom of the License agreement before you can click this button.
-
3
Click Continue. It’s at the bottom of the my TeamSpeak introduction window.
-
4
Login or create an account. If you already have a TeamSpeak account, enter the email address and password associated with your TeamSpeak account and click Login in the lower-right corner. If you do not have an account, use the following steps to create an account.
- Click Create account in the lower-right corner.
- Enter a valid email address in the top line.
- Enter your desired password.
- Enter your desired password again.
- Enter your desired username.
- Click Create.
- Check your email and open the verification email.
- Click the link in the email.
- Enter your email address and password to log in.
- Click Login on the TeamSpeak client.
- Enter your email and password and click Login
-
5
Save the recovery key. The first time you open TeamSpeak, it asks you to save a recovery key that you can use if you forget your password. It is recommended that you store the recovery key on a USB flash drive and keep it in a safe location. Click Save to file if you to save the recovery key as a text tile. Click Copy to clipboard to copy the recovery key and paste it to a separate file.
-
6
Open the Options menu. The options menu allows you to set up your hotkeys, microphone activation and sensitivity settings, and more. Use the followings steps to open the options menu.
- Click Tools in the menu bar.
- Click Options.
-
7
Click Capture. This allows you to set up your Microphone settings. It’s in the panel to the left of the Options menu.
-
8
Choose your microphone activation settings and click Apply. There are three different ways to activate your microphone so that you can talk: Voice Activity Detection (VAD), Push-to-Talk (PTT), and Continuous Transmission (CT). VAD automatically activates your microphone when it detects sound. PTT requires you to set a hotkey which will activate the microphone while it is being held down. Continuous transmission means your mic is always on. Most TeamSpeak servers prefer that people use PTT to prevent accidental broadcast of background noise. Use one of the following steps to set your microphone activation settings:
- Push-to-Talk (PTT): Click the radio option next to Push to talk. Then click the button that says No hotkey assigned. Press the keyboard key you want to use to activate your microphone.
- Voice Activity Detection (VAD): Click the radio option next to «Voice Activity Detection». Then use the drop-down menu to select the mode. If you select «Volume Gate» or «Hybrid», use the slider bar to select what decibel level you want to activate the microphone. Click Begin Test to test your settings.
- Note: If you are getting an echo or feedback, click the checkbox next to «echo cancelation» and/or «echo reduction».
-
9
Create hotkeys. Hotkeys assign functions to keyboard keys. If you use VAD, it’s recommended you assign a hot key to mute your microphone incase it gets too loud, or you need to mute something you don’t want others in the server to hear. Use the following steps to assign hotkeys:
- Click Hotkeys to the left in the Options menu.
- Click + Add at the bottom of the menu.
- Click > next to function category (i.g «Microphone») to expand the options.
- Click a function (i.g. «Toggle Microphone Mute») to select it.
- Click No hotkey assigned at the top.
- Press the keyboard key you want to assign the function to.
- Click Ok.
-
10
Adjust the sound volume. Use the following steps to adjust the sound settings:
- Click Playback in the Options menu.
- Use the slider bar below «Voice Volume Adjustment» to adjust the voice sound.
- Use the slider bar below «Sound Pack Volume» to adjust the sound of the sound packs.
- Click Apply
- Click Ok.
-
11
Choose the sound pack. TeamSpeak will say when users join or leave the channel, as well as notify you when you have been «poked». You can choose between a male or female voice for the notifications. You can hear the example for each notification by pressing the Play button. Use the following steps to select a sound pack:
- Click Self in the menu bar at the top.
- Click Sound packs.
- Click Default sound pack (male) or Default sound pack (female).
-
12
Download and install the Overwolf overlay (optional). This Overlay allows you to access the TeamSpeak interface on top of your current program, which can allow you to see who is speaking. This is particularly useful in large groups. Volume Control will automatically lower the volume of your game while a teammate is speaking, which can be useful for loud games or music players. Use the followings steps to download and install the Overwolf overlay:
- Click Tools.
- Click Install Overwolf Overlay.
- Click Download.
- Open the install file in your web browser or Downloads folder.
- Agree to the terms in the license agreement.
- Follow the instructions to complete the installation.
Advertisement
-
1
Click Connections. It’s the first menu in the menu bar at the top of TeamSpeak.
-
2
Click Connect. This opens the Connect window. This window will allow you to enter in the server information.
- Alternatively, you can press You can also press «Ctrl + S» to quickly open the window.
-
3
Enter in the required information. You will need to enter the channel address, which may be a name or it may be an IP address. Make sure to include the port of the server, denoted by a «:» followed by the port number. If the server requires a password, you will need to enter it into the «Server Password» field.
- The nickname displayed will be your requested nickname. If that name is already taken by someone in the server, your name will be altered.
-
4
Click the Connect button. TeamSpeak will attempt to connect to the server, and you will see the main window start to fill with information. You can check the status of the connection in the status frame at the bottom of the window.
-
5
Navigate the server. On the left side of the window, you will see a list of channels on the server. Channels can be password protected, and you may need to be granted access by an admin. A list of users will be displayed beneath each channel.
- Most larger gaming groups will have the server broken into channels for different games that the group plays, along with an Senior-only section if the group is particularly large. Server setups will vary wildly from group to group.
-
6
Double-click on a channel to join it. You will only be able to talk with users in the same channel as you.
-
7
Text chat with other users. Besides being able to voice chat, there is a basic text chat for each channel. This can be accessed by clicking on the tab at the bottom of the window. Avoid putting important, time-sensitive information or commands in the text chat, as many players will not see it in-game.
-
8
Bookmark frequently used servers. If you plan on connecting to the server you are using on a frequent basis, you can make connecting much easier by bookmarking it. This will allow you to connect in the future with a single click. If you are currently connected to a server, use the following steps to bookmark it:
- click Bookmarks.
- Click Add to Bookmarks. to add the current server to your bookmark list.
- Click Ok.
-
9
Download the server client. The TeamSpeak server client is free to anyone using it for non-profit use, such as gaming groups. You can run the server client on your own machine or hosted server for up to 32 people, or you can run it on a dedicated hosted server for up to 512 people. If you need a server larger than this, you will need to rent one from TeamSpeak. Use the following steps to download the TeamSpeak server client:
- Go to https://www.teamspeak.com/en/downloads/#server in a web browser.
- Click Download next to your operating system.
-
10
Extract the zip file. The file that you downloaded is an archive that contains multiple files. Extract the archive so that you can use the files contained within. Extract it somewhere that is easy to access, such as your desktop.
-
11
Start the server client. Run the application in the extracted folder. You will see several files and folders get created, and then a window will appear with several important pieces of information. You will see your server admin username, password, and privilege key. Use the following steps to start the server client.
- Click the ts3server application in the extracted folder to start the server.
- Click Accept to accept the license terms.
- Click the icon that resembles two sheets of paper to Copy the different values.
- Paste each value to a blank Notepad document.
-
12
Connect to the server. Open up your TeamSpeak client. Then use the following steps to connect to the server.
- Click Connections
- Click Connect
- Enter localhost into the address bar.
- Change your nickname to whatever you’d like.
- Make sure the server password field is empty.
- Click the Connect button.
-
13
Claim server admin rights. When you first connect to your server, you will be prompted for the privilege key that you copied into Notepad. Copy and paste the privilege key and click Ok. This will allow you to change the configuration of the server and grant permissions to other users. After entering the key, a server administrator icon will appear next to your name on the users list.
Advertisement
-
1
Configure your server. You have a variety of options to help make your server feel more like «yours». Use the following steps to configure your server:
- Right-click on the server name at the top of the channel list.
- Select Edit Virtual Server from the menu that appears.
- Enter in the name for your server in the «Server Name» field.
- Set a password for your server in the «Password» field.
- Write a short message In the Welcome Message field.
-
2
Add customizations. While you are still in the «Manage Virtual Server» menu, use the following steps to add customizations to your server.
- Click the More in the lower-left corner of the «Manage Virtual Server» window.
- The Host tab, you can set a banner image for your server that all of your users will see. You can also create a Host button that will appear in the upper-right corner. Many servers use this button to direct users to the team’s website.
- The Integration tab allows you to link your Twitch account to your server.
- The Transfer tab allows you to set limits on downloads and uploads.
- The Anti-flood tab allows you to set policies that limit the number of posts people can posts to prevent bots from flooding your server.
- The Security tab allows you to select a security level for your server. The details of each level are listed in the tab.
-
3
Create new channels. If your group has a variety of interests, you may want to create multiple channels to help keep people on topic for the game at hand. For example, if your group primarily plays two games, you can create a channel for each game, as well as a general «lounge» channel. When people are playing, they can move to the appropriate channel, and when they’re relaxing between games, they can use the lounge and not bother people who are playing. You can even create sub-channels within channels. Use the following steps to create channels for your server:
- Right-click on the server name in the channel
- Click Create Channel.
- Enter channel name in the «Name» field.
- Enter a description for the channel in the «Description» box.
- Enter a password in the «Password» field.
- Set the channel type (i.g. Temporary, Permanent, Semi-permanent) below «Channel Type».
-
4
Open ports. While most clients should be able to connect to your server, opening a few ports can make sure the most people possible can connect without issue. Access your router settings, and open the following ports: UDP 9987 & TCP 30033. UDP 9987 helps allow incoming connections, while TCP 30033 allows for easier file transferring between users.
-
5
Set up dynamic DNS. You can give your teammates your server’s IP address so that they can connect, but this IP address is liable to change sometime in the future. It’s also not very easy to remember. You can use services such as DynDNS to assign a hostname to your IP address, which will automatically forward people even when your IP address changes.
Advertisement
Add New Question
-
Question
How do I configure overlay?
Download Overwolf. The software should guide you through the setup, and you can download extra themes using the built in store.
Ask a Question
200 characters left
Include your email address to get a message when this question is answered.
Submit
Advertisement
-
Using a headset with an attached microphone will alleviate nearly all distortion, feedback and echoing sound problems. If you choose to use your computer’s on-board or external speakers with a separate microphone, make sure to activate the «Push-to-talk» option. Otherwise, your voice coming through your own speakers will create a looping echo effect.
Thanks for submitting a tip for review!
Advertisement
-
Closing the TeamSpeak client window will exit the program. Make sure to minimize the window to your taskbar instead of closing it.
Advertisement
About This Article
Article SummaryX
1. Download and install Teamspeak from https://teamspeak.com/en/downloads/.
2. Open the TeamSpeak client.
3. Click Tools followed by Options to open the Options menu.
4. Use the Capture menu to configure your microphone and microphone activation settings.
5. Use the «Playback menu to adjust the volume settings.
6. Use the «Hotkey» menu to assign keys to different functions.
7. Click Connections followed by Connect to open the connect window.
8. Enter the server address, and port number.
9. Enter your nickname.
10. Click Connect.
Did this summary help you?
Thanks to all authors for creating a page that has been read 156,134 times.