
Как установить:
- Скачайте файл(кнопка внизу страницы)
- Перенесите файл в папку
- Откройте и запустите установку
- Все нужные файлы и зависимости появятся в папке
- После установки запускайте ещё раз и готово
- Может потребоваться отключить антивирус, чтобы запустить!
- В комменты пишите если что помогу
Смотреть видео обзор:
Описание:
Как сделать анимацию майнкрафт на андроид/телефоне?! Как сделать крутую майнкрафт позу?!
How to make animation for minecraft on android / phone ?! How to make a cool Minecraft pose ?!
Привет! Я ResterPlay, и раз ты зашол на это видео, то попрошу поставить лайк и подписаться на этот канал:)
Спасибо за внимание, Удачной анимации!
‼️?НЕПЛОХО ЗАРАБОТАЙ НА ПОИСКАХ КАНАЛОВ!
?Сайт с безплатными 3D моделями, который я вам на@рен не рекомендую. Раньше там было безплатно, но герой креди это заметил и нас спас!
?Скачать модель персонажа майнкрафт
?Скачать модель мира из видео
?️ Скачать Prizma 3D
✔️ Скачать КраскаMediBang
? Скачать EsПроводник
Скачать EsПроводник
?Вместо ЕsПроводника можете использовать CX проводник
ЕСЛИ У ВАС ЧТО-ТО НЕ ПОЛУЧАЕТСЯ СКАЧАТЬ, ТО ОБРАЩАЙТЕСЬ МНЕ В ЛС
Информация
⚠️Мой третий канал!⚠️
⚠️Мой второй канал⚠️
✔️Наш Discord сервер, присойденяйся, участвуй и узнавай все первым!!!?
?Я в VK!
✔️Мой XboX/тег в Майнкрафте
ResterPlay
?Мой тег во всех играх!
Rester/ResTeRPlay
Сервера мкпе на которых я играю(1.16.40) TheHive, RushNation, CubeCraft
Снимаю:
Minecraft, Among Us, (в скоре будут другие игры)
Если произошла ошибка:
- Попробуйте запустить файл от администратора
- Так же антивирус может блокировать запуск
- Напишите комментарий и вам могут помочь
Читайте также:
- Майнкрафт скачать Плагин Vault для Сервера
- Скачать плагин TrapLeave — лив из трапки в кт
- Майнкрафт плагин WCSafe Защита спавна от донатеров
- Скачать приватный чит Celestial Client для Майнкрафт 1.12.2
- Что делать если не запускается сборка сервера? Файл .bat закрывается
- Готовый сервер майнкрафт BungeeCord 1.8-1.14 Донат кейсы, Гаджеты, Питомцы
- Скачать Готовую сборку BungeeCord сервера Minecraft / Слив DexLand
- Другие видео обзоры майнкрафт
Как сделать анимацию майнкрафт на телефоне


Подпишись не пожалеешь.

Всем привет с вами андик) сегодня я решил сделать свой лаунчер мкпе на андроид! Там пришлось немоного.

Привет, привет дорогие друзья я наканец то выпустил видосик я очень долго его делал я думаю заслужил хотя-бы.

Ссылка на скачивание:https://trashbox.ru/topics/93286/animate-it-4.9.4 Приветствуем вас на канале Legion Studio.

В этом видео вы научитесь как делать лёгкие анимации майнкрафт ! Ставь лайк и подписывайся на канал.


Kinemaster -https://pdalife.ru/kinemaster-videoredaktor-android-a15614.html PixelLab .

Привет братишка, меня зовут Ази, и добро пожаловать на мой канал! Надеюсь тебе понравится данный ролик.


Привет друг, меня зовут ВанРей, и добро пожаловать на мой канал! Надеюсь тебе понравится данное видео.

Ссылки на программы: Анимированые человечки-https://trashbox.ru/topics/93286/animate-it-4.9.4 .

Привет , сегодня я покажу как же сделать крутую анимацию на Андроид как у разных известных аниматоров youtube.

Animate it и skin Viewer.


ЧИТАЙТЕ ОПИСАНИЕ ПРЕЖДЕ ЧЕМ ЗАДАВАТЬ ВОПРОСЫ. Не бейте тапками((9 Это мой первый туториал по флипаклипу.
Recently Searched
- 4 тур ЛПМ Спартак Локомотив 1 состав
- Как сделать анимацию майнкрафт на телефоне
- 2 тур ФК Энергия КДЮСШ Шатурский р н ФК Металлист Королёв
- 18 тур ФК Металлист Королёв Энергия КДЮСШ Шатурский р н 1 тайм
- Cara Mengubah Kuota Maxstream Max Menjadi Reguler Januari 2019
- энергия металлист Avi
- Ayisha Abdul Basith
- 15 тур ФК Металлист Королёв ФК Энергия КДЮСШ Шатурский р н 2 тайм
- Кубок МО 1 4 ФК Металлист Королёв 2 Легион Ивантеевка ГОЛЫ
- 15 тур ФК Металлист Королёв ФК Энергия КДЮСШ Шатурский р н 1 тайм
- Ультиматум 4 1 Сирена Третий дивизион A 2018 19 36 й тур Обзор матча
- Hitman Транспозиция органов Хоум ран Игры с огнем Запредельная высота Холодное прощание
- Третий дивизион Тур 10 Вихрь Про Верчелли Д 02 12 2018
- 15 тур ФК Металлист Королёв ФК Энергия КДЮСШ Шатурский р н ГОЛЫ
- Watch Yt Owgtqlcle8k Om Kili Opsiyonlardan Para Kazanmak I 35 Dk Da 70 Dolar
- Где скачать Tom Clancy 39 S The Division Пиратку
- Локомотив Строгино 2004 17 01 2015
- Hitman Транспозиция органов Игры с огнем
- Карма 2 2 Стандарт Д Третий дивизион C 2018 19 4 й тур Обзор матча
- Вешняки 3 2 Dexrushan обзор матча
- A Te Lorenzo Jovanotti Cherubini Ufficiale
- Вешняки 2 3 Буржуа Третий дивизион С 2018 19 26 й тур Обзор матча
- СШ Чайка 2009 Орбита Юниор Железнодорожный
- Nuevo Pack Windy Girk El Pack Que No Quiere Que Veas Desnuda
- Встреча против Крыльев Советов 2 Первый тайм часть 1
- 24 09 2018 Первенство МО Орбита Юниор Дзержинский 1 2 Метеор Балашиха Второй тайм
- 5 тур ДЮСШ Краснознаменск ФК Металлист Королёв
- Победный гол Валентина Павлова ЛФК МО 21 05 2017
- The Dark Pictures Man Of Medan Трейлер на руском 2019
- Орбита Юниор Метеор КФК Чемпионат МО Лига Б 22 06 19
- Архив орехово мытищи 0 4 2002г р
- The Dark Pictures Man Of Medan Создание Корабля призрака
- я уезжаю в лагерь медвежонок
- Diye Jalte Hain Karaoke With
- Ураган Люблино 1 5 Линия Алькор Премьер Лига Сезон 2018 19 30 й тур Обзор матча
- Альтаир Серпухов СШ Звезда 2 Люберецкий район 0 1 команды 2006 гр
- ПРЕВЬЮ 38 тур Металлист Королёв ВДВ СпортКлуб
- Diye Jalte Hain Phool Khilte Hai
- Can We Kill The Immortal Sean Bean In Hitman 2 Hitman 2 Elusive Target
- Марьино Д 6 3 Парадокс Третий дивизион С 2018 19 21 й тур Обзор матча
- Man Of Medan Хэллоуинский трейлер Ps4
- 10 тур ФК Истра Истра ФК Металлист Королёв 1 тайм
- 9 ТУР ЛФЛ САО дивизион 3d Феррата 3 8 Север
- 2 тайм Кунцево Савеловская 2 Vi
- Кубок В И Гуляева 7 тур ФК Металлист Королёв ФК Истра Истра 1 тайм
- Paladins Livestream India No Voice 1
- ФК КУНЦЕВО 2008 ФК Савеловская 2 2008 3 0 Второй тайм 14 04 2018
- ЛФЛ САО Керамика 1337 Третий Тайм 1 тайм
- Shoplyfter Cleo Clementine
- Por Amar Sin Ley 2 Capitulo 26 Parte 1 5
- Голы матча 3 дивизиона 30 января 2016 г
- C Mo Dibujar A Meliodas Modo Asalto Con Lapices Escolares De 2 Nanatsu No Taizai
- Warframe покраска корабля
- Goalkeeper Challenge 1 Mars Vs Karim
- ПРЯТКИ в ЛЕСУ с БАЛЛЛОНЧИКОМ Краски Feat Mars Barsov
- The Undying Elusive Target Sniper Option
- Nba 2k17 Mypark Mixtape Xxsgxx Bumpx Vol 2 L Music Lil Yachty Ft Gucci Mane Bently Coupe
- Сборы в Сочи 20 01 13 Волгарь Жемчужина Сочи 6 1
- Кубок В И Гуляева за 7 8 место ФК Металлист Королёв Витязь Подольск
- 23 тур 07 10 17 Кунцево 2003 Савеловская 2 1 тайм
- 10 тур ФК Истра Истра ФК Металлист Королёв 2 тайм
- Yi Ithan Polat
- 21 тур ФК Металлист Королёв ФК Истра Истра
- Фк Истра Фк Квант матч
- 12 06 2019 Quot Кунцево Quot Vs ФК Quot Торпедо Quot
- первый тайм Истра Металлист
- Кубок В И Гуляева 7 тур ФК Металлист Королёв ФК Истра Истра 2 тайм
- Rocio Lopez Ruelas
- Com Gta Sanandreas Para Pol Sten Kurtulma Sinirsiz Merm
- МО 2 тур ФК Серпухов Металлист Королёв 2 1 тайм
- 21 тур ФК Металлист Королёв ФК Истра Истра обзор
- Итоги Е3 2018 Electronic Arts Microsoft Bethesda Devolver Digital Square Enix Ubisoft Sony
- Қасым Жомарт Тоқаев ресми сапармен Мароккоға барды ВИДЕО
- КРТВ В Красногорске создается спортклуб Зоркий
- 12 тур ЛФЛ СЗАО Унионъ Скуадра ДТ 3 дивизион С
- видеообзор матча Фк Истра Фк Люберцы
- 21 тур ДЮСШ Краснознаменск ФК Металлист Королёв 2 тайм
- Одинцово Кунцево 98 2014 тов
- Hitman The Complete First Season Миссия 5 Борцы за свободу
- ИТОГИ E3 2018 Игроновости 3
- 10 тур ФК Металлист Королёв ФК Красково Красково 2 тайм
- автоалхимия таумкрафт 4 2
- Hitman 2016 Восхождение Сноррасона Обострение
- Dipecat Mui Pasca Bela Ahok Ahmad Ishomuddin Ungkap Isi Hatinya
- Piechures
- Кубок Московской области среди команд лиги А и лиги Б Quot Зоркий 2 Quot Vs Quot Витязь Quot
- Bigo Live Hot Buka Baju Parahh
- Shoplyfter 2019
- 2015 04 19 Турнир в Калуге ЦДЮС Мытищи 2004 Квант Обнинск 2004 Гол
- Larissa Manoela Dan Ando Funk S De Calcinha
- ХИМКИ МО ЦДЮС МЫТИЩИ 2004 второй тайм
- 1 2 Первый матч ФК Металлист Королёв Олимп СКОПА Железнодорожный
- Мнение о фильме Превосходство Transcendence
- ЦДЮСШ МЫТИЩИ ХИМКИ МО 2004 ГОЛЫ
- Встреча против Мегасферы Второй тайм
- Beetlejuice Original Broadway Cast Recording Various Artists
- Превосходство Hd кино трейлер 2014
- Зоркий Дублеры 4 2 ЛФЛ СЗАО 20 тур Первого Дивизиона
- Iv Тур Зимнее Первенство Чертаново 2 Воробьёвы Горы Первый Тайм
- Смена 1 4 Олимп Развилка Npg Премьер Лига Сезон 2017 18 14 й тур Обзор матча
![]() Загрузка…
Загрузка…
![]()
Download Article
![]()
Download Article
Do you want to make a 3D Minecraft animation but have no idea how to begin? Animation can be a pretty complex process, but you can get it down with enough practice and patience. We’re here to help you get started on your animating journey—with the help of this tutorial, you’ll be making professional-grade animations in no time.
-

1
Go to https://www.blender.org/download in a web browser. This is the download page for Blender 3D, an advanced 3D animation suite that is completely free to download and is available for all operating systems.
- There are other 3D animation suites available, such as 3DS Max and Maya, but these programs can cost thousands of dollars to purchase.
-

2
Click Download Blender 2.81a and double-click the Blender install file. It’s the blue button in the center of the page. This downloads the Windows install file for the latest version of Blender 3D. Then, double-click this file—you can open downloaded files in your web browser, or in your Downloads folder. Follow the instructions to complete the installation of Blender 3D.
- If you are using another operating system besides Windows, click the drop-down menu below the blue button in the menu, then select your operating system.
Advertisement
-

3
Go to https://nilssoderman.com/downloads/minecraft-blender-rig/ in a web browser. This page contains free downloads of Minecraft Blender files. The download contains Minecraft structures, blocks, and rigs for all the mobs and a Minecraft character.
-

4
Click Download Cycles Minecraft Rig BSS Edit. It’s the third download link on the page. This downloads a ZIP file containing the latest version of the files and rigs.
-

5
Extract the ZIP file. if you’re using Windows, right-click the downloaded file and select Extract All, then extract the files to a location you’ll remember. If you have a Mac, just double-click the ZIP file to unzip the files to a folder with the same name.
Advertisement
-

1
Open Blender 3D. Blender 3D has an icon with an orange and white circle with a blue dot in the middle, and lines to the left side. You’ll find it in the Windows Start menu or your Mac’s Applications folder. When Blender 3D opens, a new scene containing a cube, camera, and light is generated as a new scene.
-

2
Navigate the 3D view space in Blender 3D. It can be hard to figure out what to do when you first open Blender. Use the following steps to get acquainted:
- Roll the mouse wheel to zoom in and out.
- Press and hold the mouse wheel and move the mouse to rotate around the 3D cursor in Blender 3D.
- Press and hold Shift and the mouse wheel to pan from side to side.
- Press 7 on the number pad to view from above.
- Press 1 on the number pad to view from the front.
- Press 3 on the number pad to view from the side.
- Press 5 on the number pad to switch to an orthoscopic (flat) view.
- Press 0 on the number pad to switch to the camera view.
-

3
Click an object to select it. A selected object will be highlighted in orange. You can select 3D meshes, lights, cameras, and more.
- To select multiple objects, hold ⇧ Shift and click each object, or click and drag a square over all the objects you want to select.
- If clicking an object does not select it, make sure you have the select tool selected. It’s the icon with a mouse cursor inside a box in the upper-left corner of the 3D view. Also, make sure you have «Object Mode» selected in the menu in the upper-left corner of the 3D view.
-
4
Use your keyboard to delete, move, rotate, resize objects, and do other tasks. The shortcuts are as follows:
- Press Delete to remove a selected object. The permanently removes the object from our scene.
- Press G to grab and move an object. Once the object is grabbed, use the mouse to move it, and then click the desired location to set it down.
- Press R to rotate an object. Click an object to select it, then press R and drag the mouse to rotate it. When you’re done rotating, click the mouse.
- Press S to scale and resize a selected object. After pressing S, drag the mouse to change the object size, then click to set the size.
- Press ⇧ Shift+D to duplicate a selected object. Once selected, drag the mouse to move the object copy away from the original, then click to place the object copy.
- Press Ctrl+Z to undo a mistake.
-

5
Add new objects to the scene. Objects you are most likely to add to a scene include meshes, lights, and cameras. You can also try other Blender tutorials to learn how to edit objects in Blender 3D. Use the following steps to add an object to a scene:
- Click Add in the upper-right corner.
- Select an object category.
- Click the object you want to add.
-

6
Switch shading modes. There are four different shading modes you can use in Blender 3D. Click the circle icons in the upper-right corner of the 3D view to switch to different shading modes:
- The icon that resembles a wireframe globe displays objects as wireframes with no shading or textures. This mode is easiest on your processor.
- The icon that looks like a solid white circle displays objects as solid white objects with no textures.
- The icon that looks like a pie chart displays objects with textures and colors, but no lighting effects.
- The icon that looks like a 3D sphere enabled rendered mode, which displays a rough image of what objects look like when fully rendered with textures and lighting effects. This mode uses the most processing power.
Advertisement
-

1
Click the File and select Append. The File menu is at the top-left corner. A file browser will expand.
-

2
Double-click a Blender file. Blender files have a .blend file extension at the end. This displays numerous folders for the Blender file.The Minecraft BSS edit ZIP file contained numerous Minecraft related Blender files, including characters, structures, mobs, and items.
-

3
Double-click the Object folder. This displays all objects in the Blender file.
-

4
Select all objects and click Append. To select all objects, click the first object in the list and then scroll down to the bottom of the list. Hold the ⇧ Shift key and click the last object to select everything. Clicking Append imports the selected objects into your scene.
-

5
Press H to hide objects in your scene. Many objects have lots of boxes and planes that serve a function but don’t need to be visible in a scene. To hide objects you don’t want to appear, click to select them and then press «H» to hide them.
- To unhide an object, click the eyeball icon next to the object name in the «View Layer» panel in the upper-right corner.
- Warning: You’ll notice wireframes above character rigs that resemble a control panel, as well as around moveable parts of the rig. Do not hide these. You will need them to animate the rig.
-

6
Delete objects you don’t want. Many of the blender files contain multiple objects. For example, the mobs Blender file has a rig for every Minecraft mob. You probably don’t want to use every single mob in your animation. You can delete rigs you don’t want by selecting them and pressing the Del key. Just be careful not to delete any part of a rig you do want to use.
-

7
Click the armature controls of a rig. You’ll notice black wires around the joints of character models, at the base of the model, and as control panels above the character model. Click this wireframe to select it. The entire wireframe should turn orange.
- In 3D animation, armatures go inside a character model and act as bones and joints. They keep all the parts of the character attached and allow you to move parts of the model.
-

8
Switch to Pose mode. Object mode is the default mode in Blender 3D. Once you select the armature control rig, click the drop-down menu that says «Object Mode» in the upper-left corner of the 3D view, then select Pose Mode to switch.
- If Pose Mode is not available in the drop-down menu, you do not have a valid armature rig selected.
-

9
Click a moveable part of the rig. The black lines around the model are generally moveable parts of the right. Click one of the moveable parts. It should turn blue.
-

10
Press G to grab and move the part. To move a part of a character model in Pose mode, click the black line around a joint on the model, or one of the sliders in the control panel above the rig, and then press G to grab the part. Drag the mouse to move it.
- These Minecraft rigs have many unique animations already programmed in. You can access these animations using the control panel above the rig in Pose mode. Experiment and see what kind of poses you can get from the rigs.
Advertisement
-

1
Place all objects in your animation. Make sure you have all objects you want to include in your animation imported into your scene. Place them where you want them to be at the start of your animation.
- Make sure you have the camera aiming at your scene.
-

2
Enter how many frames you want to include in your animation in the timeline. The timeline is the panel at the bottom of the Blender 3D. By default, it starts at Frame 1 and ends at Frame 250, which produces about 8 seconds of animation at 30 frames per second. If you want more frames, click End 250 in the upper-right corner of the timeline panel and enter how a different number.
-

3
Place the playhead at the start of your animation. The playhead is the blue line in the timeline panel. This represents which frame you are currently on. Place the playhead at Frame 1 at the start.
-

4
Click the record icon to turn on auto keyframing. It’s the icon with the circle above the timeline panel at the bottom of Blender.
-

5
Grab and place an object you want to animate. Select the object you want to animate, press G to grab it, and then click immediately to place it exactly where it is. This records a starting keyframe at frame 1.
- In animation, keyframes record changes in the motion of an object.
- You’ll need to switch to Pose Mode to animate parts of a rig.
-

6
Move the playhead to where you want the object motion to stop or change. Most video is done at about 30 frames per second. This gives you an idea of how much time has passed between frames.
-

7
Move the object to where you want the object to be at the second keyframe. This records a second keyframe in the timeline. Blender will automatically calculate the position of the object for each frame in between keyframes. Continue adding as many keyframes as you need for the entire animation.
- You can also right-click the keyframe in the timeline and click Copy. Move the playhead to where you want the keyframe to repeat, right-click the playhead and click Paste. This is useful for repeating animations, such as a walk cycle.
- You can animate multiple objects in a scene at the same time in a scene. Each object has its own independent timeline with unique keyframes.
-

8
Click the printer icon. It’s in the sidebar to the right. This is the Properties Output icon.
-

9
Enter the resolution of your video. This goes next to «X» and «Y» at the top of the Properties Output Window. By default, the video output is standard HD (1900 x 1080). If you want a higher (4K 3840 x 2160) or lower (1280 x 720), you can enter the resolution next in this panel. The higher the resolution, the longer it will take to render.
- If you don’t see this option in the Properties Output menu, click Dimensions at the top of the panel.
-

10
Select a frame rate. Use the menu next to «Frame Rate» to select the frames per second. 30 FPS is standard for film, while 29.97 FPS is standard for YouTube. You can select a number of options between 23.97 FPS, up to 60 FPS. You can also enter a custom FPS.
-

11
Select a format from the «File Format» menu. The menu is below «Output». Select AVI JPEG to render video in AVI format with each frame compressed using JPEG compression.
- AVI RAW will render a video in AVI format with no compression. This produces large video sizes.
- You can also select an image format, such as JPEG or PNG and render each frame as a separate image so you can add frames a sequence in a video editor like Adobe Premiere Pro. This prevents you from losing all the frames you’ve rendered if something goes wrong during the render process.
-

12
Click Render. It’s in the menu bar in the upper-left corner of Blender 3D.
-

13
Click Render Animation. It’s the second option in the Render menu. This begins the process of rendering each frame of the animation. Be patient. It can take hours or even days to render a video animation. You can view the progress in the Render window as it works.
Advertisement
Add New Question
-
Question
Can I do it without downloading anything?

No. You need a specific animation engine to work. It is not like Microsoft paint.
-
Question
How do you make sure that something you download isn’t a virus?
Use a antivirus software and install a firewall to avoid viruses. Run a full scan on your computer after you download something new.
-
Question
Could I use mine imitator from Minecraft?

Yes, you can.
See more answers
Ask a Question
200 characters left
Include your email address to get a message when this question is answered.
Submit
Advertisement
-
Don’t get mad when it doesn’t go your way. Keep using it, and you’ll turn into a pro
-
If your first animation doesn’t look very good, don’t worry. Your first animation should be a learning experience, not a masterpiece.
Thanks for submitting a tip for review!
Advertisement
About This Article
Article SummaryX
1. Install Blender 3D from https://www.blender.org/download/.
2. Download Minecraft Blender files at https://nilssoderman.com/downloads/minecraft-blender-rig/
3. Open Blender 3D.
4. Click File followed by Append
5. Select a Minecraft Blender file.
6. Select all objects in the «Object» folder and click Append.
7. Select the armature frame of a Minecraft character rig and switch to Pose Mode.
8. Click a part of the character rig and move it.
9. Place the timeline playhead at Frame 1 and click the Record button.
10. Select an object you want to animate and place it to record the first keyframe.
11. Move the playhead forward in the timeline and place the object where you want it to move t to record another keyframe.
12. Continue for all keyframes in the animation.
13. Repeat for all objects in the animation.
14. Click Render
15. Click Render Animation.
Did this summary help you?
Thanks to all authors for creating a page that has been read 113,000 times.
Reader Success Stories
-

Habib Diakit
May 20, 2017
«It helped me to make an Minecraft animation!»
Did this article help you?
![]()
Download Article
![]()
Download Article
Do you want to make a 3D Minecraft animation but have no idea how to begin? Animation can be a pretty complex process, but you can get it down with enough practice and patience. We’re here to help you get started on your animating journey—with the help of this tutorial, you’ll be making professional-grade animations in no time.
-
1
Go to https://www.blender.org/download in a web browser. This is the download page for Blender 3D, an advanced 3D animation suite that is completely free to download and is available for all operating systems.
- There are other 3D animation suites available, such as 3DS Max and Maya, but these programs can cost thousands of dollars to purchase.
-
2
Click Download Blender 2.81a and double-click the Blender install file. It’s the blue button in the center of the page. This downloads the Windows install file for the latest version of Blender 3D. Then, double-click this file—you can open downloaded files in your web browser, or in your Downloads folder. Follow the instructions to complete the installation of Blender 3D.
- If you are using another operating system besides Windows, click the drop-down menu below the blue button in the menu, then select your operating system.
Advertisement
-
3
Go to https://nilssoderman.com/downloads/minecraft-blender-rig/ in a web browser. This page contains free downloads of Minecraft Blender files. The download contains Minecraft structures, blocks, and rigs for all the mobs and a Minecraft character.
-
4
Click Download Cycles Minecraft Rig BSS Edit. It’s the third download link on the page. This downloads a ZIP file containing the latest version of the files and rigs.
-
5
Extract the ZIP file. if you’re using Windows, right-click the downloaded file and select Extract All, then extract the files to a location you’ll remember. If you have a Mac, just double-click the ZIP file to unzip the files to a folder with the same name.
Advertisement
-
1
Open Blender 3D. Blender 3D has an icon with an orange and white circle with a blue dot in the middle, and lines to the left side. You’ll find it in the Windows Start menu or your Mac’s Applications folder. When Blender 3D opens, a new scene containing a cube, camera, and light is generated as a new scene.
-
2
Navigate the 3D view space in Blender 3D. It can be hard to figure out what to do when you first open Blender. Use the following steps to get acquainted:
- Roll the mouse wheel to zoom in and out.
- Press and hold the mouse wheel and move the mouse to rotate around the 3D cursor in Blender 3D.
- Press and hold Shift and the mouse wheel to pan from side to side.
- Press 7 on the number pad to view from above.
- Press 1 on the number pad to view from the front.
- Press 3 on the number pad to view from the side.
- Press 5 on the number pad to switch to an orthoscopic (flat) view.
- Press 0 on the number pad to switch to the camera view.
-
3
Click an object to select it. A selected object will be highlighted in orange. You can select 3D meshes, lights, cameras, and more.
- To select multiple objects, hold ⇧ Shift and click each object, or click and drag a square over all the objects you want to select.
- If clicking an object does not select it, make sure you have the select tool selected. It’s the icon with a mouse cursor inside a box in the upper-left corner of the 3D view. Also, make sure you have «Object Mode» selected in the menu in the upper-left corner of the 3D view.
-
4
Use your keyboard to delete, move, rotate, resize objects, and do other tasks. The shortcuts are as follows:
- Press Delete to remove a selected object. The permanently removes the object from our scene.
- Press G to grab and move an object. Once the object is grabbed, use the mouse to move it, and then click the desired location to set it down.
- Press R to rotate an object. Click an object to select it, then press R and drag the mouse to rotate it. When you’re done rotating, click the mouse.
- Press S to scale and resize a selected object. After pressing S, drag the mouse to change the object size, then click to set the size.
- Press ⇧ Shift+D to duplicate a selected object. Once selected, drag the mouse to move the object copy away from the original, then click to place the object copy.
- Press Ctrl+Z to undo a mistake.
-
5
Add new objects to the scene. Objects you are most likely to add to a scene include meshes, lights, and cameras. You can also try other Blender tutorials to learn how to edit objects in Blender 3D. Use the following steps to add an object to a scene:
- Click Add in the upper-right corner.
- Select an object category.
- Click the object you want to add.
-
6
Switch shading modes. There are four different shading modes you can use in Blender 3D. Click the circle icons in the upper-right corner of the 3D view to switch to different shading modes:
- The icon that resembles a wireframe globe displays objects as wireframes with no shading or textures. This mode is easiest on your processor.
- The icon that looks like a solid white circle displays objects as solid white objects with no textures.
- The icon that looks like a pie chart displays objects with textures and colors, but no lighting effects.
- The icon that looks like a 3D sphere enabled rendered mode, which displays a rough image of what objects look like when fully rendered with textures and lighting effects. This mode uses the most processing power.
Advertisement
-
1
Click the File and select Append. The File menu is at the top-left corner. A file browser will expand.
-
2
Double-click a Blender file. Blender files have a .blend file extension at the end. This displays numerous folders for the Blender file.The Minecraft BSS edit ZIP file contained numerous Minecraft related Blender files, including characters, structures, mobs, and items.
-
3
Double-click the Object folder. This displays all objects in the Blender file.
-
4
Select all objects and click Append. To select all objects, click the first object in the list and then scroll down to the bottom of the list. Hold the ⇧ Shift key and click the last object to select everything. Clicking Append imports the selected objects into your scene.
-
5
Press H to hide objects in your scene. Many objects have lots of boxes and planes that serve a function but don’t need to be visible in a scene. To hide objects you don’t want to appear, click to select them and then press «H» to hide them.
- To unhide an object, click the eyeball icon next to the object name in the «View Layer» panel in the upper-right corner.
- Warning: You’ll notice wireframes above character rigs that resemble a control panel, as well as around moveable parts of the rig. Do not hide these. You will need them to animate the rig.
-
6
Delete objects you don’t want. Many of the blender files contain multiple objects. For example, the mobs Blender file has a rig for every Minecraft mob. You probably don’t want to use every single mob in your animation. You can delete rigs you don’t want by selecting them and pressing the Del key. Just be careful not to delete any part of a rig you do want to use.
-
7
Click the armature controls of a rig. You’ll notice black wires around the joints of character models, at the base of the model, and as control panels above the character model. Click this wireframe to select it. The entire wireframe should turn orange.
- In 3D animation, armatures go inside a character model and act as bones and joints. They keep all the parts of the character attached and allow you to move parts of the model.
-
8
Switch to Pose mode. Object mode is the default mode in Blender 3D. Once you select the armature control rig, click the drop-down menu that says «Object Mode» in the upper-left corner of the 3D view, then select Pose Mode to switch.
- If Pose Mode is not available in the drop-down menu, you do not have a valid armature rig selected.
-
9
Click a moveable part of the rig. The black lines around the model are generally moveable parts of the right. Click one of the moveable parts. It should turn blue.
-
10
Press G to grab and move the part. To move a part of a character model in Pose mode, click the black line around a joint on the model, or one of the sliders in the control panel above the rig, and then press G to grab the part. Drag the mouse to move it.
- These Minecraft rigs have many unique animations already programmed in. You can access these animations using the control panel above the rig in Pose mode. Experiment and see what kind of poses you can get from the rigs.
Advertisement
-
1
Place all objects in your animation. Make sure you have all objects you want to include in your animation imported into your scene. Place them where you want them to be at the start of your animation.
- Make sure you have the camera aiming at your scene.
-
2
Enter how many frames you want to include in your animation in the timeline. The timeline is the panel at the bottom of the Blender 3D. By default, it starts at Frame 1 and ends at Frame 250, which produces about 8 seconds of animation at 30 frames per second. If you want more frames, click End 250 in the upper-right corner of the timeline panel and enter how a different number.
-
3
Place the playhead at the start of your animation. The playhead is the blue line in the timeline panel. This represents which frame you are currently on. Place the playhead at Frame 1 at the start.
-
4
Click the record icon to turn on auto keyframing. It’s the icon with the circle above the timeline panel at the bottom of Blender.
-
5
Grab and place an object you want to animate. Select the object you want to animate, press G to grab it, and then click immediately to place it exactly where it is. This records a starting keyframe at frame 1.
- In animation, keyframes record changes in the motion of an object.
- You’ll need to switch to Pose Mode to animate parts of a rig.
-
6
Move the playhead to where you want the object motion to stop or change. Most video is done at about 30 frames per second. This gives you an idea of how much time has passed between frames.
-
7
Move the object to where you want the object to be at the second keyframe. This records a second keyframe in the timeline. Blender will automatically calculate the position of the object for each frame in between keyframes. Continue adding as many keyframes as you need for the entire animation.
- You can also right-click the keyframe in the timeline and click Copy. Move the playhead to where you want the keyframe to repeat, right-click the playhead and click Paste. This is useful for repeating animations, such as a walk cycle.
- You can animate multiple objects in a scene at the same time in a scene. Each object has its own independent timeline with unique keyframes.
-
8
Click the printer icon. It’s in the sidebar to the right. This is the Properties Output icon.
-
9
Enter the resolution of your video. This goes next to «X» and «Y» at the top of the Properties Output Window. By default, the video output is standard HD (1900 x 1080). If you want a higher (4K 3840 x 2160) or lower (1280 x 720), you can enter the resolution next in this panel. The higher the resolution, the longer it will take to render.
- If you don’t see this option in the Properties Output menu, click Dimensions at the top of the panel.
-
10
Select a frame rate. Use the menu next to «Frame Rate» to select the frames per second. 30 FPS is standard for film, while 29.97 FPS is standard for YouTube. You can select a number of options between 23.97 FPS, up to 60 FPS. You can also enter a custom FPS.
-
11
Select a format from the «File Format» menu. The menu is below «Output». Select AVI JPEG to render video in AVI format with each frame compressed using JPEG compression.
- AVI RAW will render a video in AVI format with no compression. This produces large video sizes.
- You can also select an image format, such as JPEG or PNG and render each frame as a separate image so you can add frames a sequence in a video editor like Adobe Premiere Pro. This prevents you from losing all the frames you’ve rendered if something goes wrong during the render process.
-
12
Click Render. It’s in the menu bar in the upper-left corner of Blender 3D.
-
13
Click Render Animation. It’s the second option in the Render menu. This begins the process of rendering each frame of the animation. Be patient. It can take hours or even days to render a video animation. You can view the progress in the Render window as it works.
Advertisement
Add New Question
-
Question
Can I do it without downloading anything?
No. You need a specific animation engine to work. It is not like Microsoft paint.
-
Question
How do you make sure that something you download isn’t a virus?
Use a antivirus software and install a firewall to avoid viruses. Run a full scan on your computer after you download something new.
-
Question
Could I use mine imitator from Minecraft?
Yes, you can.
See more answers
Ask a Question
200 characters left
Include your email address to get a message when this question is answered.
Submit
Advertisement
-
Don’t get mad when it doesn’t go your way. Keep using it, and you’ll turn into a pro
-
If your first animation doesn’t look very good, don’t worry. Your first animation should be a learning experience, not a masterpiece.
Thanks for submitting a tip for review!
Advertisement
About This Article
Article SummaryX
1. Install Blender 3D from https://www.blender.org/download/.
2. Download Minecraft Blender files at https://nilssoderman.com/downloads/minecraft-blender-rig/
3. Open Blender 3D.
4. Click File followed by Append
5. Select a Minecraft Blender file.
6. Select all objects in the «Object» folder and click Append.
7. Select the armature frame of a Minecraft character rig and switch to Pose Mode.
8. Click a part of the character rig and move it.
9. Place the timeline playhead at Frame 1 and click the Record button.
10. Select an object you want to animate and place it to record the first keyframe.
11. Move the playhead forward in the timeline and place the object where you want it to move t to record another keyframe.
12. Continue for all keyframes in the animation.
13. Repeat for all objects in the animation.
14. Click Render
15. Click Render Animation.
Did this summary help you?
Thanks to all authors for creating a page that has been read 113,000 times.
Reader Success Stories
-
Habib Diakit
May 20, 2017
«It helped me to make an Minecraft animation!»
Did this article help you?
Мультик, интро и анимация Майнкрафт — в вашем браузере
Создайте мультик, интро или анимацию Майнкрафт для своего игрового канала! С готовыми шаблонами Renderforest создание анимации Minecraft будет простым и увлекательным даже для новичков без навыков монтажа. Все, что нужно сделать, — это просмотреть шаблоны интро Майнкрафт, выбрать понравившийся и настроить его
Компании, которые выбрали Renderforest
![]()
![]()
Компании, которые выбрали Renderforest
Шаблоны видео Майнкрафт
![]()
![]()
Набор Заголовков Майнкрафт
Этот уникальный шаблон анимации Майнкрафт идеально подходит для игровых каналов и видео промо. Выберите любую из 10+ доступных сцен, настройте их и наслаждайтесь новым великолепным Майнкрафт-видео уже сегодня!
Редактировать шаблон
![]()
![]()
Появление Логотипа Остов Майнкрафт
Подарите своим игровым видео драматическое начало с этим шаблоном Майнкрафт-интро. Загрузите свой логотип, добавьте музыку и получите веселую и профессиональную анимацию логотипа с изображением острова Майнкрафт.
Редактировать шаблон
![]()
![]()
Майнкрафт Приключенческое Интро
Оживите свой игровой канал Майнкрафт-анимацией. Благодаря 8-битной среде этот шаблон интро добавит авантюрных флюидов в ваши видео. Попробуйте сегодня!
Редактировать шаблон
![]()
![]()
Интро Магия Майнкрафт
Добавьте немного волшебства в ваши игровые видео с мощным Интро Логотипа Майнкрафт. Настройте это Майнкрафт-шаблон под себя, загрузив логотип и добавив звуковые эффекты. Идеален для игровых каналов и видеоблогов.
Редактировать шаблон
![]()
Конструктор интро Renderforest — это ключевое усовершенствование создаваемого мной контента, благодаря предлагаемым визуально привлекательным, эффектным и эффективным шаблонам. Я открываю Renderforest, когда хочу добавить официоза в свои видео, и просто обожаю огромное разнообразие доступных мне опций. С Renderforest креативность повышается, а возможности становятся просто безграничными.
![]()
Alex Charles
Копирайтер и Блоггер
Mr. Worldview
СОЗДАТЬ СВОЕ ИНТРО
Как создать мультик, интро или анимацию
Майнкрафт?
Выберите понравившуюся Майнкрафт-анимацию из огромной библиотеки шаблонов.
Настройте текст, добавьте музыку и просмотрите окончательный вид.
За считанные минуты получите готовое Майнкрафт-видео и поделитесь им со своей аудиторией.
Причины включить интро в видео
![]()
Представьте свой Майнкрафт-канал
Вспомните свои любимые каналы о Майнкрафт. Их вступительные видео может быть первым, что вы вспомните, и это неудивительно. Когда игровые видео, взрывают интернет, выделиться становится важнее, чем когда-либо. Профессиональное Майнкрафт-интро может помочь стать заметнее и сделает весь ваш канал единообразным. Наш конструктор анимации Майнкрафт поставляется с широким выбором шаблонов, которые можно использовать для создания высококачественных интро для игровых каналов в мгновение ока. Выберите шаблон Майнкрафт-интро, который станет торговой маркой вашего канала, и добавьте свой логотип. Все, что вам нужно сделать, это быть готовым к экспериментам!
![]()
![]()
Покажите приверженность качеству
Ни для кого не секрет, что первое впечатление имеет решающее значение. Именно поэтому интро в стиле Майнкрафт покажет вашей аудитории, что вы готовы пройти пару лишних миль, чтобы создать высококачественный контент для вашего канала. Использование профессионального конструктора анимации Майнкрафт может сэкономить вам массу времени и сил. Наш видеоредактор предоставит вам все инструменты, необходимые для успешного создания вступлений, которое подарит незабываемое первое впечатление и покажет вашу приверженность качеству.
![]()
![]()
Вовлечь аудиторию
Первые несколько секунд вашего видео имеют решающее значение для привлечения аудитории. Учитывая обилие Майнкрафт-роликов в интернет эти несколько секунд решают останется ли зритель досматривать ваше видео, или перейдет к следующему. Наличие убедительного Майнкрафт-интро очень хорошо помогает удерживать зрителей. Хорошая новость заключается в том, что с помощью конструктора видео Renderforest вы сможете получить профессиональную Майнкрафт-анимацию всего за несколько кликов. Выберите любой из наших шаблонов и настройте его так, как вам нужно, используя наш облачный редактор. И ваше высококлассное видео интро будет готово в самый кратчайший срок.
![]()
Ознакомьтесь с полезными видео советами в нашем блоге
Загляните в наш блог, чтобы найти советы и руководства по созданию эффективных интро анимаций с помощью Renderforest!
Смотреть Статьи

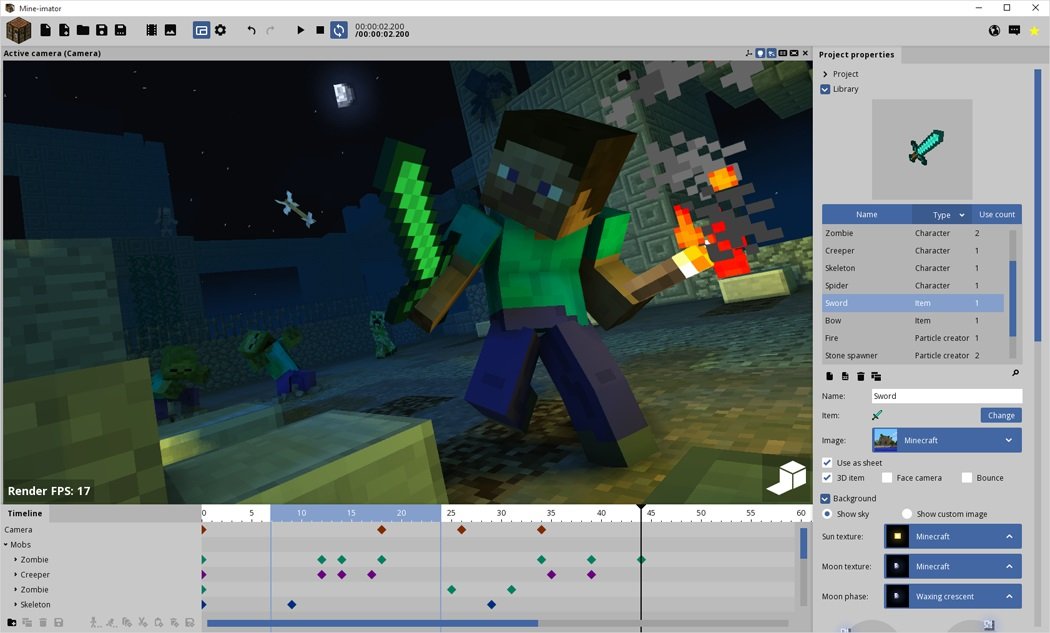
Вы постоянно смотрите мультику по Майнкрафту, но сами вы полный ноль в их создании? Mine-imator придет к вам на помощь! Благодаря данной бесплатной программе вы сможете сами создавать анимации (мультфильмы) или обои на тему игры без особых для этого знаний. Возможно, это программное обеспечение не профессиональное, но если постараться, то можно создать достойный внимания мультфильм.
Содержание
- Особенности программы Майн-иматор
- Скачать Mine-imator
- Видеоинструкция по использованию
Особенности программы Майн-иматор
- Большая встроенная библиотека игровых объектов.
- Возможность загрузки собственных текстур, скинов и файлов.
- Собственный формат моделей (риги или риглы), позволяющий пользоваться работами других пользователей.
- Удобные инструменты для создания окружения и управления анимацией, освещением, движением камеры и видеоэффектами.
Ниже приведены ссылки на бесплатное скачивание программы. Выберите установщик или портативную версию Mine-imator и загрузите на свой компьютер. Для использования установщика его нужно запустить и инсталлировать программу, а для использования портативной версии — разархивировать и запустить файл Mine-imator.exe.
- Скачать Mine-imator 1.2.9 exe (12,58 MB) [Windows Vista+]
- Скачать Mine-imator Portable 1.2.9 zip (15,2 MB) [Windows Vista+]
Что нового в этой версии
- Добавлена поддержка миров 1.18 с высотой мира по умолчанию.
- Добавлен предварительный просмотр цвета для биомов. (Примечание: биомы не экспортируются в Mine-imator.)
- Добавлена поддержка размеров пакета данных.
- Сообщение «Загрузка региона …» изменено на вид сверху вниз, добавлен новый процент.
- Добавлен предел прозрачности воды, позволяющий сделать океаны / реки более чистыми.
- У некоторых блоков теперь есть цвет, установленный вручную. (Вместо сгенерированного из его текстуры.)
- Некоторые задачи теперь являются многопоточными, что значительно повышает производительность.
- Вид сбоку теперь обновляется в реальном времени при изменении выбора блока в виде сверху вниз.
- Фильтрация водных блоков теперь удаляет «заболоченные» состояния из блоков.
- Исправлен сбой при загрузке фрагментов из разных версий Майнкрафт в одном и том же мире.
- Исправлена ошибка, из-за которой большинство вариантов блоков не отображались.
Видеоинструкция по использованию
Нижеследующие видео помогут вам сделать первые шаги в освоении программы MineImator.